
Want your wishlist activity to feed straight into your CRM? When a customer adds a product to a wishlist or saves one, SaveTo Wishlist can tag that customer’s contact in Groundhogg. Those tags can then kick off your Groundhogg funnels. This guide shows you how to connect the two.
How it works
SaveTo watches three wishlist events and updates a tag on the matching Groundhogg contact. Because Groundhogg has a built-in “Tag Applied” funnel step, a tag change can start a funnel for you, with no code.
Everything happens on your own site through Groundhogg. Nothing is sent to an outside service.
Before you start
- Groundhogg installed and active. The free version works.
- SaveTo Wishlist active.
- At least one tag created in Groundhogg, so you have something to map to.
One thing to know up front: the integration tags customers who already have a Groundhogg contact. It never creates new contacts, so a first-time guest with no contact record won’t be added.
Step 1: Connect the integration in SaveTo Wishlist
- Go to SaveTo Wishlist, then Settings, and open the Integrations tab.
- Find the Groundhogg section.
- Set Enable Groundhogg Integration to Yes. The tag options appear once it’s on.
- Choose a tag for Added To Wishlist Tag. This tag is applied when a customer adds a product, and removed when they remove it.
- Choose a tag for Wishlist Saved Tag. This tag is applied when a customer saves a wishlist.
- Save your settings.
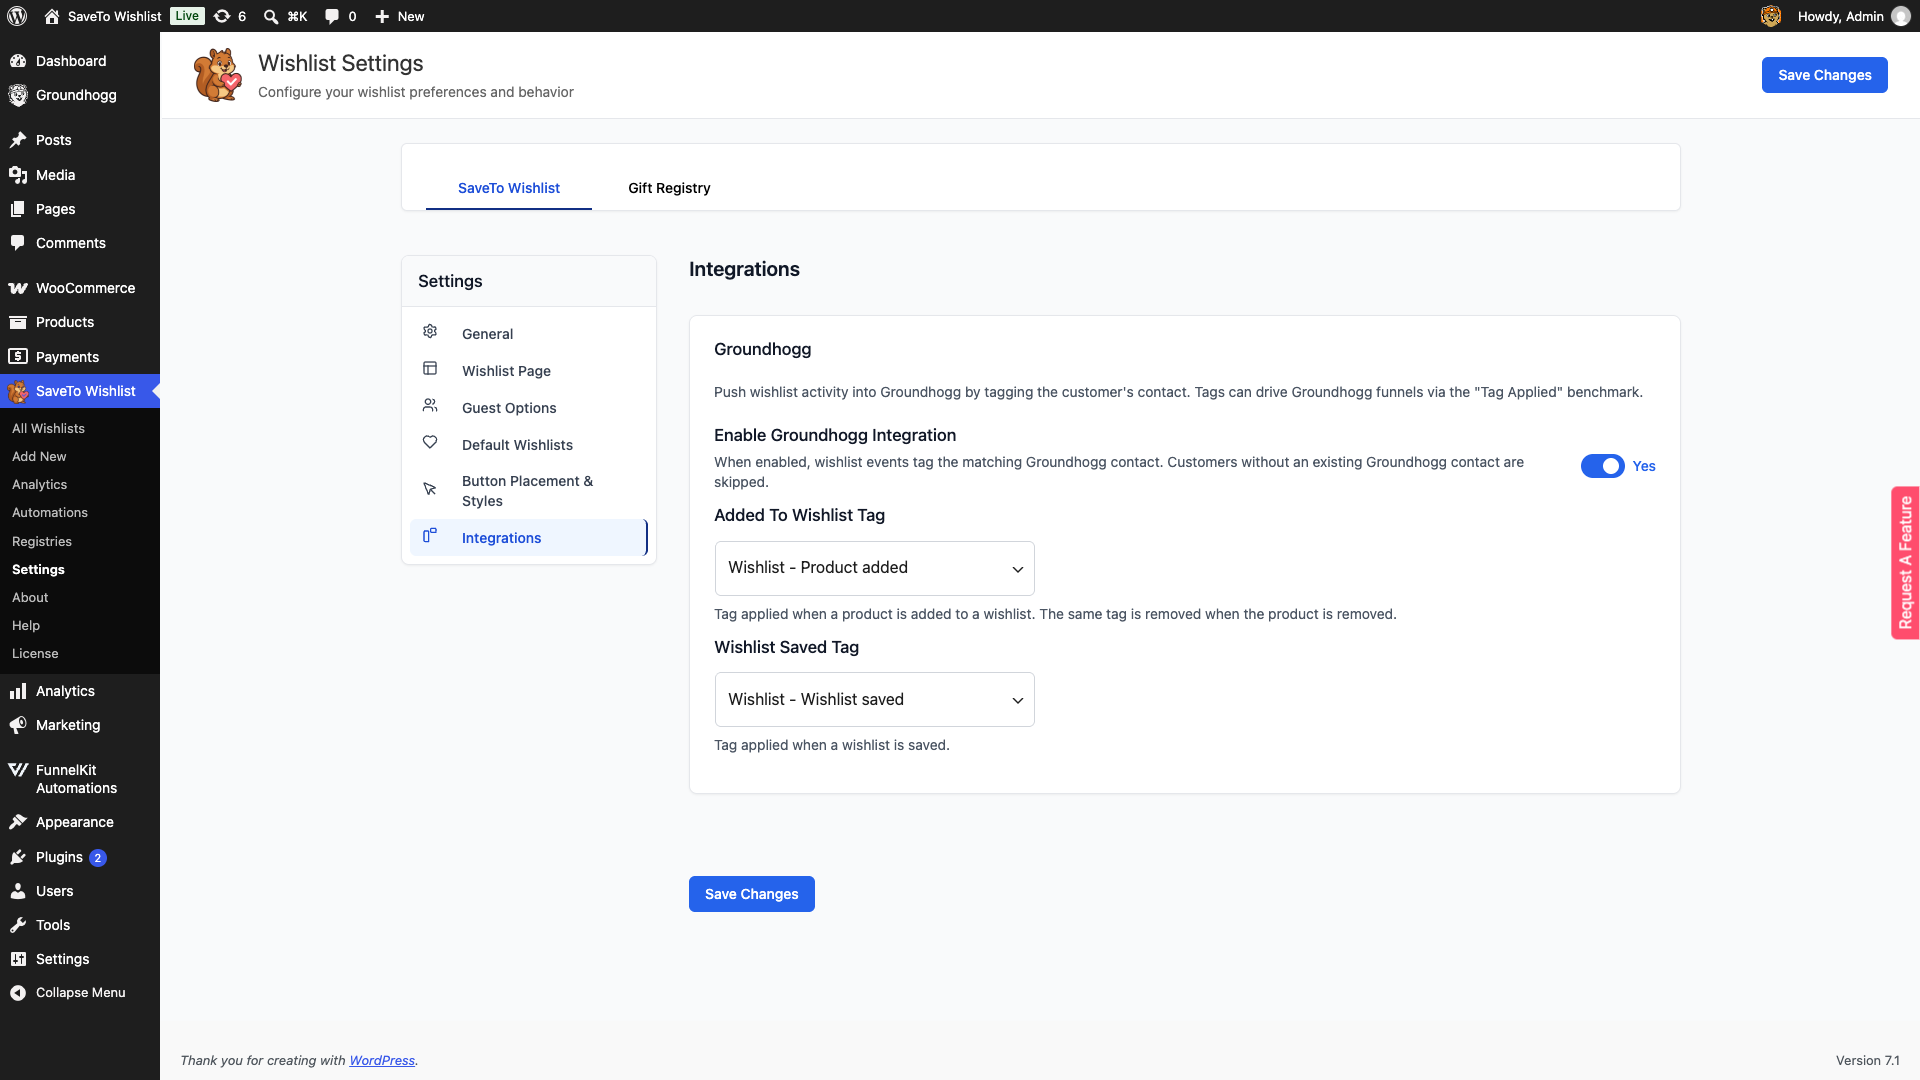
You can map one tag, both, or leave one blank. A blank tag means that event doesn’t tag anyone.
Step 2: Start a funnel from the tag in Groundhogg
Now that wishlist activity sets a tag, you can use that tag to trigger a funnel.
- In Groundhogg, create or open a funnel.
- Add the Tag Applied benchmark as the starting step.
- Select the same tag you chose in SaveTo Wishlist.
- Add the actions you want, such as sending an email, then set the funnel live.
What each wishlist event does
| Wishlist event | What happens to the contact |
|---|---|
| Customer adds a product | The “Added to wishlist” tag is applied. |
| Customer removes a product | The same “Added to wishlist” tag is removed. |
| Customer saves a wishlist | The “Wishlist saved” tag is applied. |
The integration only ever tags the customer who owns the wishlist. If you or an importer save a wishlist on someone else’s behalf, no tag is applied to that person.
Send wishlist events to Groundhogg with a webhook
SaveTo Wishlist Pro can post wishlist events straight to Groundhogg. A built-in quick start fills in the method, headers and payload for you, so there is no code to write. This is separate from the automatic sync above, and you can run both.
- In Groundhogg, create an inbound webhook and copy its URL.
- In WordPress, go to SaveTo Wishlist > Automations and create an automation.
- Pick a trigger under When this happens (Trigger).
- Set Do this (Action) to Call a webhook.
- Set Quick start (optional) to Groundhogg.
- Paste your webhook URL into Webhook URL.
- Save the automation.
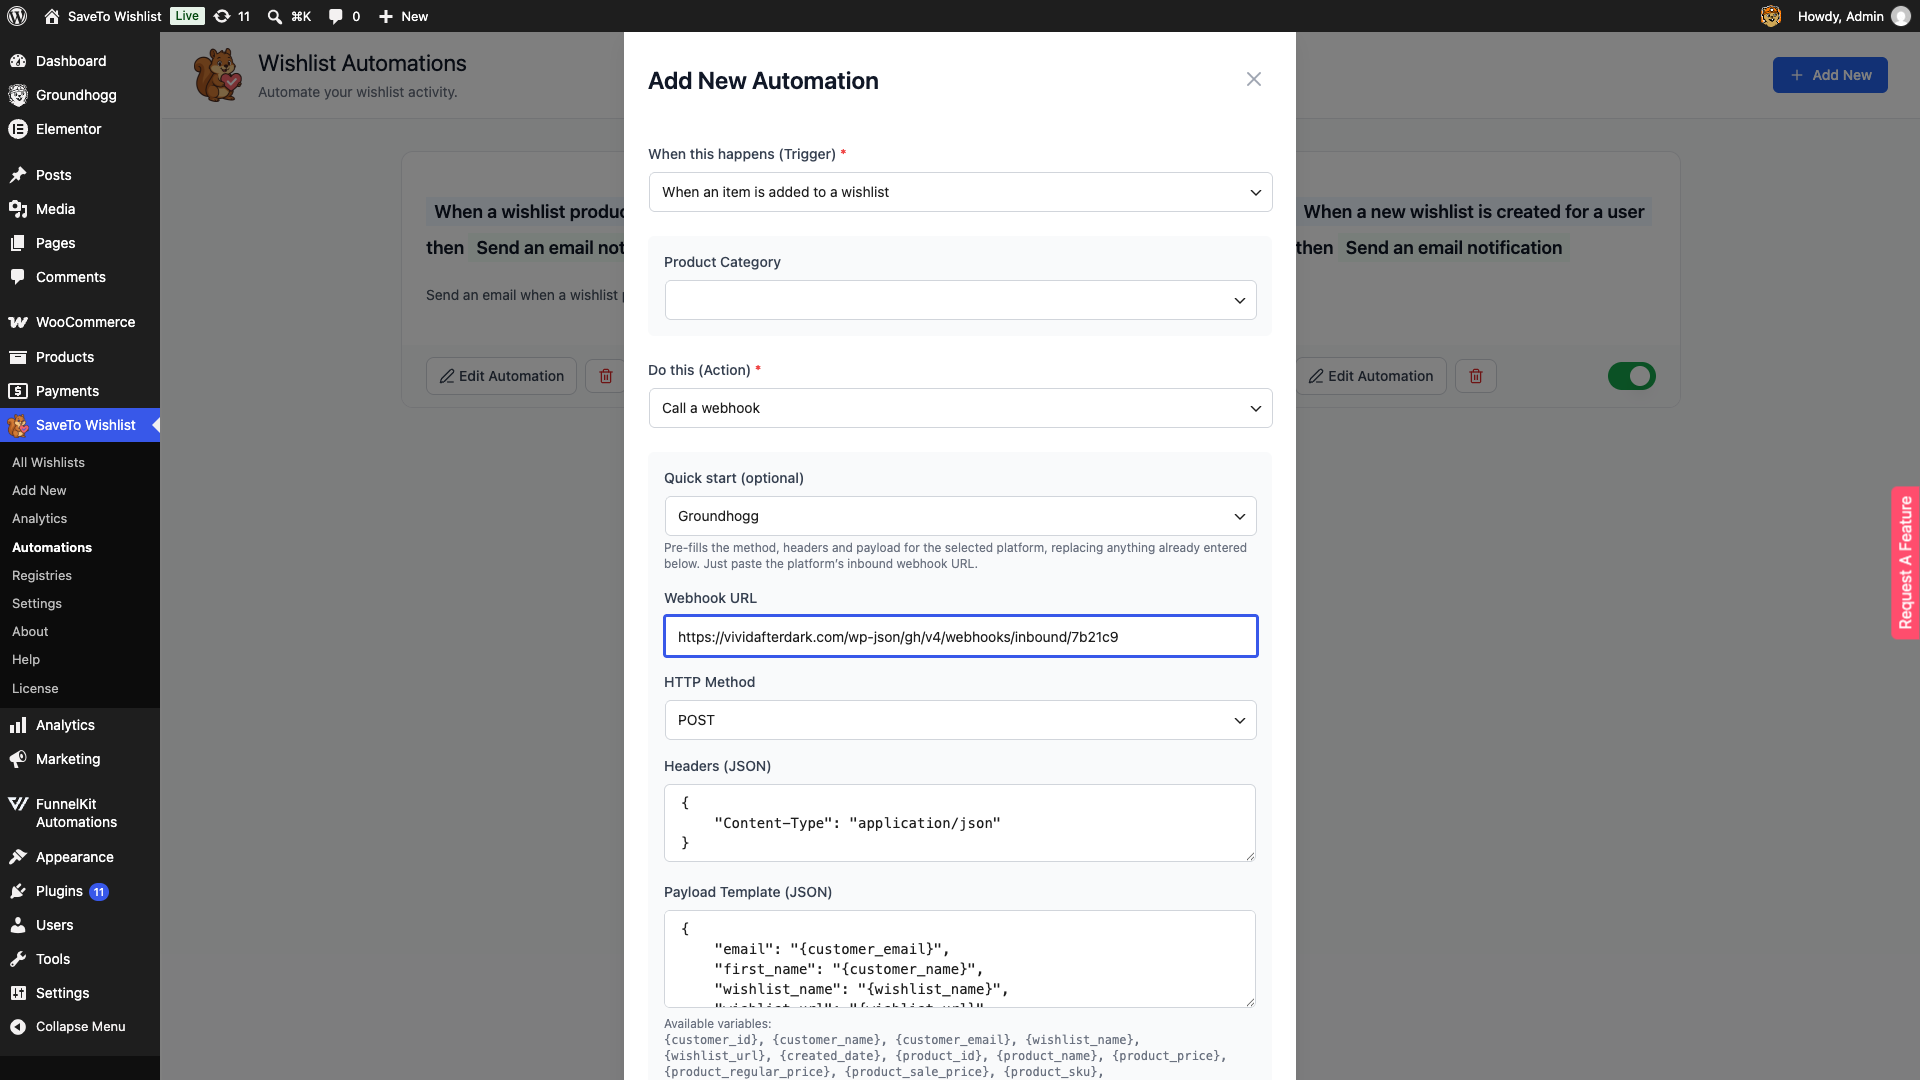
Choosing Groundhogg sets HTTP Method to POST, adds a Content-Type: application/json header, and writes a ready-made payload. It replaces anything already entered in those fields, so pick the quick start before you customise them.
Triggers the quick start supports
The quick start is offered on three triggers:
- When a new wishlist is created for a user
- When an item is added to a wishlist
- When an item is removed from a wishlist
It is not offered on When a wishlist product goes on sale or When an out of stock wishlist product comes back in stock. Those two triggers work across a list of wishlists rather than one customer, so the customer details in the payload have nothing to resolve to. Use the email action for those instead.
Available placeholders
The payload uses these variables. Each resolves per customer when the automation runs.
| Placeholder | Resolves to |
|---|---|
{customer_email} | The customer’s email address, used to match or create the Groundhogg contact |
{customer_name} | The customer’s name, sent as first_name |
{wishlist_name} | The name of the wishlist that triggered the event |
{wishlist_url} | A link to that wishlist |
You can edit Payload Template (JSON) after applying the quick start to add or remove fields.
Frequently asked questions
My funnel only ran once, even though the customer added several products. Why?
That’s expected. Groundhogg starts a “Tag Applied” funnel only when the tag actually changes, so it fires on the customer’s first add, not on every add after that. The tag is already there, so nothing changes on the next add.
Does it work for guests?
No. Guests aren’t tagged, because there’s no contact to tag. The integration also never creates a contact, so it only acts on customers Groundhogg already knows.
I turned the integration off. Do I lose my tag choices?
No. Turning it off stops all tagging, but your tag choices stay saved. Turn it back on and they’re still there.
Nothing is being tagged. What should I check?
Confirm the integration is set to Yes, that you’ve picked a tag for the event you’re testing, and that the customer is logged in with an existing Groundhogg contact. Guests and customers with no contact are skipped.
Need help?
If you have a question or run into any issues, we’re here to help.
- Premium users: Open a support ticket
- Free users: Visit our community forum

