
Want to follow up with customers based on what they wishlist? SaveTo Wishlist can tag a customer’s FluentCRM contact whenever they add a product to a wishlist or save one, so you can trigger email automations off that activity. This article shows you how to connect the two and map your tags.
Before you start
- FluentCRM installed and active.
- At least one FluentCRM tag created (you map wishlist events to it).
- This works for logged-in customers. Guests have no contact to tag.
How to connect FluentCRM
- In FluentCRM, go to Contacts → Tags and create a tag, for example Wishlist interest.
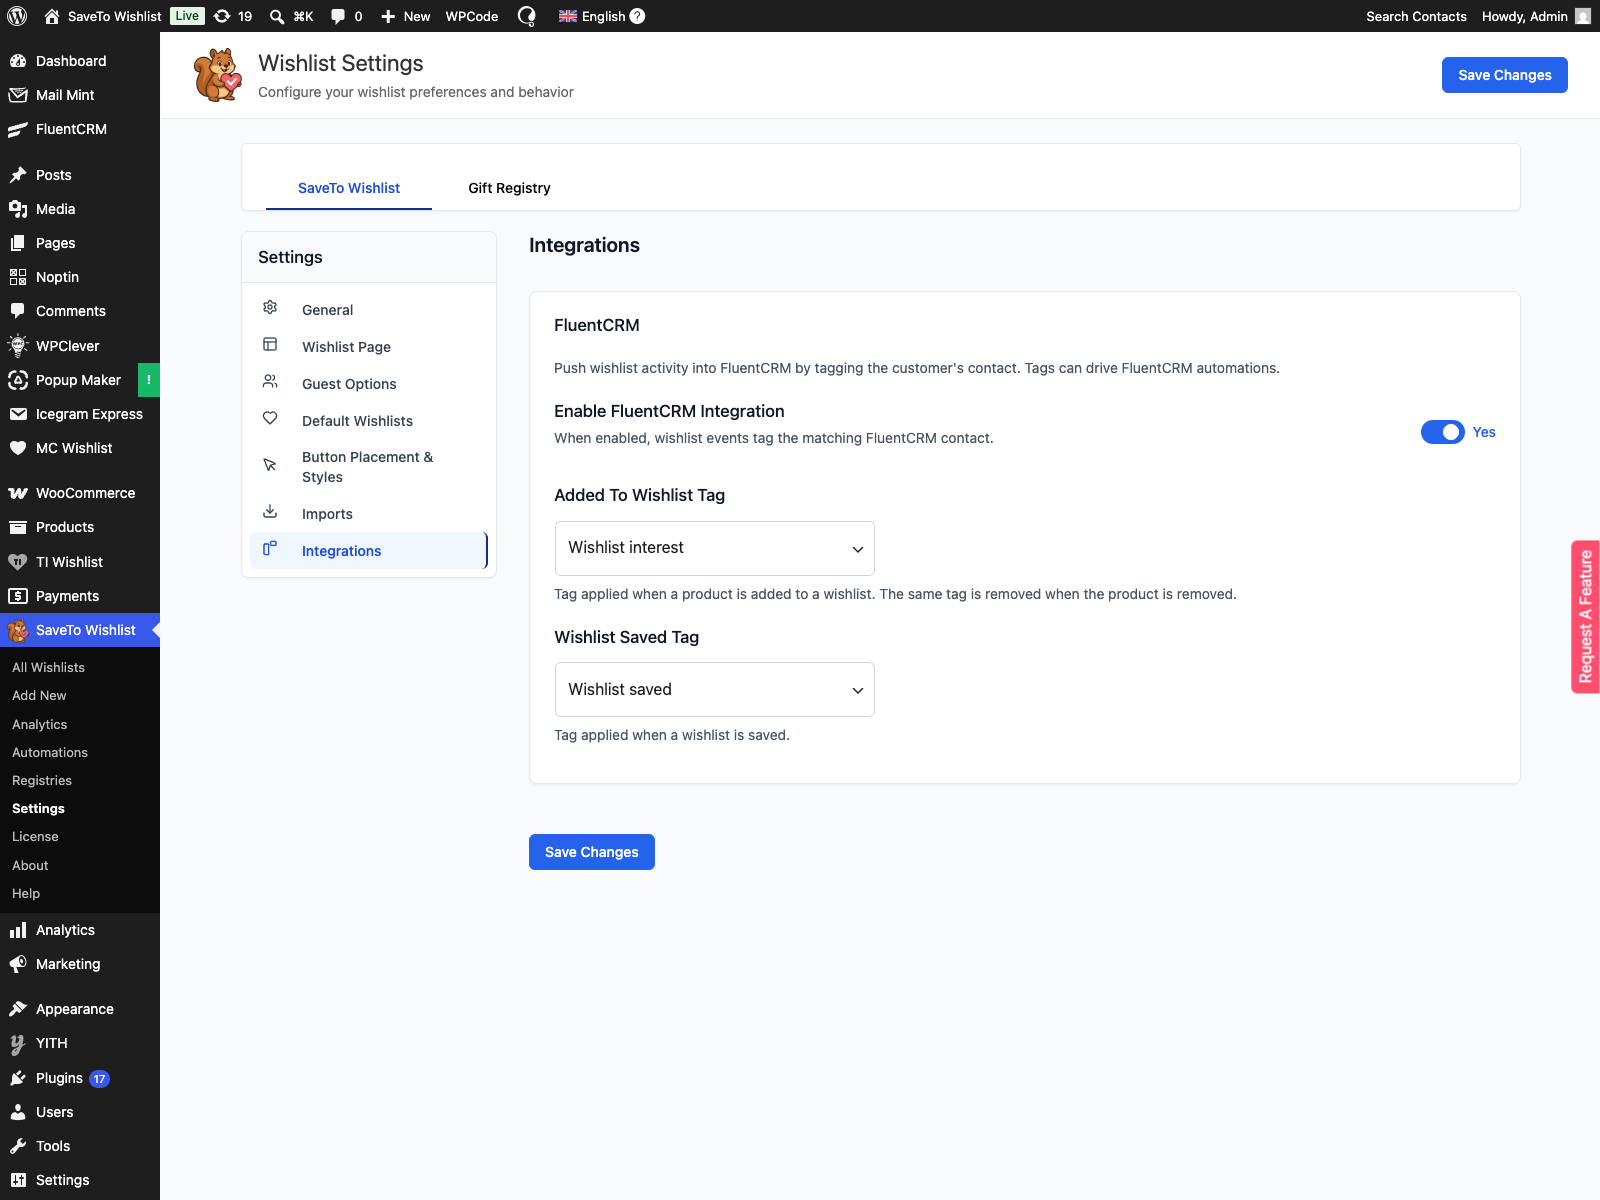
- In your WordPress admin, go to SaveTo Wishlist → Settings and open the Integrations tab.
- In the FluentCRM section, turn on Enable FluentCRM integration.
- Choose a tag under Added to wishlist tag. SaveTo applies this tag when a product is added, and removes it when that product is removed.
- Choose a tag under Wishlist saved tag. SaveTo applies this tag when a customer saves a wishlist.
- Save your settings.
How it works
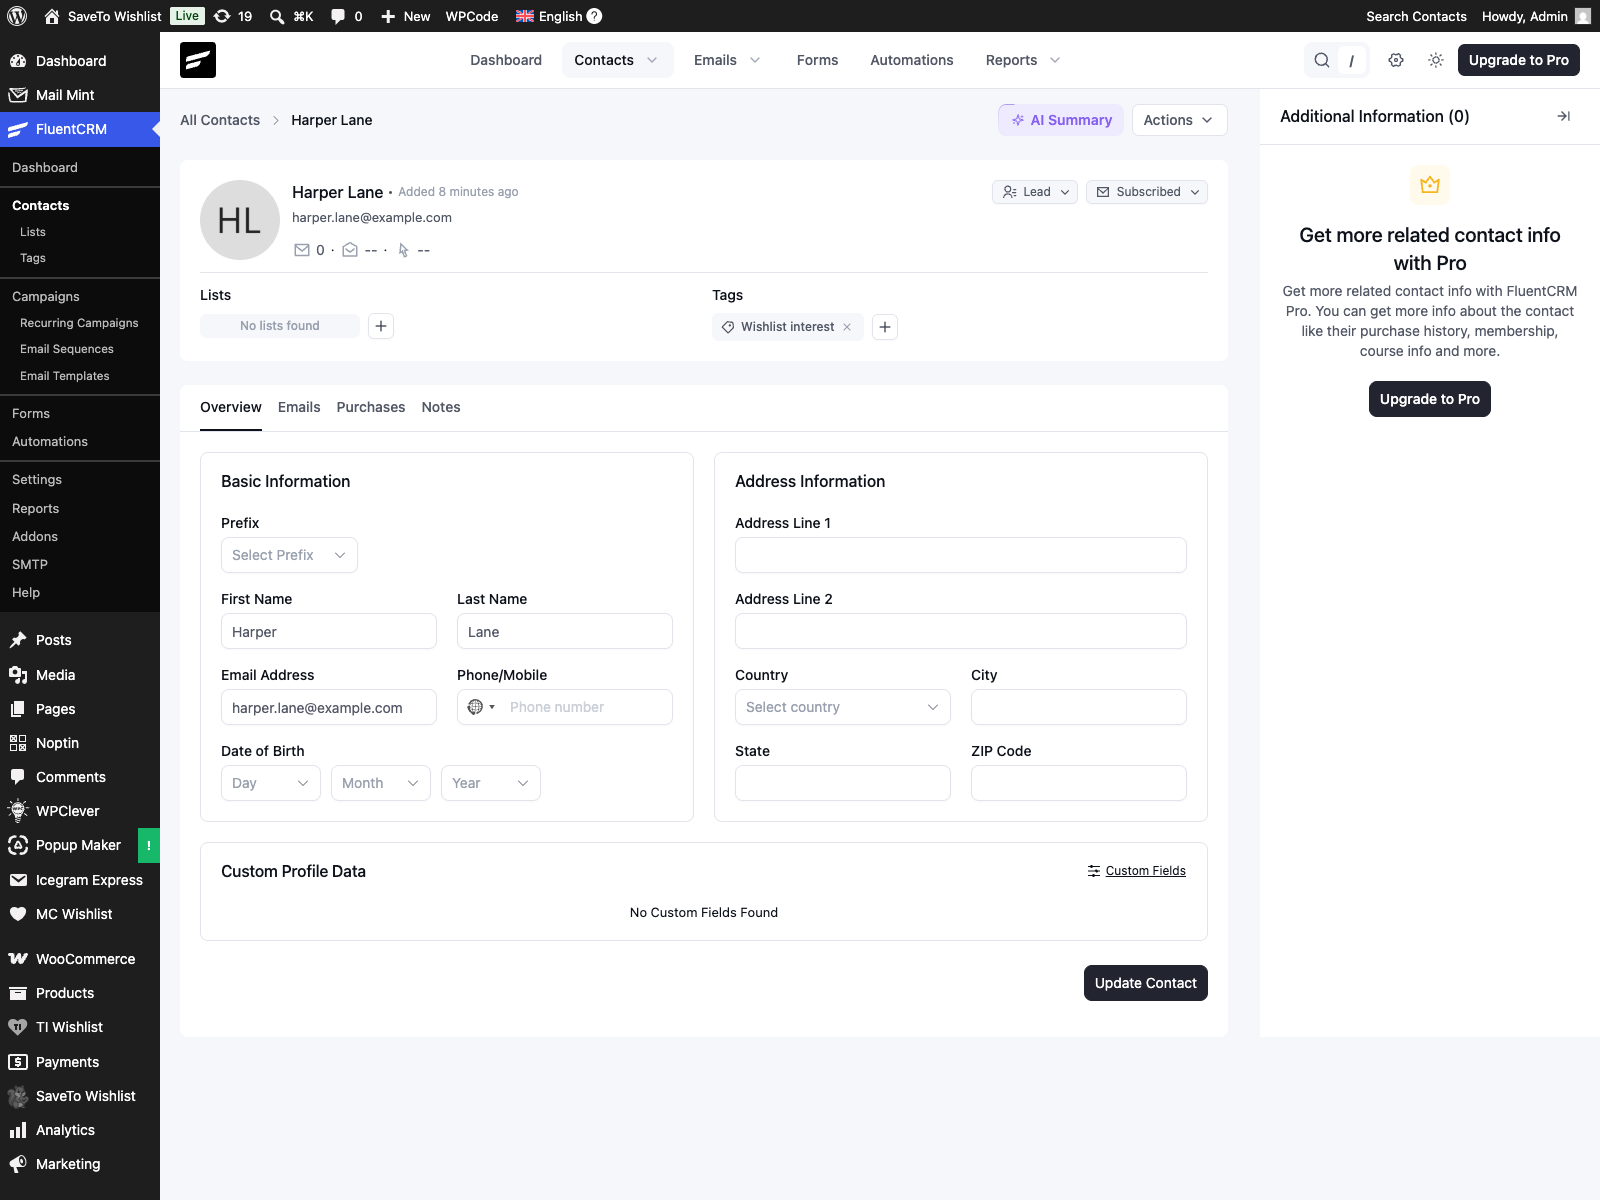
When a logged-in customer adds a product to a wishlist, SaveTo finds their FluentCRM contact by email (creating one if needed) and attaches your Added to wishlist tag. If they remove that product, SaveTo detaches the same tag. When they save a wishlist, SaveTo attaches the Wishlist saved tag.
Because these are ordinary FluentCRM tags, you can use FluentCRM’s Tag Applied automation trigger to send a follow-up email, add the contact to a sequence, or anything else FluentCRM supports.
Connect with a no-code automation (Pro)
If you’re on SaveTo Wishlist Pro, there’s a second way to connect: instead of the built-in bridge above, you can build a webhook automation that pushes wishlist events straight to FluentCRM. See How to connect external tools using wishlist webhooks for more on how wishlist automations work.
The Quick start preset for FluentCRM described below needs SaveTo Wishlist Pro 1.0.4 or later. On earlier versions the preset is not in the list, and you can still set the webhook up by filling in the fields by hand.
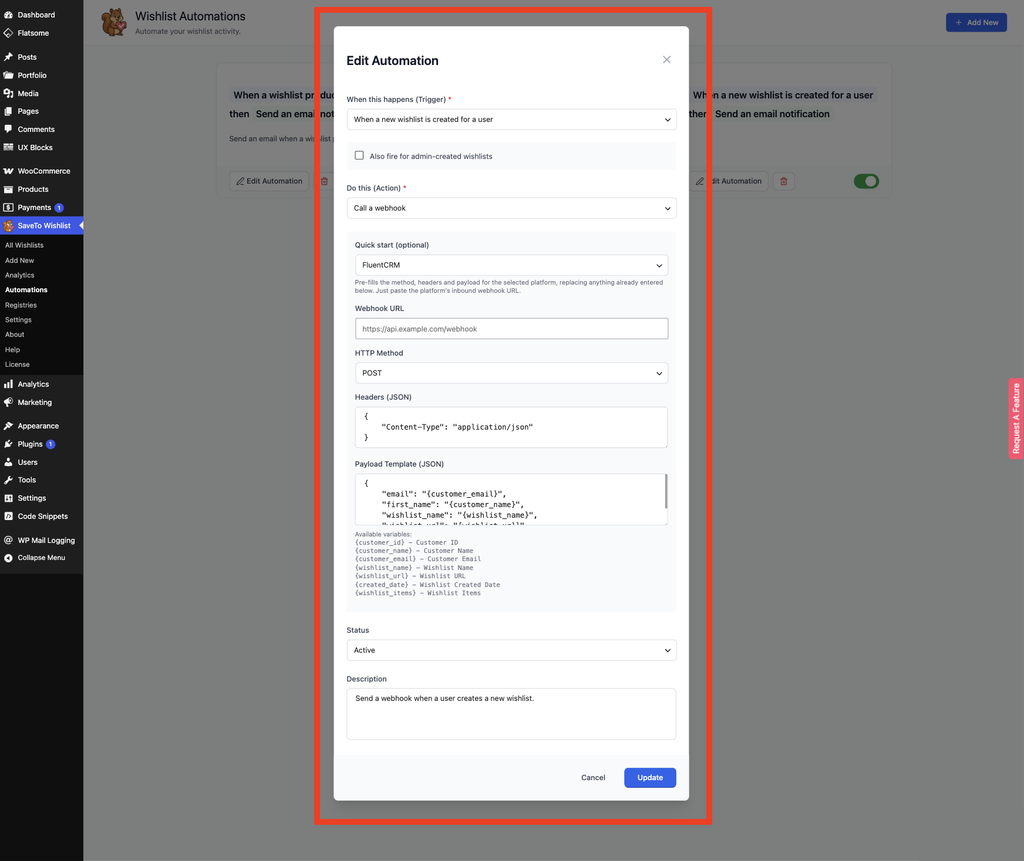
- Under When this happens (Trigger), choose When a new wishlist is created for a user, When an item is added to a wishlist, or When an item is removed from a wishlist.
- Under Do this (Action), choose Call a webhook.
- Under Quick start (optional), choose FluentCRM. This fills in the HTTP Method (POST), the Headers (JSON) field with a JSON content type, and the Payload Template (JSON) field with your customer’s email, name, wishlist name, and wishlist URL.
- Paste your FluentCRM inbound webhook URL into Webhook URL. Create this in FluentCRM under Settings → Webhook Settings → Create Webhook, where you also set the list, tags, and status every contact from this webhook receives.
- Save the automation.
FluentCRM reads email and first_name from the payload natively. To keep wishlist_name and wishlist_url, add a matching custom field under FluentCRM’s Settings → Custom Contact Fields with the same name. FluentCRM has no “webhook received” automation trigger, so tagging a contact or starting a sequence from this webhook depends on the tag or list you set when creating it: add a FluentCRM automation on the matching Tag Applied or List Applied trigger, then attach the action you want.
Troubleshooting
Contact isn’t getting tagged after adding a product or saving a wishlist
Check that you’ve turned on the FluentCRM integration and mapped both tags under Settings, Integrations. Tagging only works for logged-in customers, since the plugin can’t attach a contact to a guest.
The webhook automation isn’t reaching FluentCRM
Make sure the automation’s status is Active and that the webhook URL is your real FluentCRM inbound webhook URL rather than a placeholder. A wrong or expired URL fails outside WordPress, so nothing will show up in your SaveTo error logs. Test with your own wishlist activity and check FluentCRM’s contact list for the new entry.
FluentCRM isn’t tagging a contact or running an automation from the webhook
This is expected if you’re waiting on a “webhook received” trigger: FluentCRM doesn’t have one. Instead, add a FluentCRM automation on the Tag Applied or List Applied trigger that matches the tag or list your webhook applies.
Frequently asked questions
Does this work for guests?
No. Tagging needs a contact, so it applies to logged-in customers with an email address.
Why is the tag dropdown empty?
You need at least one tag in FluentCRM first. Create one under Contacts, then come back and map it.
What happens when a product is removed?
SaveTo removes the Added to wishlist tag from that contact, so your automations can reflect current interest.
Need help?
If you have a question or run into any issues, we’re here to help.
- Premium users: Open a support ticket
- Free users: Visit our community forum

