
Once you’ve purchased SaveTo Wishlist Pro, you’ll need to activate your license before the premium features switch on. This guide walks you through activation, explains what different license statuses mean, and shows you how to move your license to a new site when needed.
Prerequisites
- SaveTo Wishlist Lite and Pro installed and activated.
- WooCommerce installed and configured.
Activate Your License
Once you have purchased your Pro license:
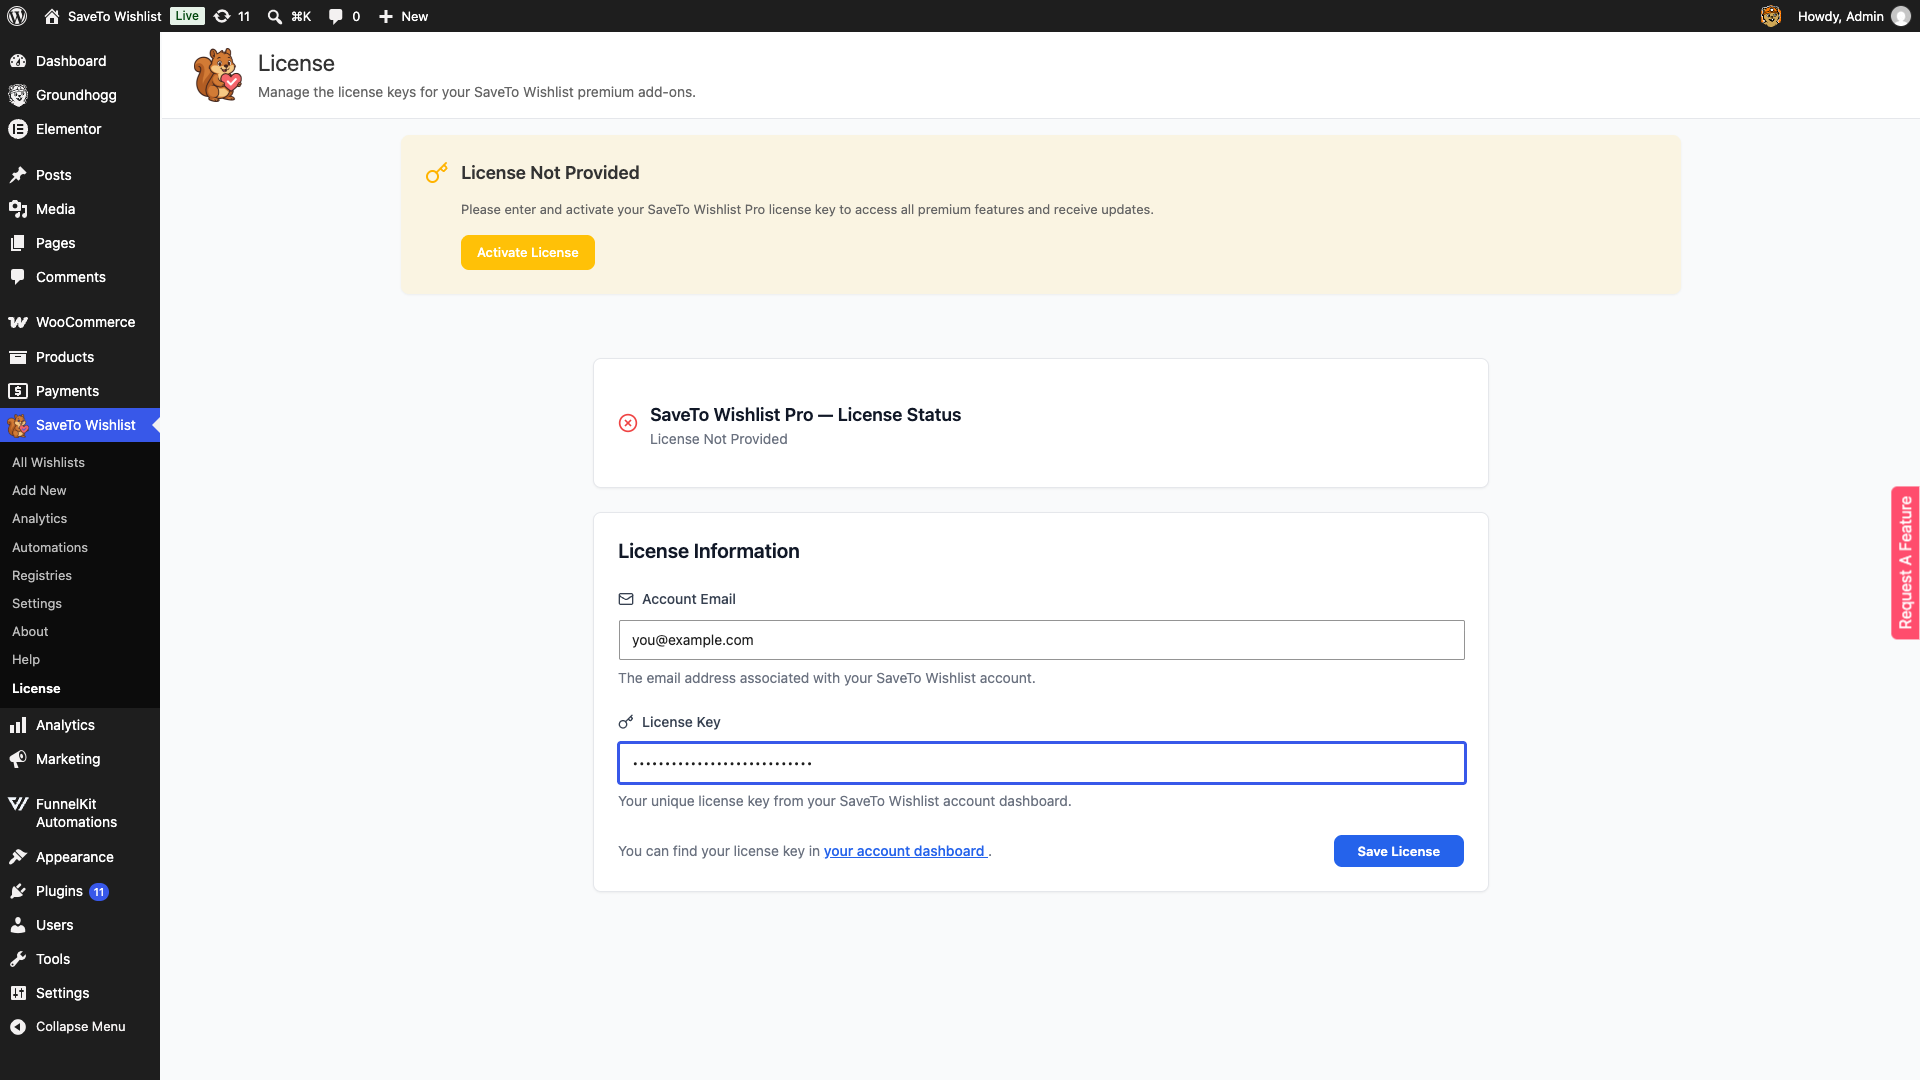
- Navigate to SaveTo Wishlist → License. If you have more than one SaveTo Wishlist premium add-on licensed, a tab strip appears, so select the SaveTo Wishlist Pro tab. With Pro on its own there are no tabs and its panel opens directly.
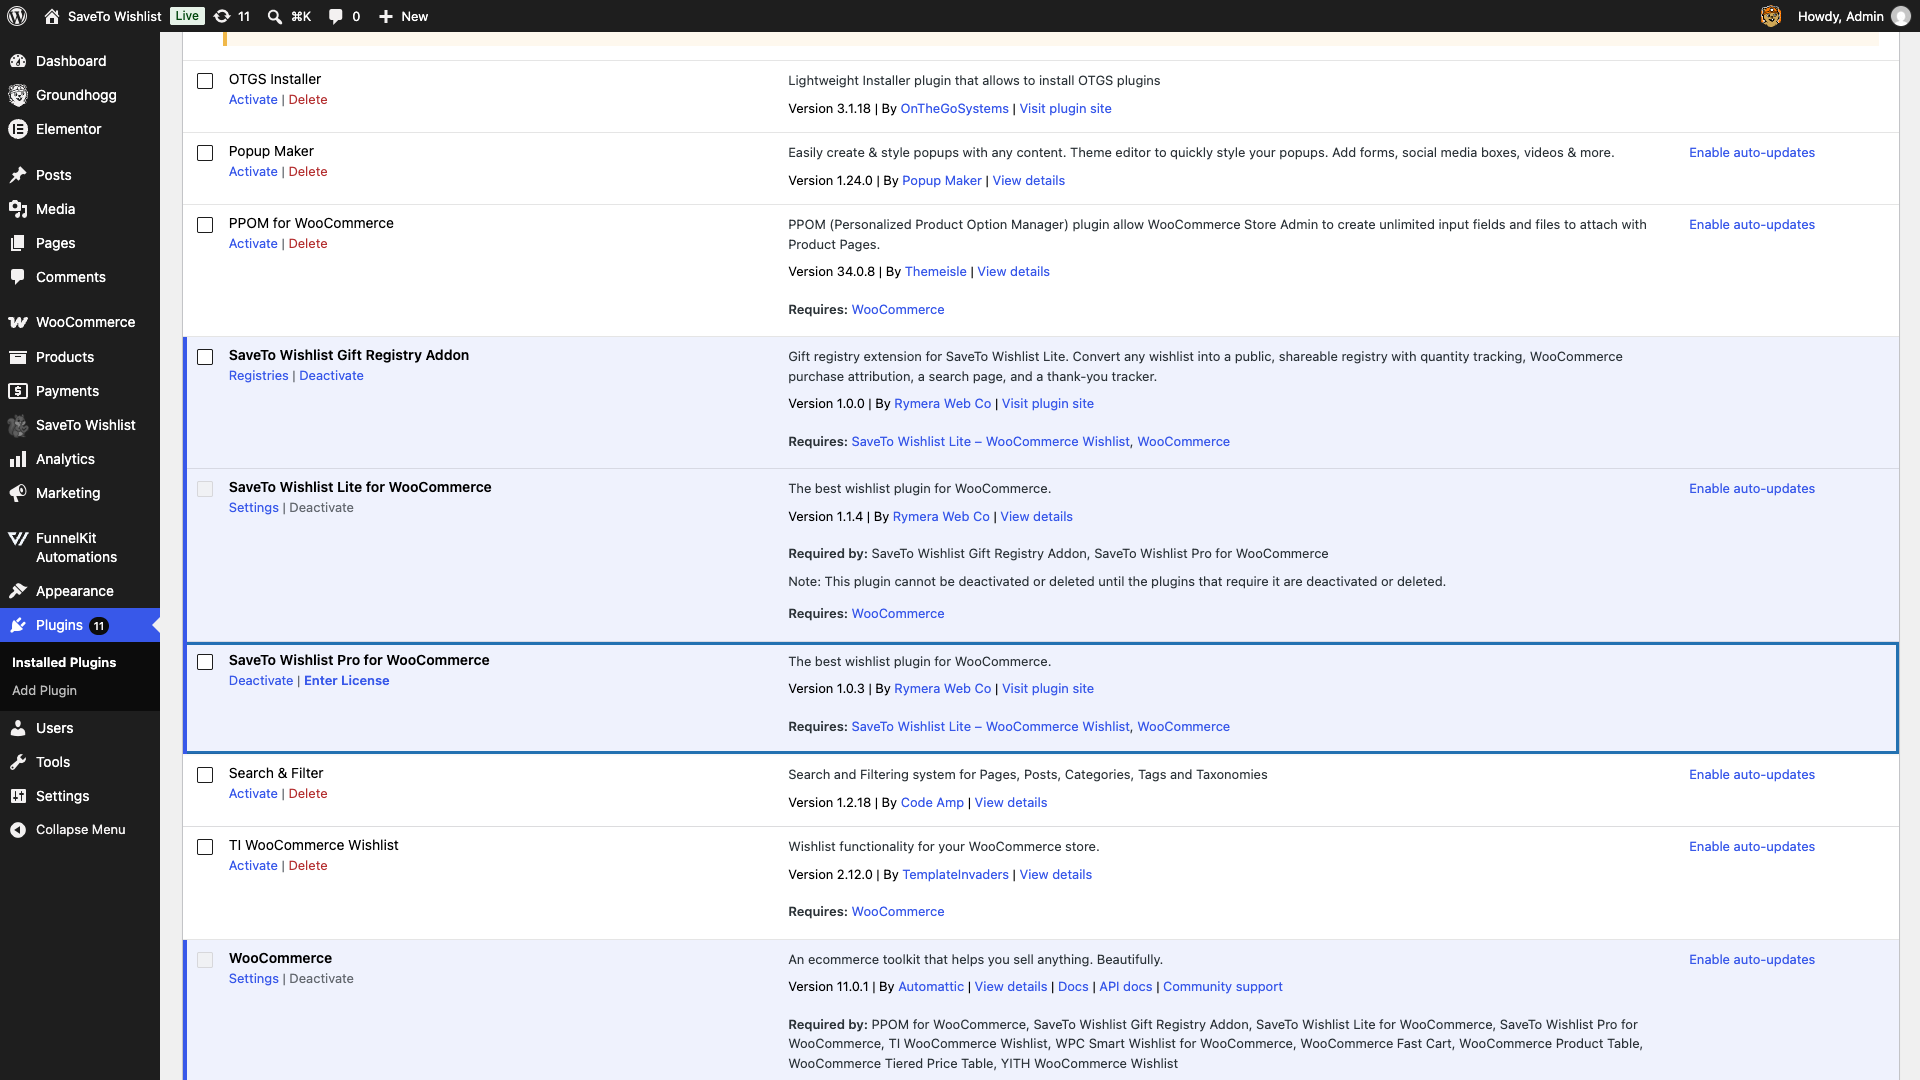
- If your license is not active yet, you can jump straight to this page by clicking Enter License next to Deactivate on the Plugins page. That link disappears once your license is active.
- On the License page, a License Not Provided notice appears with an Activate License button that takes you to the form below.
- Enter your Account Email.
- Paste your license key into the License Key field.
- Click Save License.
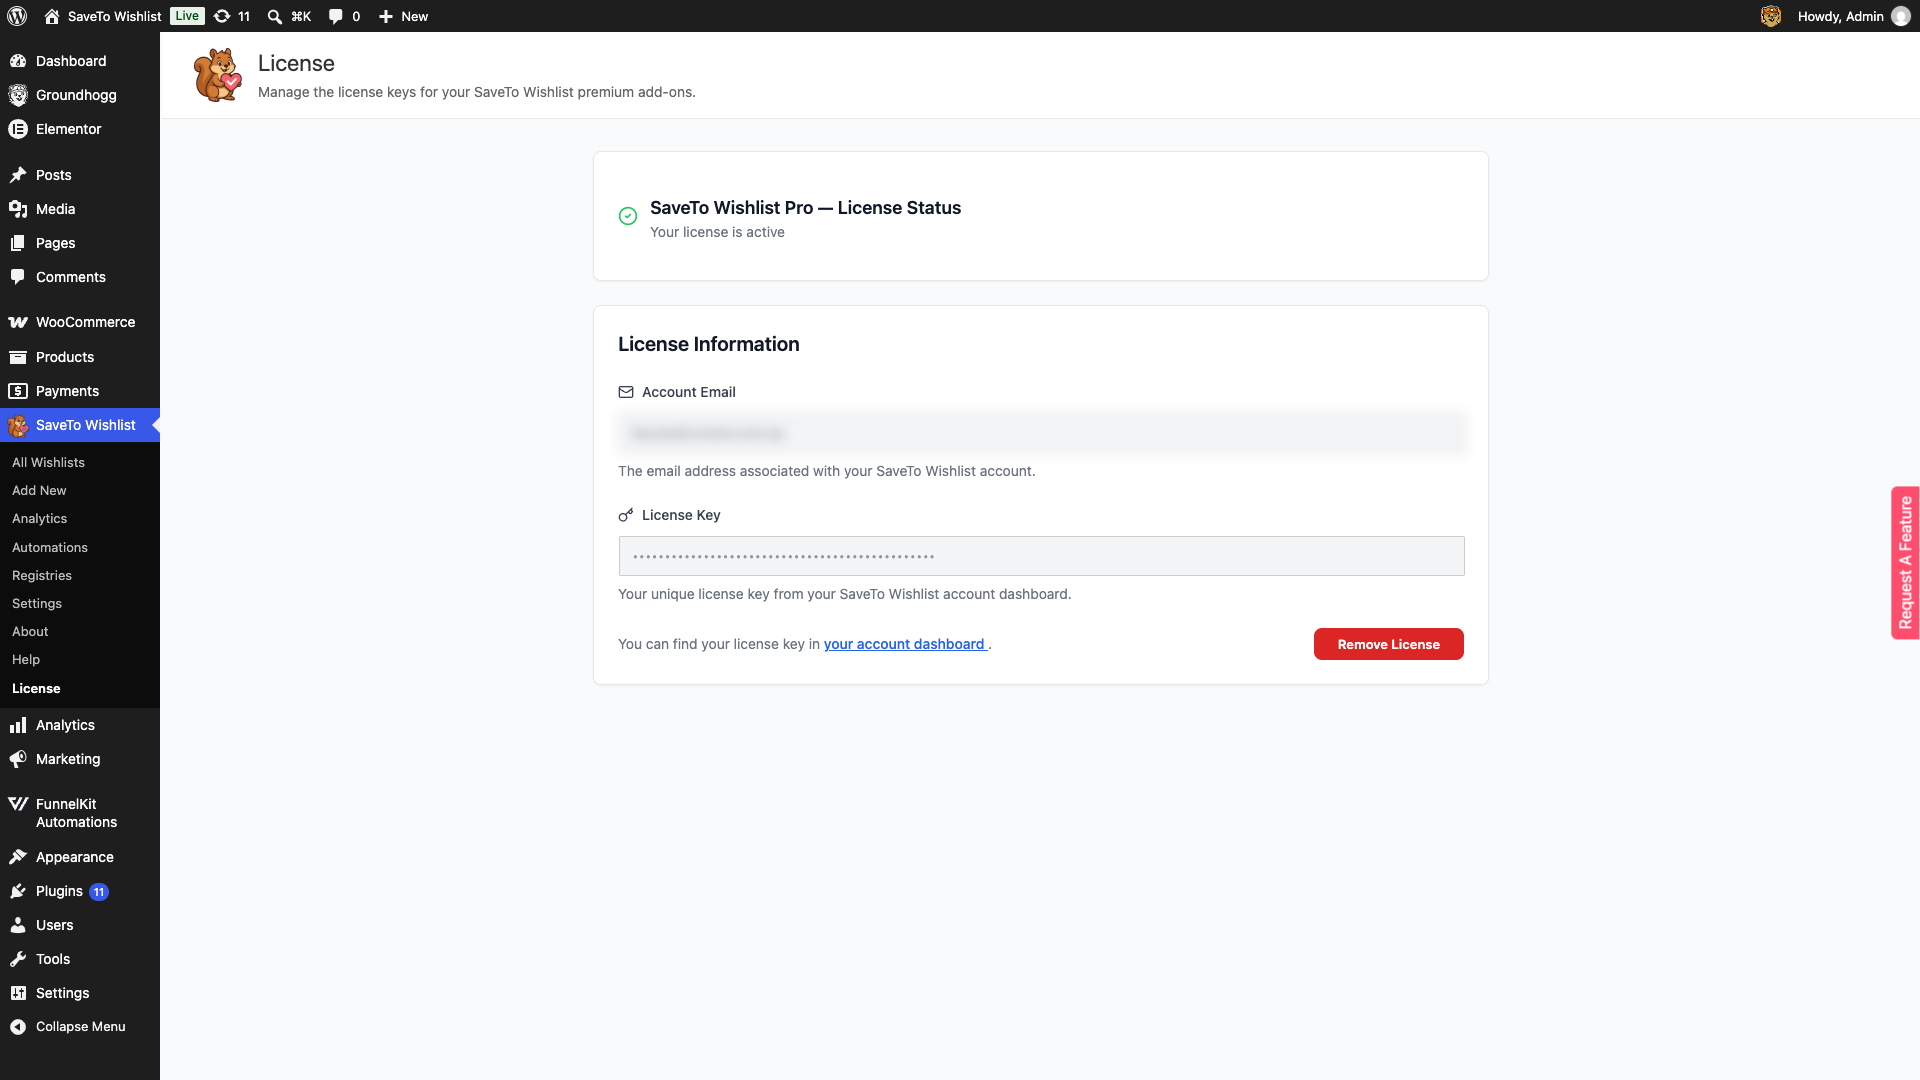
- Check for the green checkmark and the Your license is active message. This confirms your site is connected to the update server.
Understanding License Status
- Active: You receive all pro features, bug fixes, and new feature updates automatically via the WordPress dashboard.
- Inactive/Expired: The plugin will continue to function, but you will lose access to new updates and premium support. We highly recommend keeping your license active to ensure compatibility with the latest version of WooCommerce.
Moving Your License
If you are moving from a staging site to a live production site:
- Navigate to SaveTo Wishlist → License on the old site, select the SaveTo Wishlist Pro tab, and click Remove License.
- Repeat the activation steps on your new site.
Troubleshooting & FAQ
➤ How to fix “Invalid License” error?
Ensure there are no extra spaces before or after the key when you paste it.
➤ Where is my Saveto Wishlist Pro license key?
You can find your license key in your purchase confirmation email or by logging into your account on our website.
You’re Ready for SaveTo Wishlist Pro!
With your license active, you’ve got full access to Pro features, updates, and support. Head to SaveTo Wishlist → Automations to set up your first automated email notification, or browse the SaveTo Wishlist Pro Getting Started Guide to see everything that’s now unlocked.
Help & Support
We have a dedicated support team for SaveTo Wishlist Pro for WooCommerce who knows our products, WooCommerce, and the industry very well. You’re welcome to make use of their expertise at any time, worldwide.
- Premium users: Open a support ticket
- Free users: Visit our community forum
Need an earlier version instead?
Your account’s Downloads area always gives you the latest release. If you need a specific earlier version of SaveTo Wishlist Pro, contact our support team and tell us the exact version number you need, and we will send you that version.
Using the free SaveTo Wishlist Lite plugin? You can grab an earlier release yourself from WordPress.org. Open the SaveTo Wishlist Lite plugin page, click Advanced View at the bottom, and choose the version you want under Previous Versions. The free WP Rollback plugin can also roll it back from your Plugins screen.
Once you have the file, back up your site, then install it from Plugins → Add New → Upload Plugin. Upload the ZIP and choose Replace current with uploaded. To stop the plugin updating back to the newest release, click Disable auto-updates next to it on your Plugins screen.

