
Building your product pages in Elementor and the wishlist button will not sit where you want it? SaveTo Wishlist ships a native Elementor widget, so you can drag the button exactly where it belongs instead of relying on the plugin’s automatic placement. This guide covers adding the widget, styling it, using it inside product grids, and fixing the issues that come up most often.
What you’ll need
- Elementor, free or Pro.
- SaveTo Wishlist Lite version 1.1.3 or later. Earlier versions do not include the widget.
- SaveTo Wishlist Lite version 1.1.6 or later if you want the button in Premium Addons for Elementor product grids.
- WooCommerce, with at least one published product.
- A template or page that has a product to work with, such as a single product template or a product loop.
The widget reads your existing wishlist settings, so there is nothing to set up first. Drop it onto a template and it renders the same button your store already shows.
Add the widget to a product template
- Open the product template or page you want to edit in Elementor.
- In the widget panel, search for Save to Wishlist.
- Drag the widget onto your layout where you want the button to appear.
- Click Update to save.
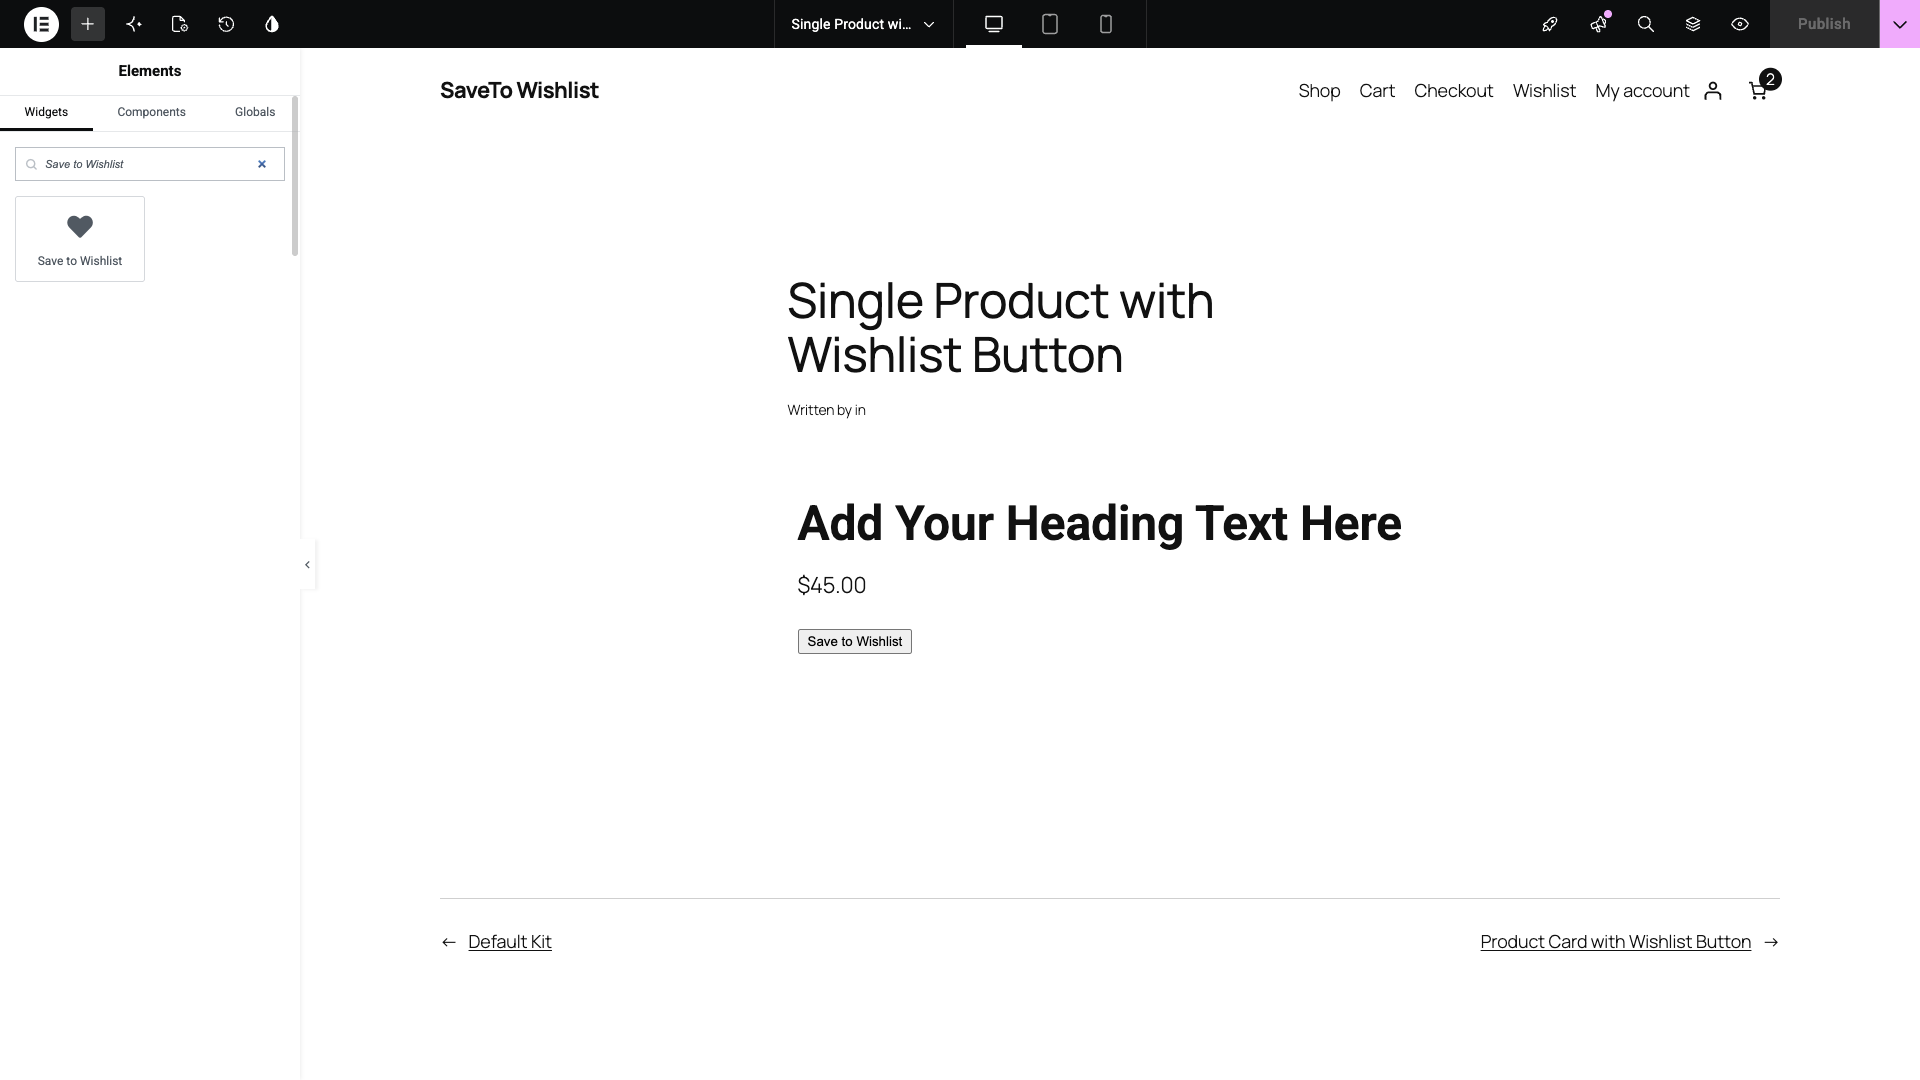
The widget appears under both the WooCommerce and General categories in the panel, so either one works if you prefer browsing to searching.
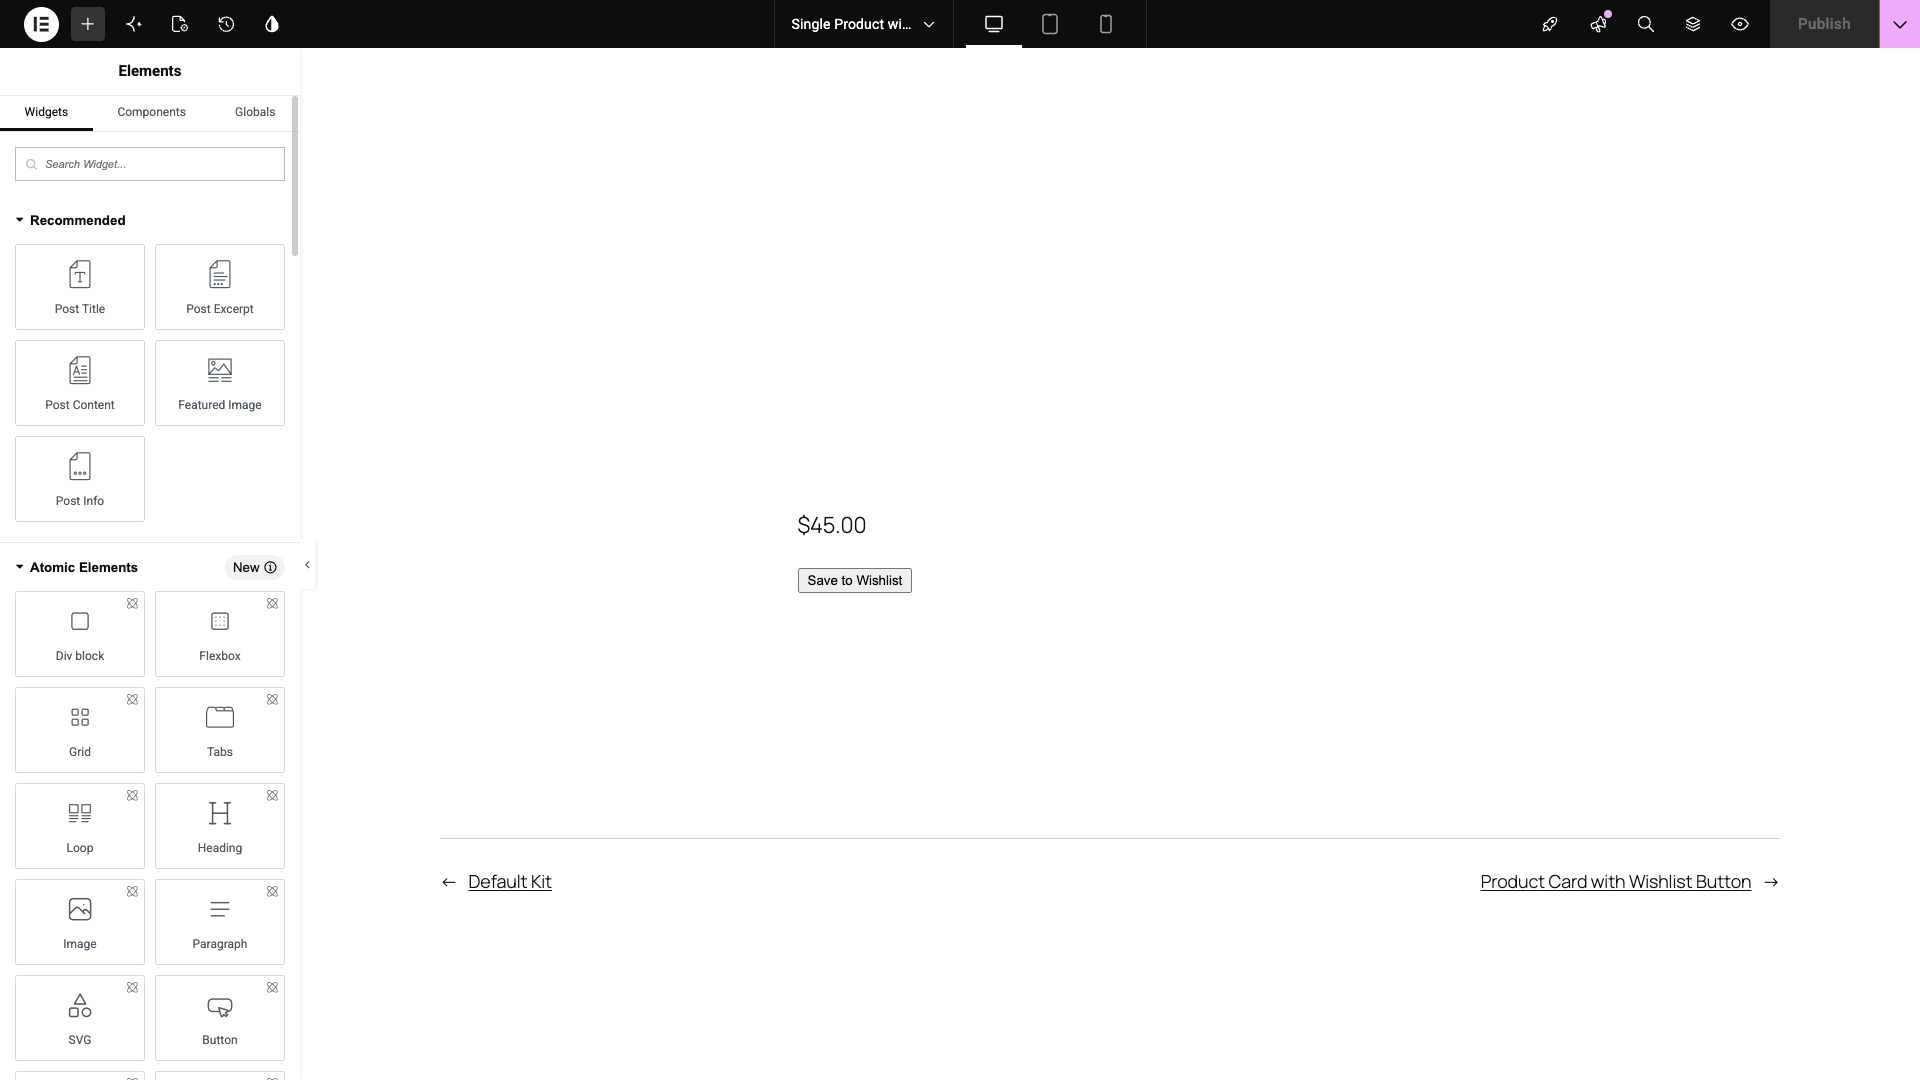
The button renders straight away using your current wishlist settings. If nothing appears, see the troubleshooting section below.
Choose the button type
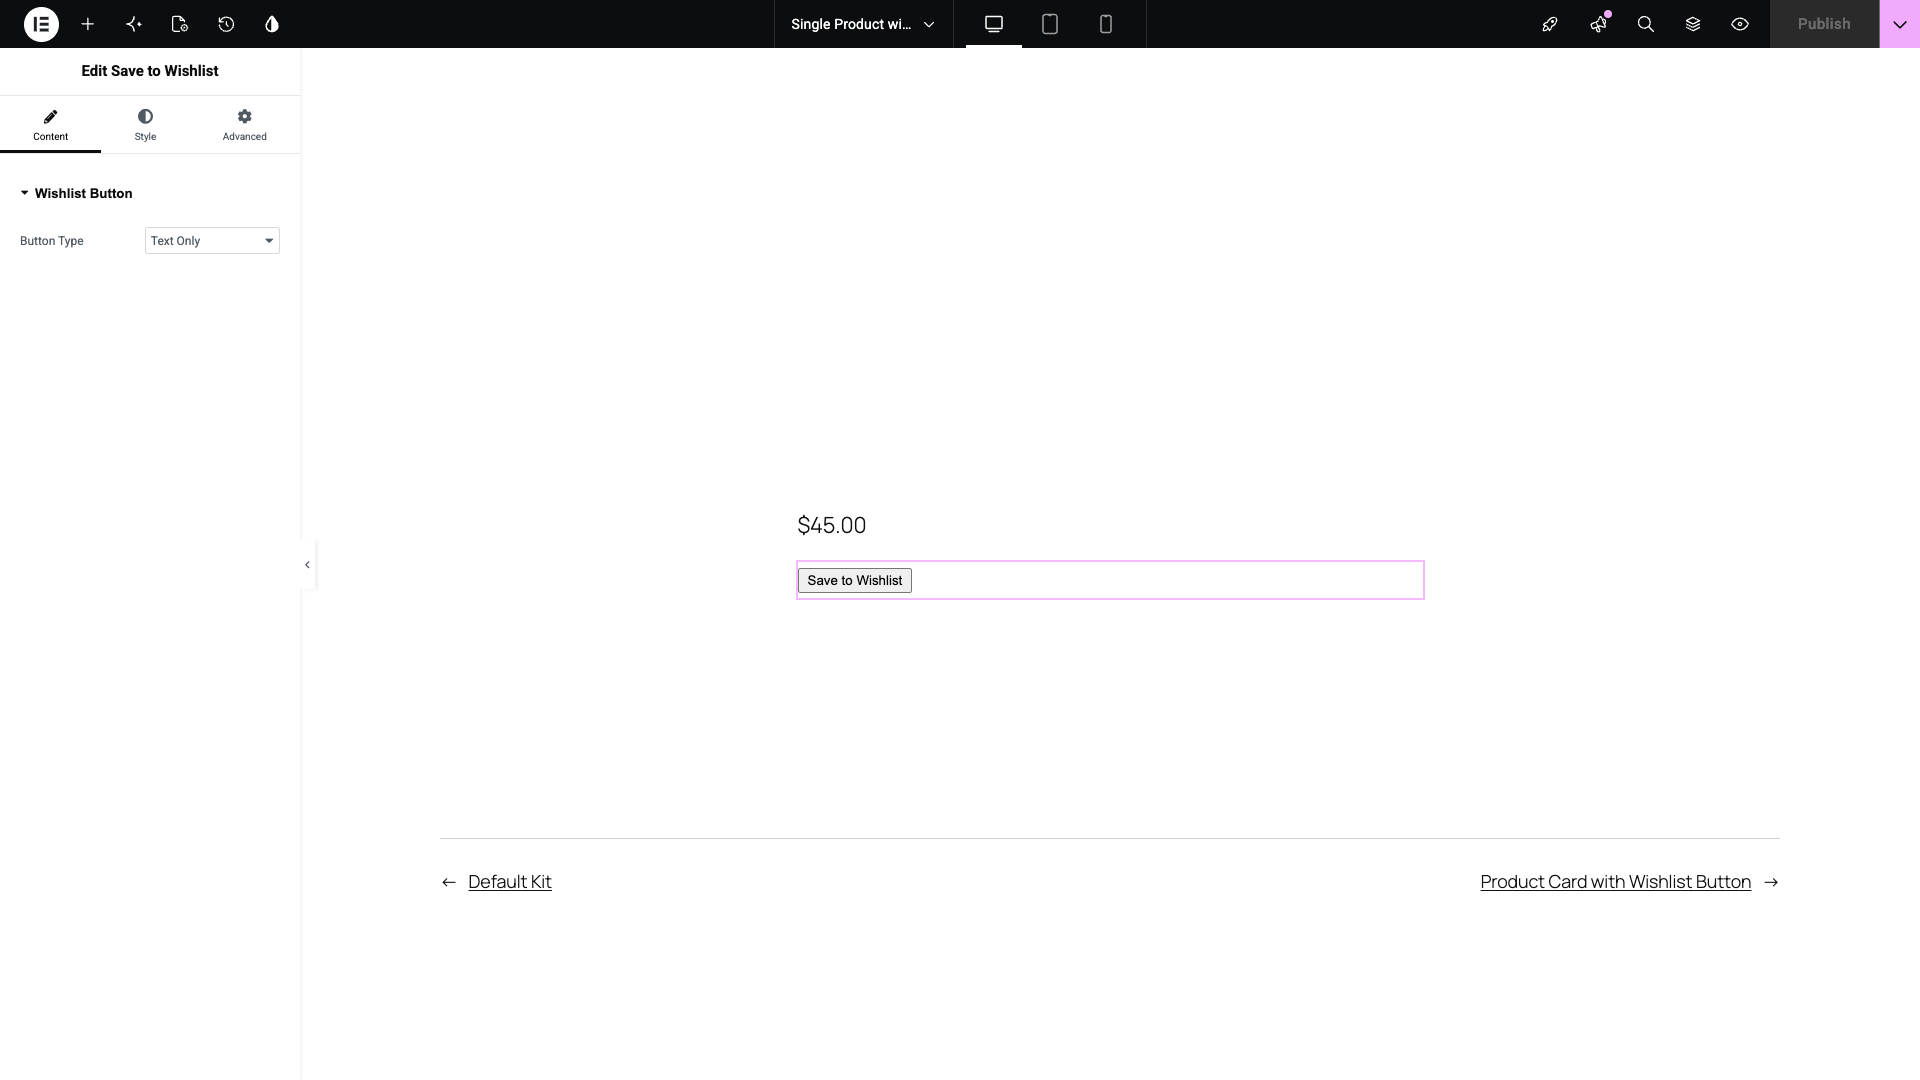
Open the Wishlist Button section on the Content tab. It holds one setting.
- Set Button Type to the style you want.
- Defaults to whatever your product button style is set to in the wishlist settings.
- Changing it here affects this widget only, not the rest of your store.
Ten styles are available:
- Text Only
- Icon Only
- Icon and Text
- Icon and Text Pill
- Solid Icon
- Solid Icon and Text
- Solid Icon and Text Pill
- Minimal Icon
- Minimal Icon and Text
- Minimal Icon and Text Pill
The Pill variants use fully rounded corners. Solid fills the icon shape, and Minimal uses a lighter outline.
Set the alignment
Alignment sits on the Style tab, where Elementor keeps alignment for its own widgets.
- Open the Layout section on the Style tab.
- Set Alignment to Left, Center, or Right.
Alignment defaults to Left.
Change the button colors
Open the Colors section on the Style tab. You get eight color controls, each with a normal and a hover state:
- Text Color and Text Color (Hover)
- Background Color and Background Color (Hover)
- Border Color and Border Color (Hover)
- Icon Color and Icon Color (Hover)
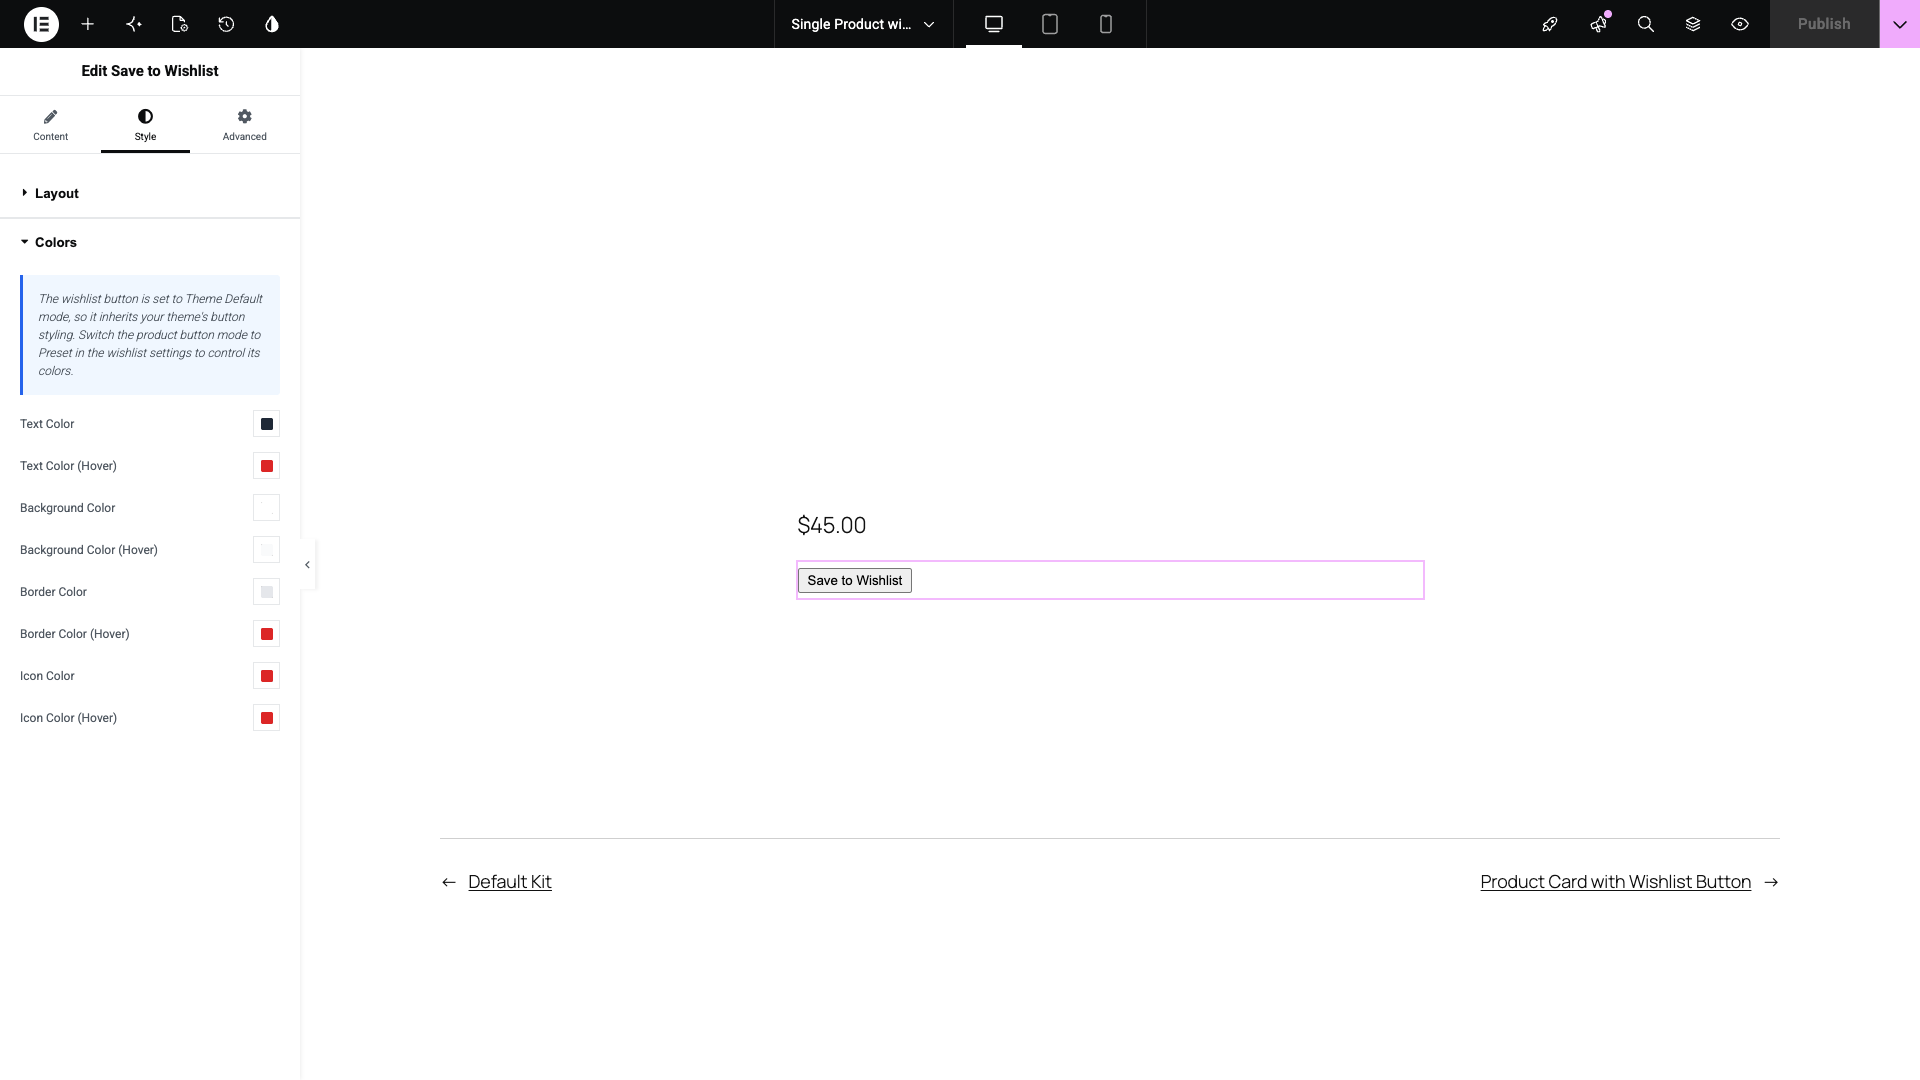
Each one starts at the color already saved in your wishlist settings, so an untouched widget looks exactly like the rest of your store. Change one and it overrides that color for this widget only.
Colors are the only thing the widget overrides. Button size, padding, border width, and icon shape keep coming from your wishlist settings, so change those in SaveTo Wishlist > Settings > Button Placement & Styles.
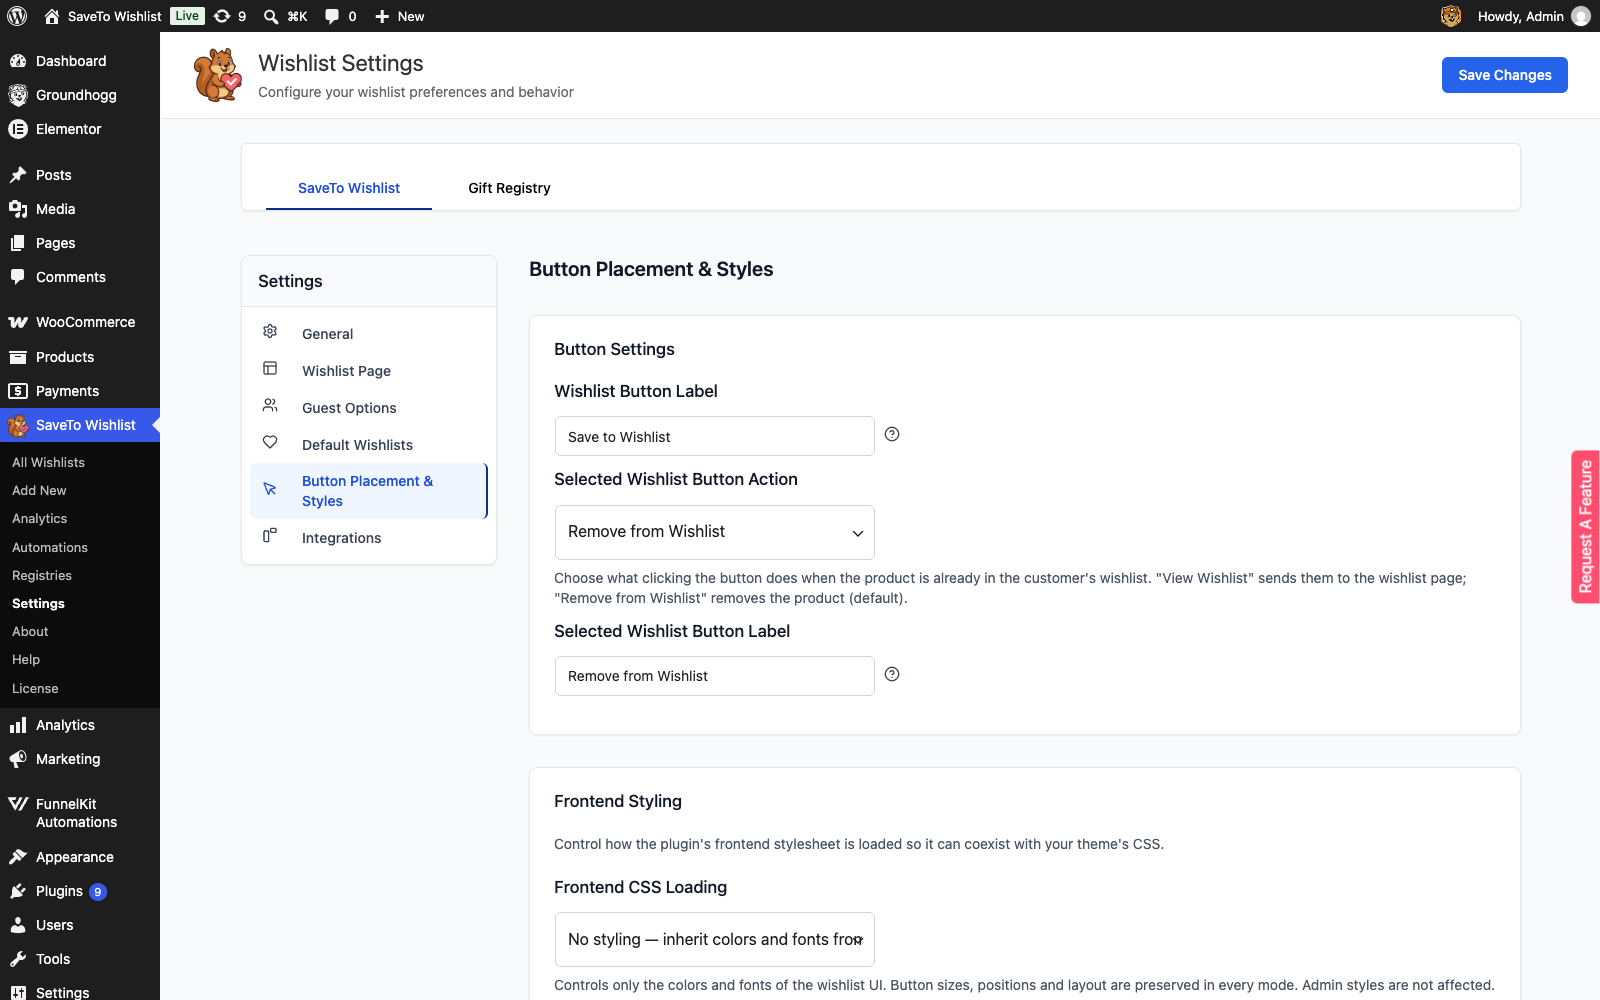
The color pickers accept solid colors only. There is no transparency slider and no global colors tab, because the wishlist button stores plain hex colors.
Show the button in Loop Grid and Loop Carousel
If you use Elementor Pro, the wishlist button also works inside the Loop Grid and Loop Carousel widgets. You have two ways to get it there.
Leave it to the plugin. Your shop page button placement already applies to loop cards, so the button appears on each card without you adding anything.
Place it yourself. Edit the loop item template, then add the Save to Wishlist widget to the card layout. This gives you control over exactly where on the card the button sits.
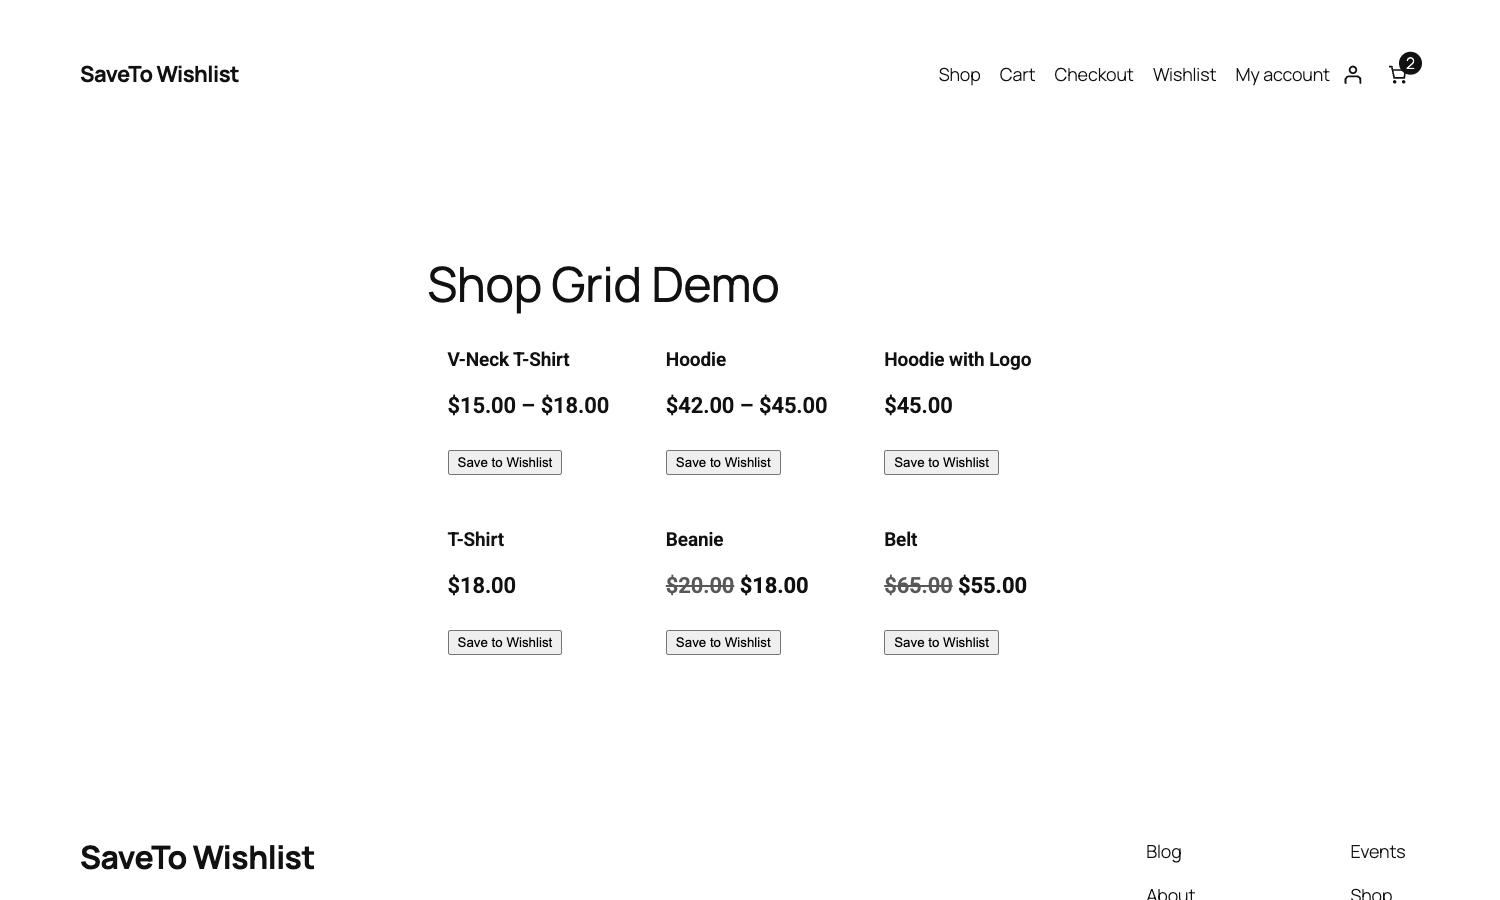
Placing the widget inside a loop item does not turn off the shop placement’s own button. If your shop button placement is still active on that template, the card shows both: the shop placement’s button and the widget’s. To make the widget the only button on the card, set your shop button placement to Don’t show in SaveTo Wishlist > Settings > Button Placement & Styles.
Show the button in Premium Addons product grids
If you use Premium Addons for Elementor, the wishlist button appears on every card of its WooCommerce product grid or carousel widget. You don’t add a widget for this. The button shows up on its own once SaveTo Wishlist Lite 1.1.6 or later is active.
The button follows your Shop Page > Button Placement setting in SaveTo Wishlist > Settings > Button Placement & Styles:
- Above the Product Title, Below the Product Title, Above the Add to Cart Button and Below the Add to Cart Button put the button in the matching spot on the card. If your grid hides that part of the card, or shows its Add to Cart button somewhere else, the button appears at the end of the card’s details instead.
- Top Right of the Product Image and Top Left of the Product Image show the button at the top of the card’s details area instead of on the image. Premium Addons has no spot inside its image area for the button.
- Don’t show hides the button in Premium Addons grids too.
If Disable Guest Wishlist is on, logged-out visitors don’t see the button in these grids either.
If the grid widget’s Cache Settings option on its Advanced tab in Elementor is set to Active, the button is not added. This stops one visitor’s wishlist status from being cached and shown to everyone. Set it to Default or Inactive to show the button.
Which method should you use?
SaveTo Wishlist gives you three ways to put wishlist features on a page, and they do different jobs. The most important difference: the Elementor widget places the button on a product, while the shortcode and the block display the wishlist itself. Most stores use both.
The Elementor widget puts the Save to Wishlist button wherever you drop it. Use it when you build product templates in Elementor. It is the only one of the three with its own styling controls.
The [saveto_wishlist] shortcode displays a customer’s wishlist. Use it when the wishlist needs to appear outside an Elementor layout, such as a classic editor page, a text widget, or a builder with no native element. See How to Use the Wishlist Shortcode.
The wishlist block does the same job as the shortcode, in the WordPress block editor. Use it when you edit pages with blocks rather than a page builder. See How to Use the Wishlist Gutenberg Block.
Premium Addons product grids need no widget at all. The button appears on each card automatically, as described in the section above.
Troubleshooting
The button does not appear at all
Work through these in order.
- No product in context. The widget only renders where WooCommerce has a product to work with. A plain page, or a template not bound to a product, gives it nothing to render, so it stays empty. Put it on a single product template, a loop item template, or a page that sets a product.
- Guest wishlists are turned off. If Disable Guest Wishlist is enabled in your wishlist settings and you are viewing the site logged out, the button is hidden on purpose. Log in, or turn that setting off, to see it.
- SaveTo Wishlist is older than 1.1.3. The widget does not exist in earlier versions. Update the plugin.
Two wishlist buttons appear on the product page
This usually resolves itself. When your Elementor product template contains the widget, the plugin unregisters its own single product placement, so only the button you placed renders.
Related products, upsells, and cross-sells are deliberately left alone, because those cards render through the shop placement. If you see a second button on those, that is the shop placement doing its job. Change it in SaveTo Wishlist > Settings > Button Placement & Styles.
The color pickers have no effect
Two settings switch the color controls off, and each one shows a message in the panel explaining why.
If your product button mode is set to Theme Default, the button inherits your theme’s button styling and the plugin applies no color of its own. Switch the product button mode to Preset in your wishlist settings to control colors.
If your wishlist icon is a custom uploaded image, Icon Color and Icon Color (Hover) do nothing, because an uploaded image cannot be tinted. Swap it for a built-in icon shape in your wishlist settings if you want color control.
A blog layout appears instead of the wishlist
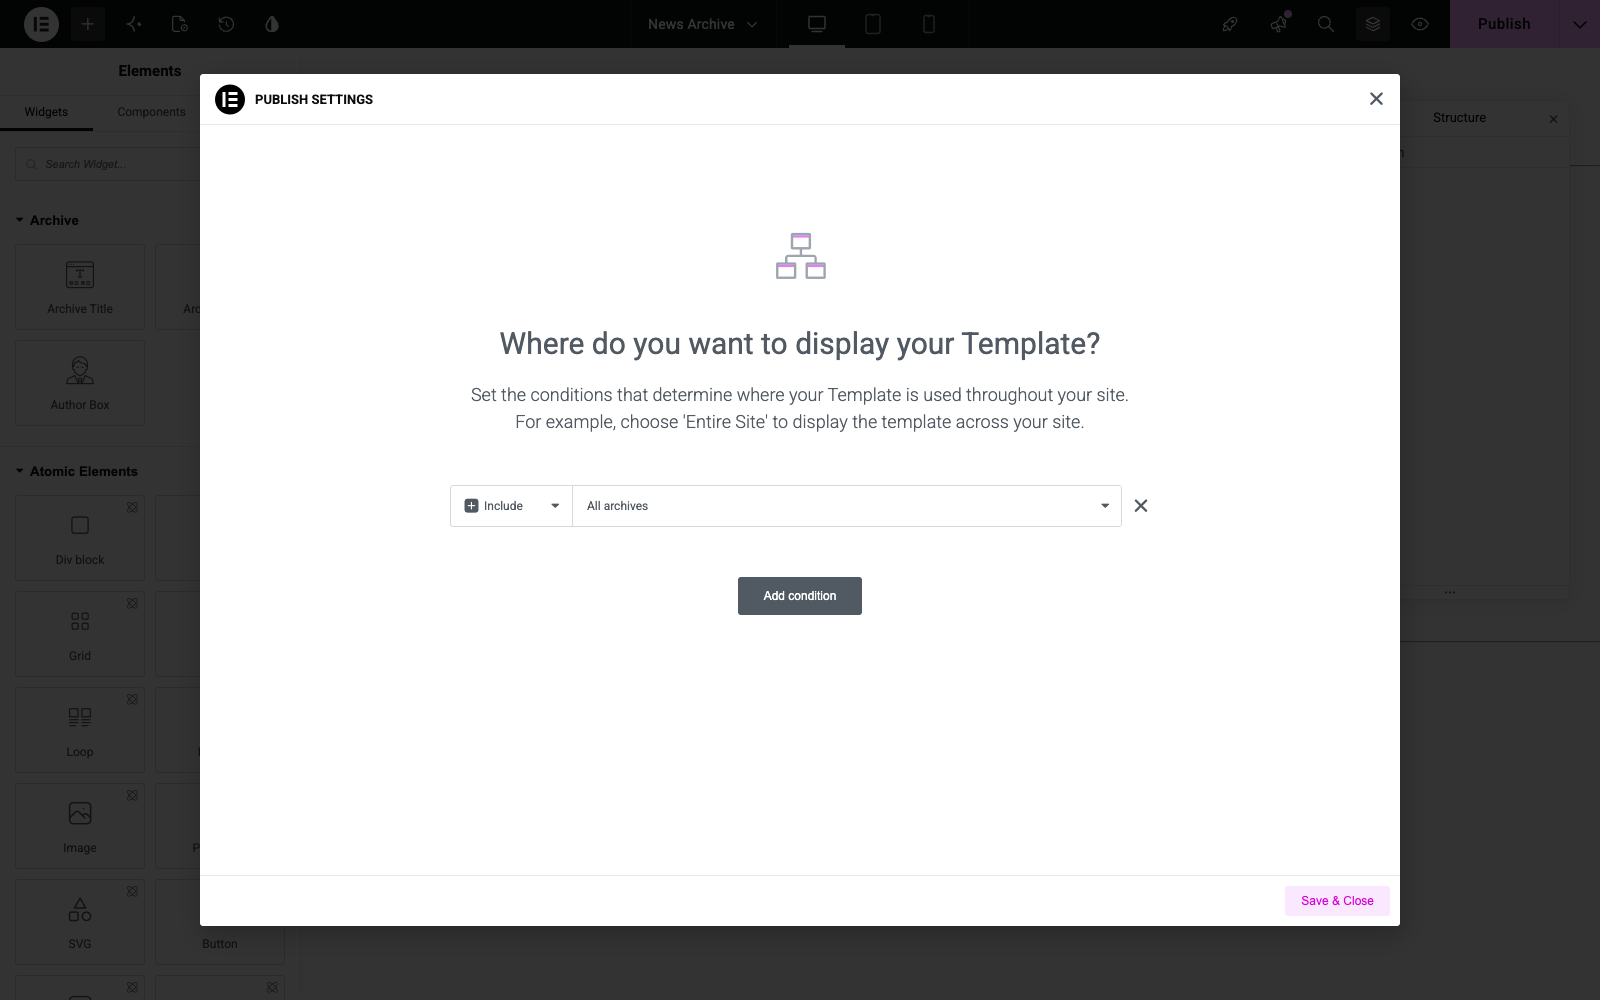
If you open a wishlist link and see your posts archive design instead of the wishlist, an Elementor Theme Builder archive template is taking over the page. This happens when that template’s display condition targets the posts archive, which also matches individual wishlist views.
Update to SaveTo Wishlist Lite version 1.1.5 or later to fix this. The single wishlist view now resolves to the wishlist page itself, so an Elementor Theme Builder archive template no longer matches it. Rewrite rules flush automatically on update, so there’s nothing to re-save in Permalinks.
The fix doesn’t apply in three setups, so the workaround below is still the answer if you’re in one of them:
- The wishlist page is a draft or trashed rather than published.
- You run WPML and two language versions of the wishlist page share the same slug.
- The wishlist page is also set as the Posts page under Settings > Reading.
If you’re on an earlier version, or your site matches one of the cases above, work around it instead:
- Open Templates > Theme Builder and select your archive template.
- Open its Display Conditions.
- Remove the condition that targets the posts archive.
- Build your posts archive as a standalone page instead of a Theme Builder template.
Frequently asked questions
Do I need Elementor Pro to use the widget?
No. The Save to Wishlist widget works in free Elementor. Elementor Pro is only needed for the Loop Grid and Loop Carousel widgets and for Theme Builder templates.
Will the widget override my wishlist settings?
Only the eight colors, and only for that one widget. Button type and alignment are per widget too. Everything else, including size, padding, border width, and icon shape, still comes from your wishlist settings.
Can I use the widget and the automatic placement together?
Yes, but the two placements don’t automatically coordinate everywhere. On a single product template containing the widget, the plugin turns off its own single-product placement, so you get one button. Inside a loop item, placing the widget does not turn off the shop placement. If it’s still active, both buttons render. Set your shop button placement to Don’t show if you want the widget to be the only button on the card.
Why is there no transparency slider on the color pickers?
The wishlist button stores solid hex colors only. A transparent or global color would preview correctly in the editor and then fall back to the saved color on the live page, so those options are switched off rather than left to mislead you.
Need help?
- Premium users: Open a support ticket
- Free users: Visit our community forum

