
Do you list your products in a table with the Barn2 WooCommerce Product Table? SaveTo Wishlist adds the wishlist button right into each row, so customers can save products without leaving the table. This guide shows you how it works and how to set the button’s position.
Before you start
- Barn2 WooCommerce Product Table installed and active, with a product table on one of your pages.
- SaveTo Wishlist active. The integration runs automatically, no extra settings are required.
- The wishlist button turned on for your shop and archive pages. If Button Placement is set to “Don’t show”, the button won’t appear in the table either.
How it works
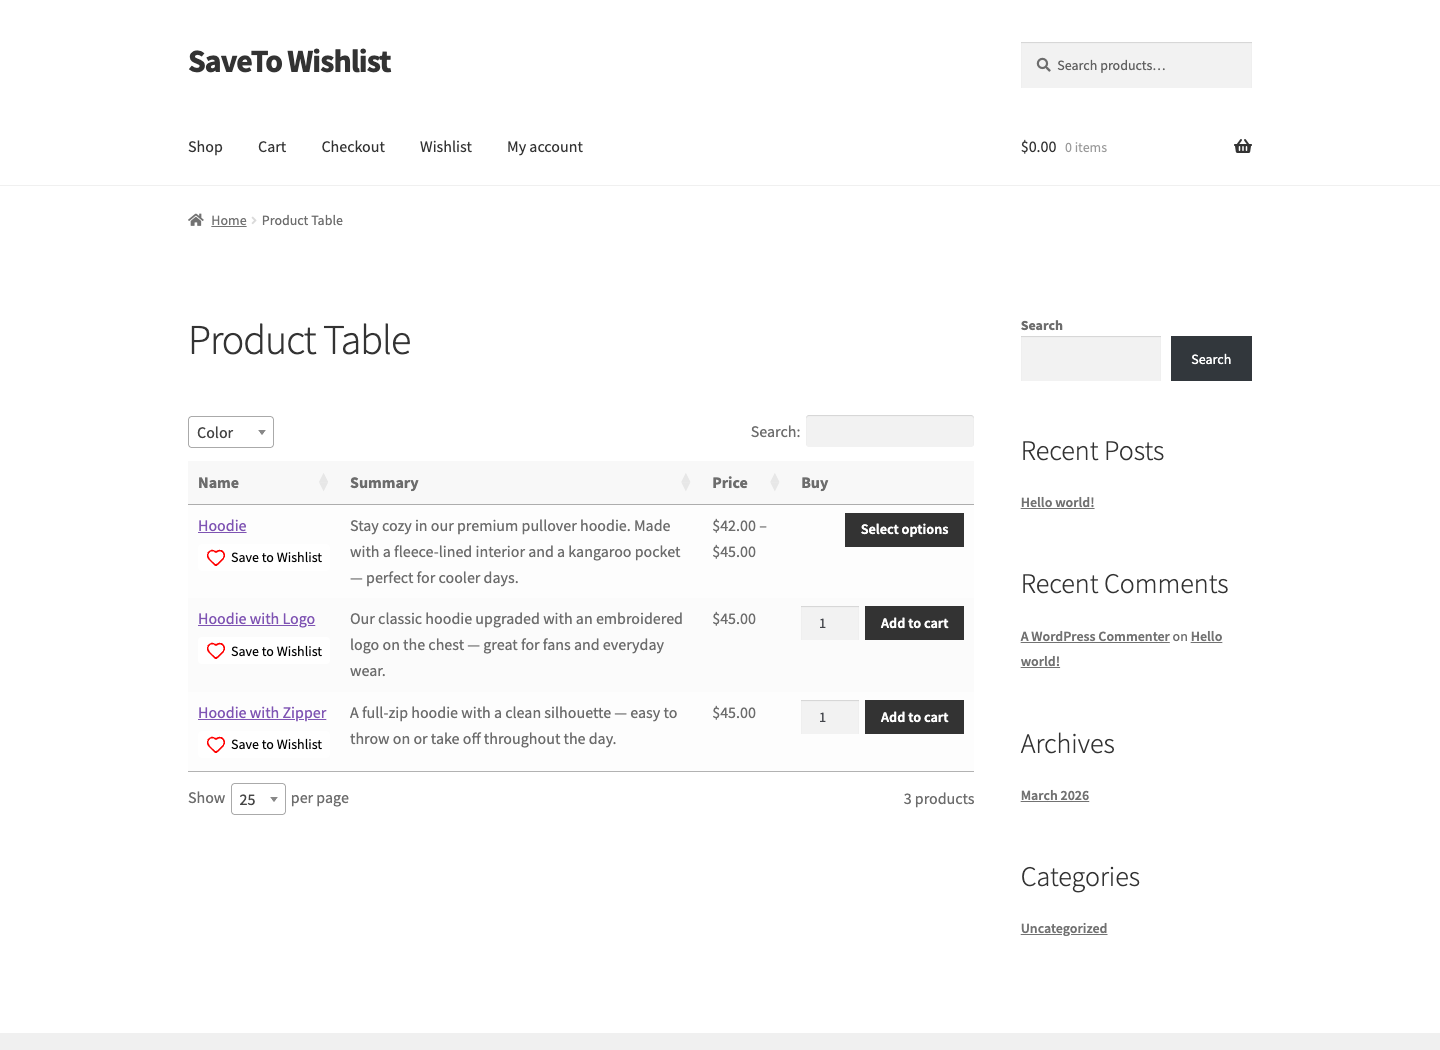
When both plugins are active, SaveTo adds the wishlist button to the product name column of every row in your Barn2 product table. The button uses the same style you set for your shop page, so it matches the rest of your store. Customers can save any product straight from the table.
Choose where the button appears
You can place the button above or below the product name in each row.
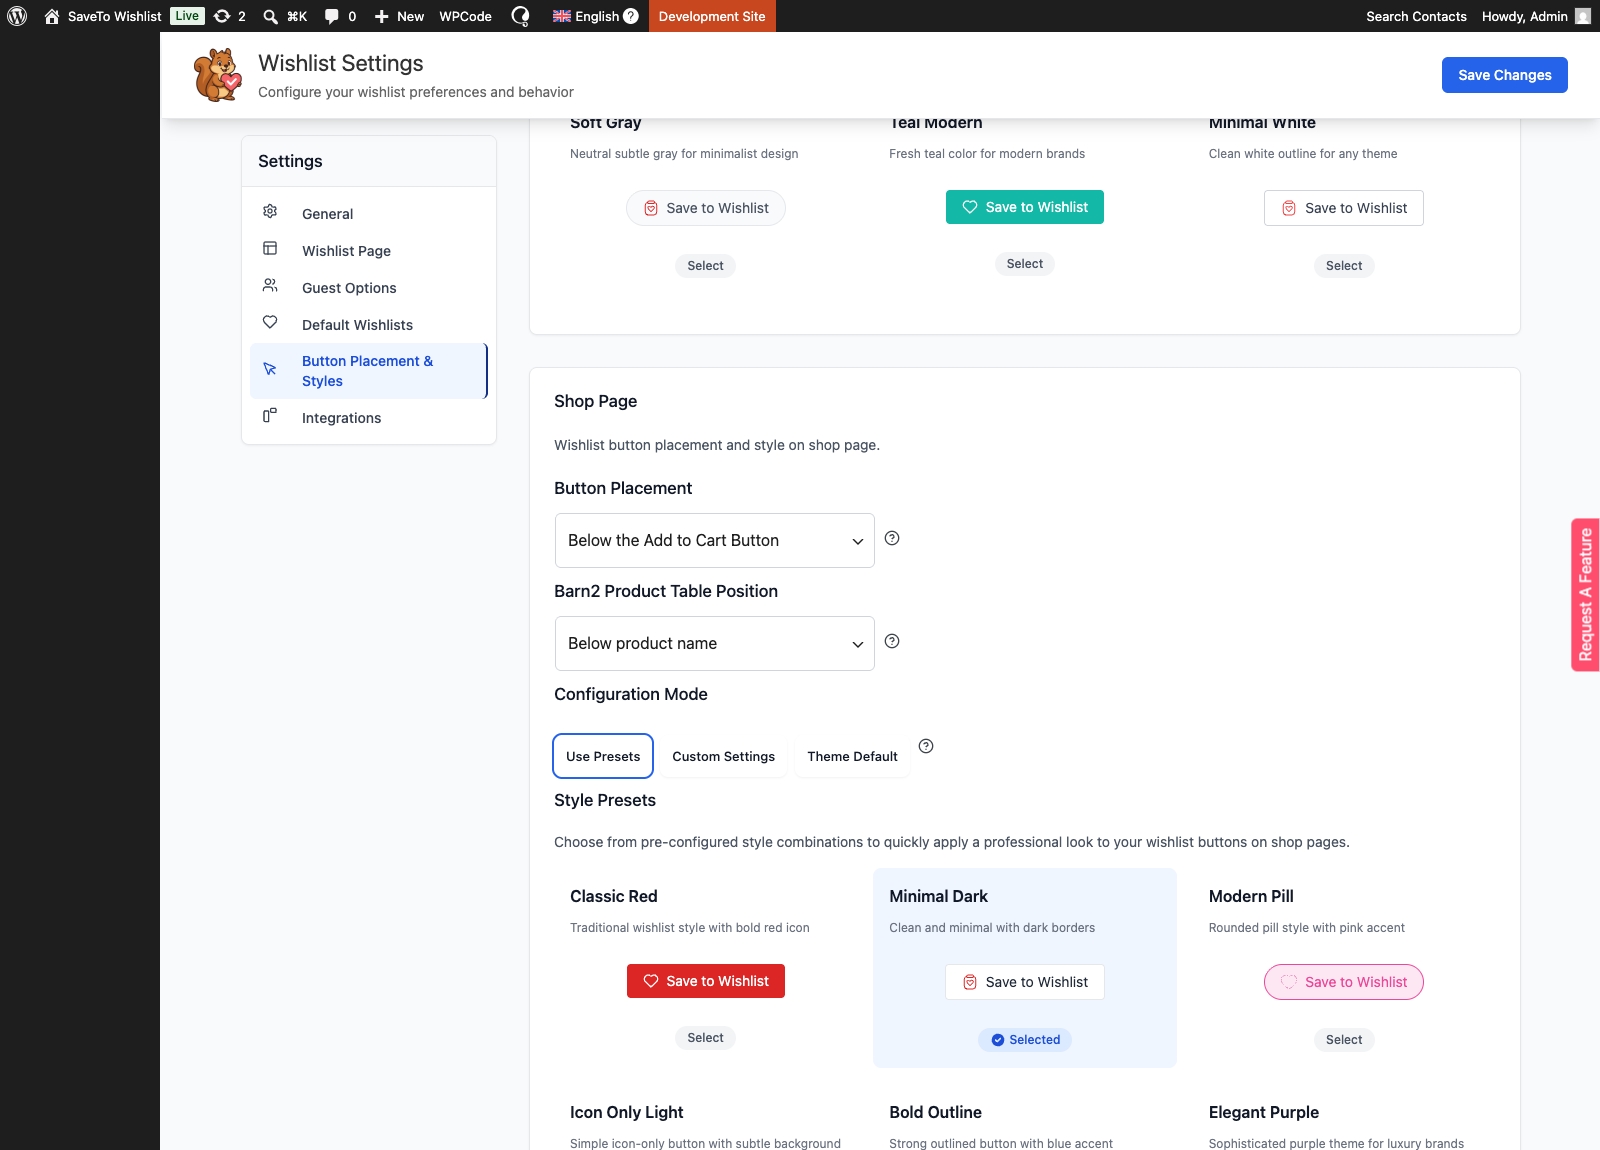
- Go to SaveTo Wishlist, then Settings, and open the Button Placement & Styles tab.
- Open the Shop Page section.
- Set Barn2 Product Table Position to Above product name or Below product name.
- Save your settings.
Frequently asked questions
The wishlist button isn’t showing in my product table
Check that Button Placement for the shop page isn’t set to “Don’t show”. The table uses the same shop button setting, so hiding it there also hides it in the table.
Do I need to configure the table in SaveTo?
No. The only table-specific option is where the button sits in the row. Everything else follows your normal shop button settings.
Does the button match my shop styling?
Yes. The button in the table uses the same style and colors you set for the shop page, so it looks consistent across your store.
Need help?
If you have a question or run into any issues, we’re here to help.
- Premium users: Open a support ticket
- Free users: Visit our community forum

