
Want new customers to have multiple wishlists like “Birthday” or “Wedding” ready from the start instead of a single generic list? With SaveTo Wishlist Pro, you can configure a list of default wishlist names that are automatically created the moment someone registers an account. This article walks you through setting that up, and how to add the same wishlists to your existing customers who don’t have any yet.
Before you begin
- WooCommerce and SaveTo Wishlist Lite are installed and active.
- SaveTo Wishlist Pro is installed and activated. This plugin adds the Default Wishlists tab to the SaveTo Wishlist settings page.
Set up your default wishlist names
- Go to SaveTo Wishlist → Settings.
- Click the Default Wishlists tab.
- Under Default wishlists for new users, click Add wishlist name for each wishlist you want new customers to get automatically. For example: “Birthday,” “Wedding,” and “Christmas.”
- Type a name into each row’s text field.
- Select the Default radio button next to the one wishlist that should become each customer’s default wishlist. If you don’t mark one, the first row in your list is used as the default automatically.
- Drag a row using the handle on its left to reorder the list, if needed. You can also click the Move up and Move down arrow buttons on each row if dragging isn’t practical.
- Click Save Defaults. The button shows Saving… while your changes are being saved.
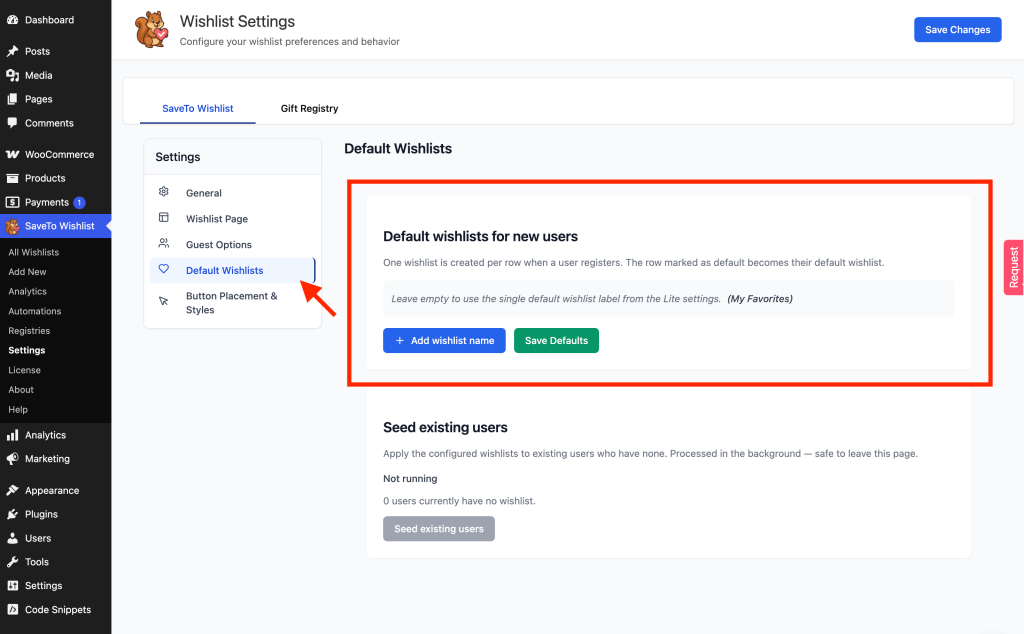
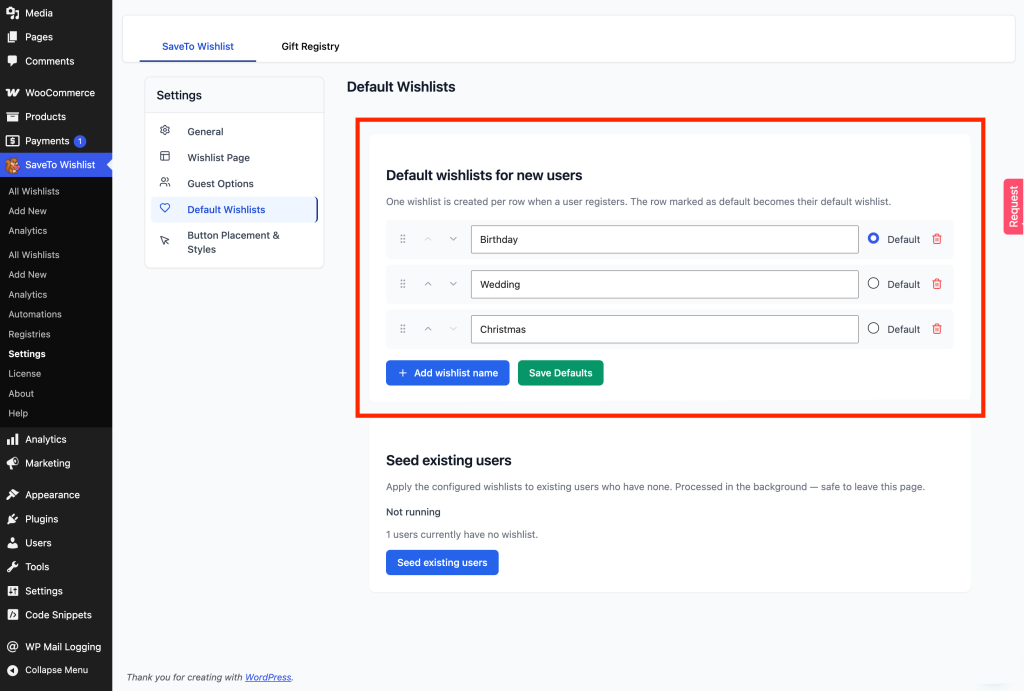
You can add up to 20 wishlist names. Blank rows and names that duplicate an existing name (matched without regard to capitalization) are removed automatically when you save.
What happens when a customer registers
Once you save your list, every new customer who registers gets one wishlist created per row you configured, with the row marked Default set as their default wishlist. This happens automatically. You don’t need to do anything for each new customer.
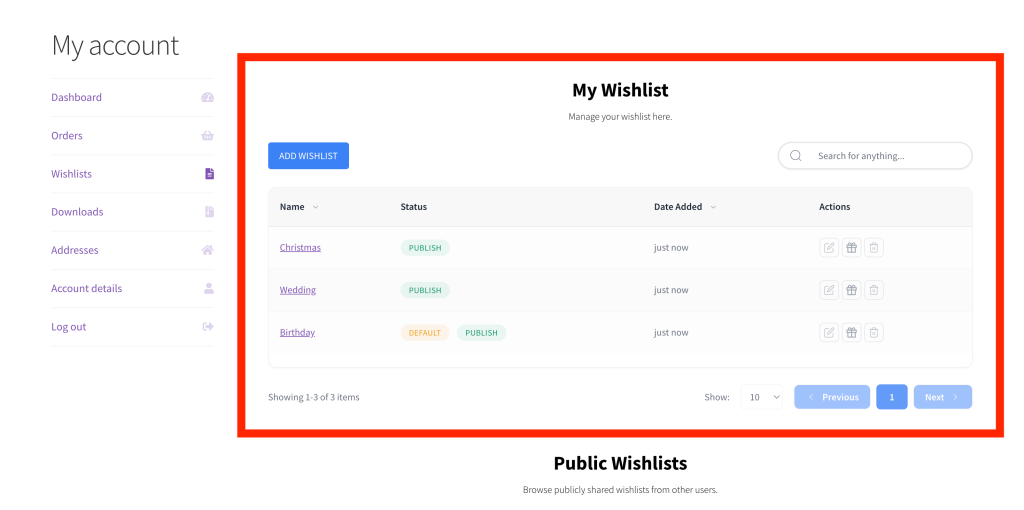
For lists of three names or fewer, the wishlists are created immediately as part of registration. For longer lists, SaveTo Wishlist Pro creates them in the background so registration isn’t slowed down; the wishlists typically appear within a minute or two.
If you clear the list entirely and save with zero wishlist names, SaveTo Wishlist Lite takes over. It creates a single default wishlist named from the First Wishlist Label setting on the Lite settings page. That wishlist is created as soon as the customer registers, and for anyone who registered earlier it is created the next time they log in, so the count of customers with no wishlist clears itself as people sign in.
Seed existing customers with the same wishlists
Already have customers who registered before you set up default wishlists? You can create the same wishlists for any customer who doesn’t have one yet, without affecting anyone who already does.
- On the Default Wishlists tab, scroll down to the Seed existing users section and check the count above it, which reads N users currently have no wishlist.
- Click Seed existing users.
- In the confirmation window titled Seed existing users?, review the number of customers who will be affected, then click Start seeding. Click Cancel to back out without making changes.
- Watch the progress bar and the [X] of [Y] users seeded counter to track progress. You can leave the page. The process keeps running in the background.
- Click Cancel migration at any time to stop it.
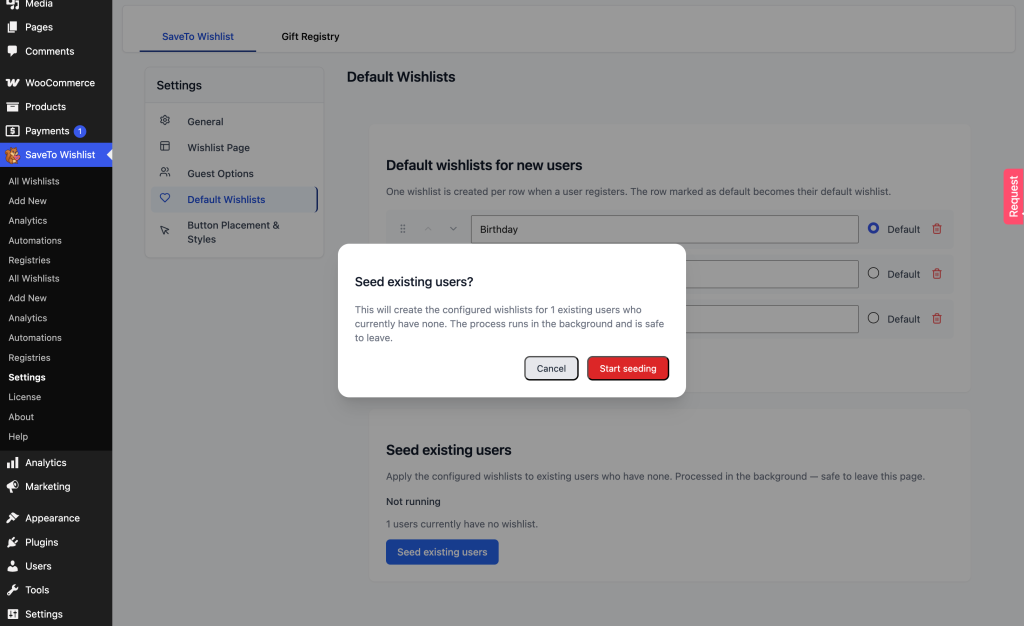
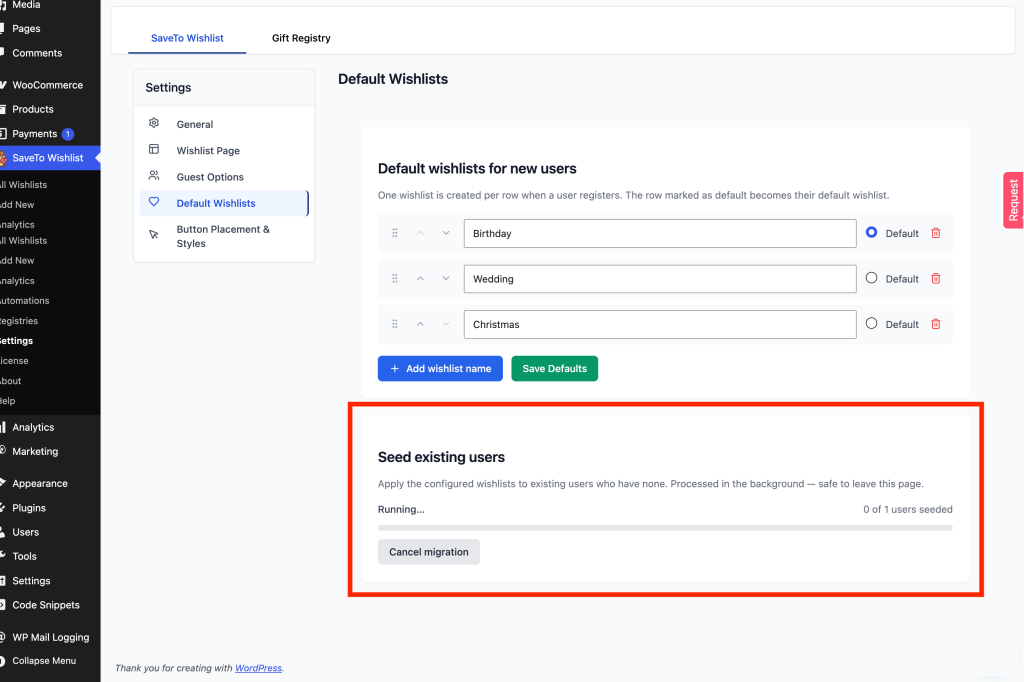
Seed existing users only affects customers who currently have zero wishlists. Anyone who already has at least one wishlist is left untouched. It’s safe to run more than once; customers who were already seeded won’t be seeded again. The count includes every user account that has no wishlist, including administrators and shop managers, not only customers.
Troubleshooting
New customers aren’t getting the configured wishlists
Confirm SaveTo Wishlist Lite is still active, because the Default Wishlists tab and its registration seeding depend on it. Also confirm you clicked Save Defaults after adding your rows; unsaved rows are never used.
A new customer only got one wishlist instead of all the names I configured
Check whether any of your wishlist names were duplicates (matched regardless of capitalization). Duplicates are removed automatically when you save, keeping only the first occurrence of each name. If your list has more than three names, seeding for that customer runs in the background and can take a minute or two. Check the customer’s account again after a short wait.
A logged-in customer has no wishlist and cannot see the button
Ask them to log out and back in. A wishlist is provisioned on login for any customer who does not already have one, so a single sign-in fixes it for that account.
This used to affect customers who registered before you set up default wishlists. To clear it for everyone at once rather than waiting for each person to log in, use Seed existing users below.
The Seed existing users button is greyed out
This happens if you have unsaved changes in your wishlist name list, if there are currently zero customers without a wishlist, or if you haven’t saved any wishlist names yet. Save your changes first, and check the eligible customer count shown above the button.
Frequently asked questions
What happens if I don’t mark any wishlist as the default?
The first row in your list is automatically used as the default.
Will Seed existing users affect customers who already have a wishlist?
No. It only creates wishlists for customers who currently have none. Existing wishlists are never touched or duplicated.
Is Default Wishlists available in SaveTo Wishlist Lite?
No, it’s a SaveTo Wishlist Pro feature. Lite creates a single wishlist for each customer the first time they use the wishlist, and you can customize its name with the First Wishlist Label setting.
How many default wishlist names can I add?
Up to 20.
Need help?
If you have a question or run into any issues, we’re here to help.
- Premium users: Open a support ticket
- Free users: Visit our community forum

