
As registries pile up across your store, you’ll want one place to keep them tidy. The Registries admin screen lists every gift registry your customers create, so you can search, review, archive, or remove them. This guide walks you through managing registries as a store admin with SaveTo Wishlist Registry.
Prerequisites
- The SaveTo Wishlist Lite plugin installed and active
- The SaveTo Wishlist Registry extension installed and active (see Getting started with SaveTo Wishlist Registry).
- An administrator or shop manager account
Step 1: Open the Registries screen
- In your WordPress admin, go to SaveTo Wishlist → Registries.
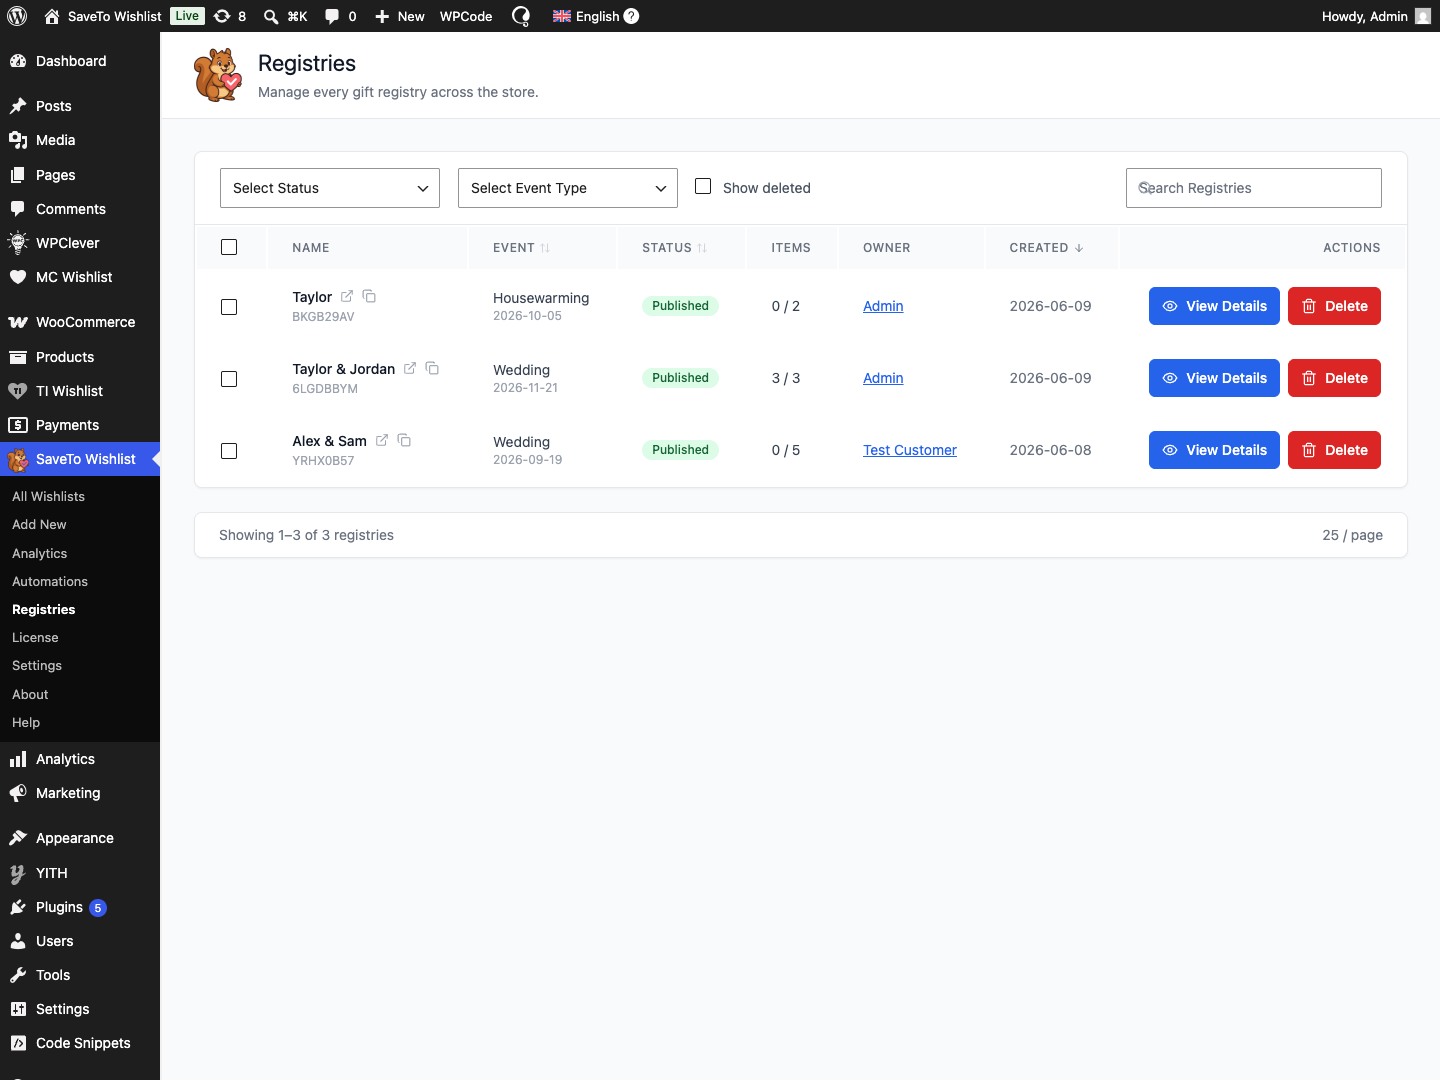
The table lists every registry across the store, with its Name, Event, Status, Items (purchased out of total), Owner, and Created date.
The table shows 25 registries per page. Use the page numbers or the Previous and Next buttons under the table to move through the rest.
Step 2: Find the registry you need
Use the controls along the top of the table to narrow the list:
- Filter by Select Status (Published, Archived, or Draft).
- Filter by Select Event Type.
- Type a name in the Search Registries box.
- Tick Show deleted to include removed registries. This also adds a Deleted option to the Select Status dropdown, so you can filter to only removed registries.
You can also sort by the Event, Status, or Created columns by clicking the column heading.
Step 3: View or edit a registry
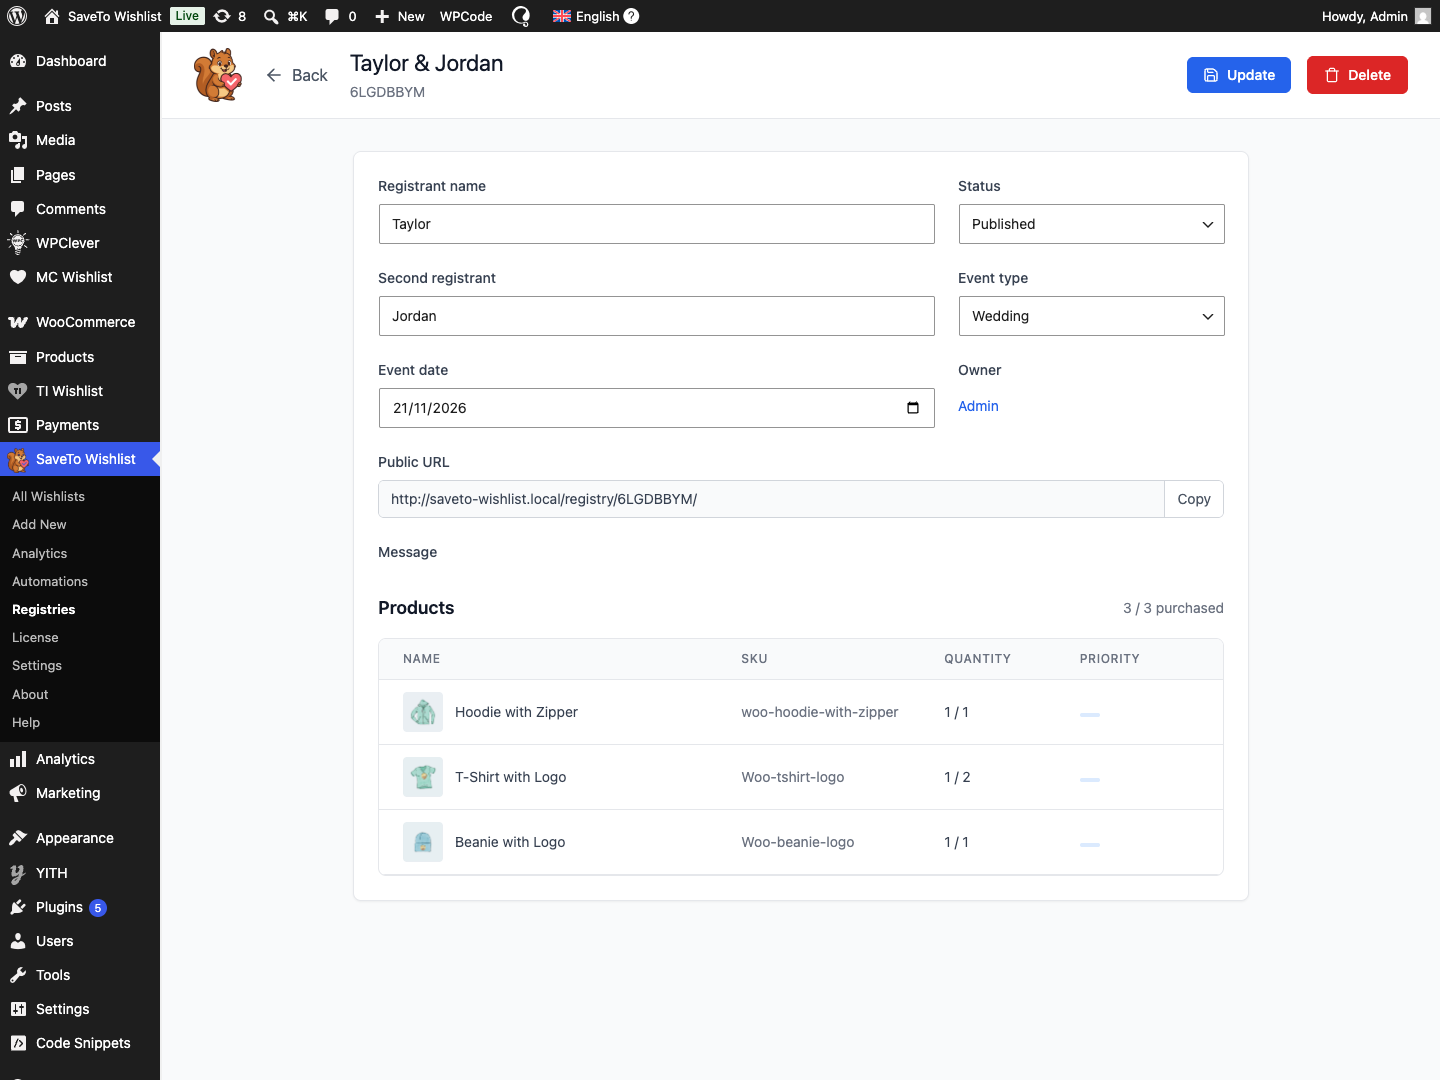
- Click View Details on a registry’s row.
- On the registry’s details screen, update the registrant names, event type, event date, status, or message.
- Click Update to save.
The screen also lists the registry’s products with how many of each have been purchased, plus the public URL with a Copy button.
Step 4: Archive, restore, or delete registries
To act on several registries at once:
- Tick the checkbox on each registry you want to change.
- Click Archive, Unarchive, or Delete in the bulk buttons that appear above the table.
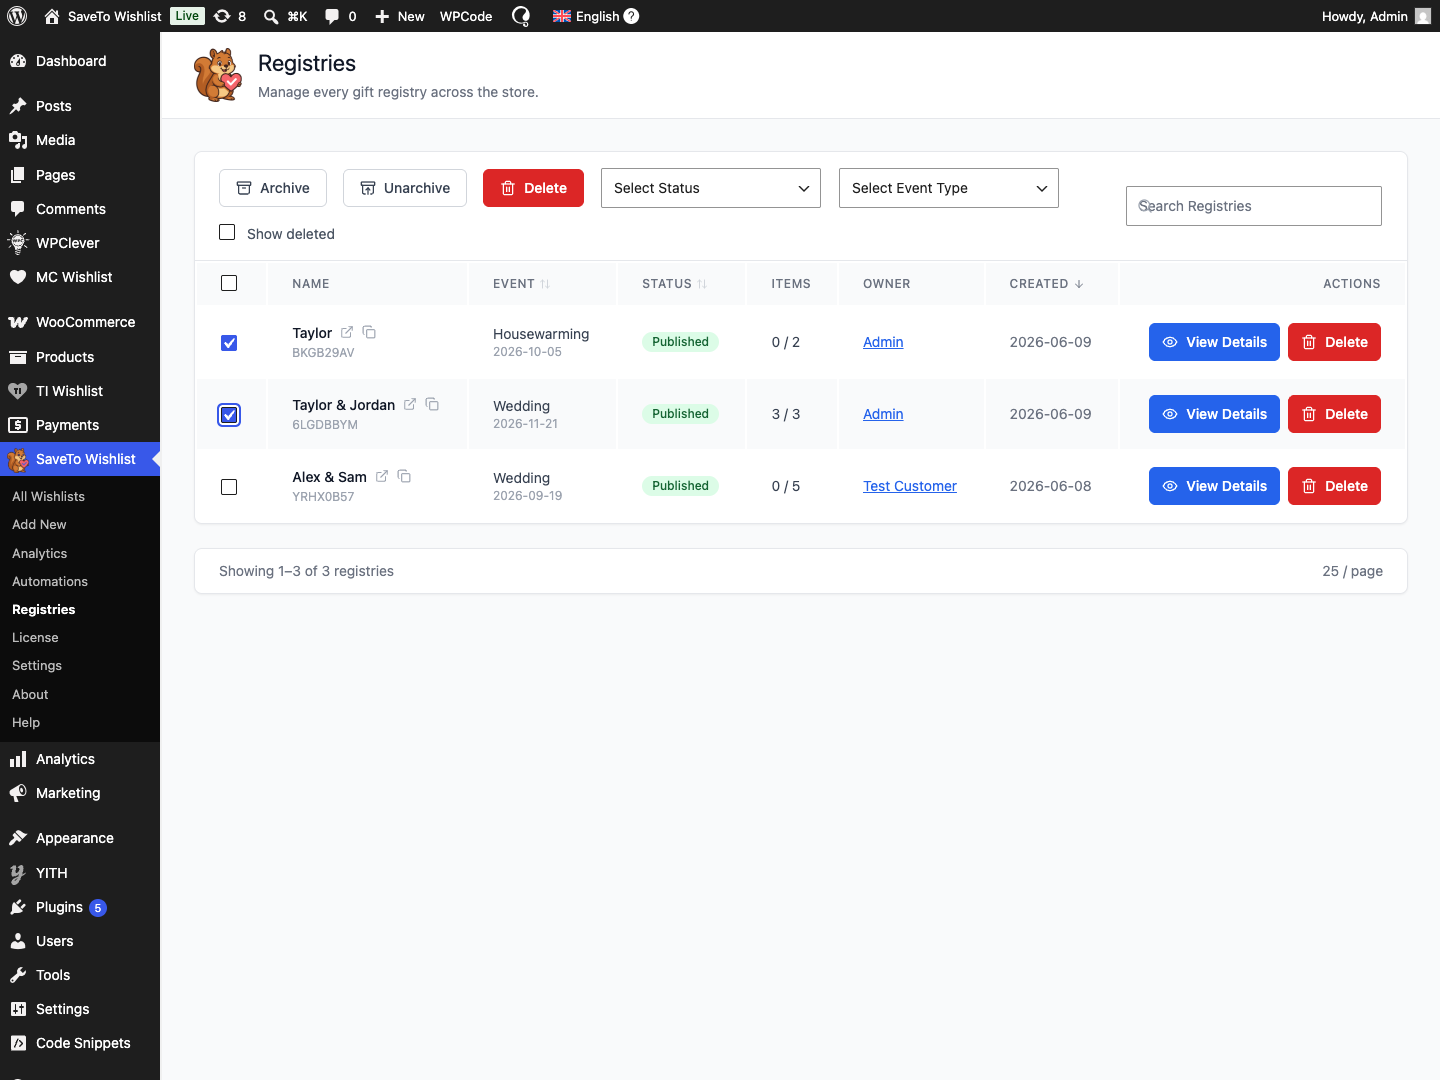
Archiving is the gentle option: an archived registry’s public page keeps working, but shows a notice that this registry is no longer accepting purchases. To remove one registry, use the Delete button on its row.
To bring a deleted registry back:
- Tick Show deleted above the table.
- Click Restore on the registry’s row.
Troubleshooting
I can’t see the Registries menu
The screen requires an administrator or shop manager account. Sign in with one, and confirm the registry extension is active.
A deleted registry isn’t in the list
Tick the Show deleted checkbox to include removed registries, then use Restore to bring one back.
An archived registry’s link still works
That’s expected. Archiving keeps the public page live with a notice that this registry is no longer accepting purchases, so guests aren’t met with a dead link. Delete the registry if you want the page to stop showing it. Guests who visit the link then see a “Registry not found.” message instead.
Frequently asked questions
What’s the difference between archiving and deleting?
Archiving keeps the registry’s public page online with a notice that this registry is no longer accepting purchases. Deleting removes it from the store, though purchase records are kept for 90 days before permanent removal.
Can I get a deleted registry back?
Yes, within the 90-day window. Tick Show deleted, find the registry, and click Restore.
What does the Items column show?
It shows how many gifts have been purchased out of the total items on that registry, for example 2 / 8.
Need help?
- Premium users: submit a support ticket and our team will help you out.
- Free users: post in the WordPress.org support forum.

