
 Reviewed by
 The SaveTo Wishlist Pro v1.0.4 update is officially live! This release is all about automations, starting with the WooCommerce wishlist email itself.
A price-drop email without a product photo leaves the shopper guessing which item changed. Now you can add that photo with one variable, and no hand-written HTML.
In this article, we’ll cover the new email tools, per-shopper webhooks for sale and restock alerts, and several reliability upgrades. If automations are new to you, our wishlist automation overview is a good first stop.
So, let’s get started!
Jump to:
1. Add Product Images To Wishlist Emails
The new {product_image_html} variable drops a ready-to-use product image into any automation email. In the variable list, it’s labeled Product Image (HTML image tag).
Here’s how to add it:
- Go to SaveTo Wishlist > Automations and add or edit an automation.
- Choose a trigger, then pick the action Send an email notification.
- In the Email Body, click where the image should go.
- Choose
{product_image_html}from the Insert variable menu. - Click Send Test Email to see the image in your inbox.
What you need to know:
- It has a sensible default size: Images render 300 pixels wide and shrink to fit smaller screens.
- There’s a fallback image: Products without a photo use the WooCommerce placeholder image.
- Existing emails stay as they are:
{product_image}still returns the image URL. Bodies that already wrap it in an image tag keep working. - It works in webhooks too: The image variable is also available in webhook payloads.
2. See What Every Variable Does
The Available variables: hint now lists one variable per line, with a plain label beside each tag. For example, you’ll see {product_image} - Product Image URL, so you know what a tag returns before you use it.
Under the Email Body, a short note confirms that “HTML tags are allowed in the email body.” Plus, the Insert variable menu writes a tag right at your cursor and keeps the text on both sides.
Meanwhile, the Update user meta action lists only the variables that suit it. That’s why the HTML image variable doesn’t appear there.
Four new variables also give you shopper-friendly values:
{product_price_formatted}: The product price with its currency symbol.{product_regular_price_formatted}: The regular price with its currency symbol.{product_sale_price_formatted}: The sale price with its currency symbol.{product_stock_status_label}: The stock status as a readable label.
The original price and stock variables still return raw numbers and codes. So any webhook or stored value that relies on them stays exactly the same.
3. Sale And Restock Webhooks For Every Shopper
The Call a webhook action now sends shopper-specific data on two triggers. The first is When a wishlist product goes on sale. The second is When an out of stock wishlist product comes back in stock.
Here’s how it works. When a saved product changes, the webhook posts once for each wishlist holding it. As a result, each request carries that shopper’s own name, email, and wishlist details.
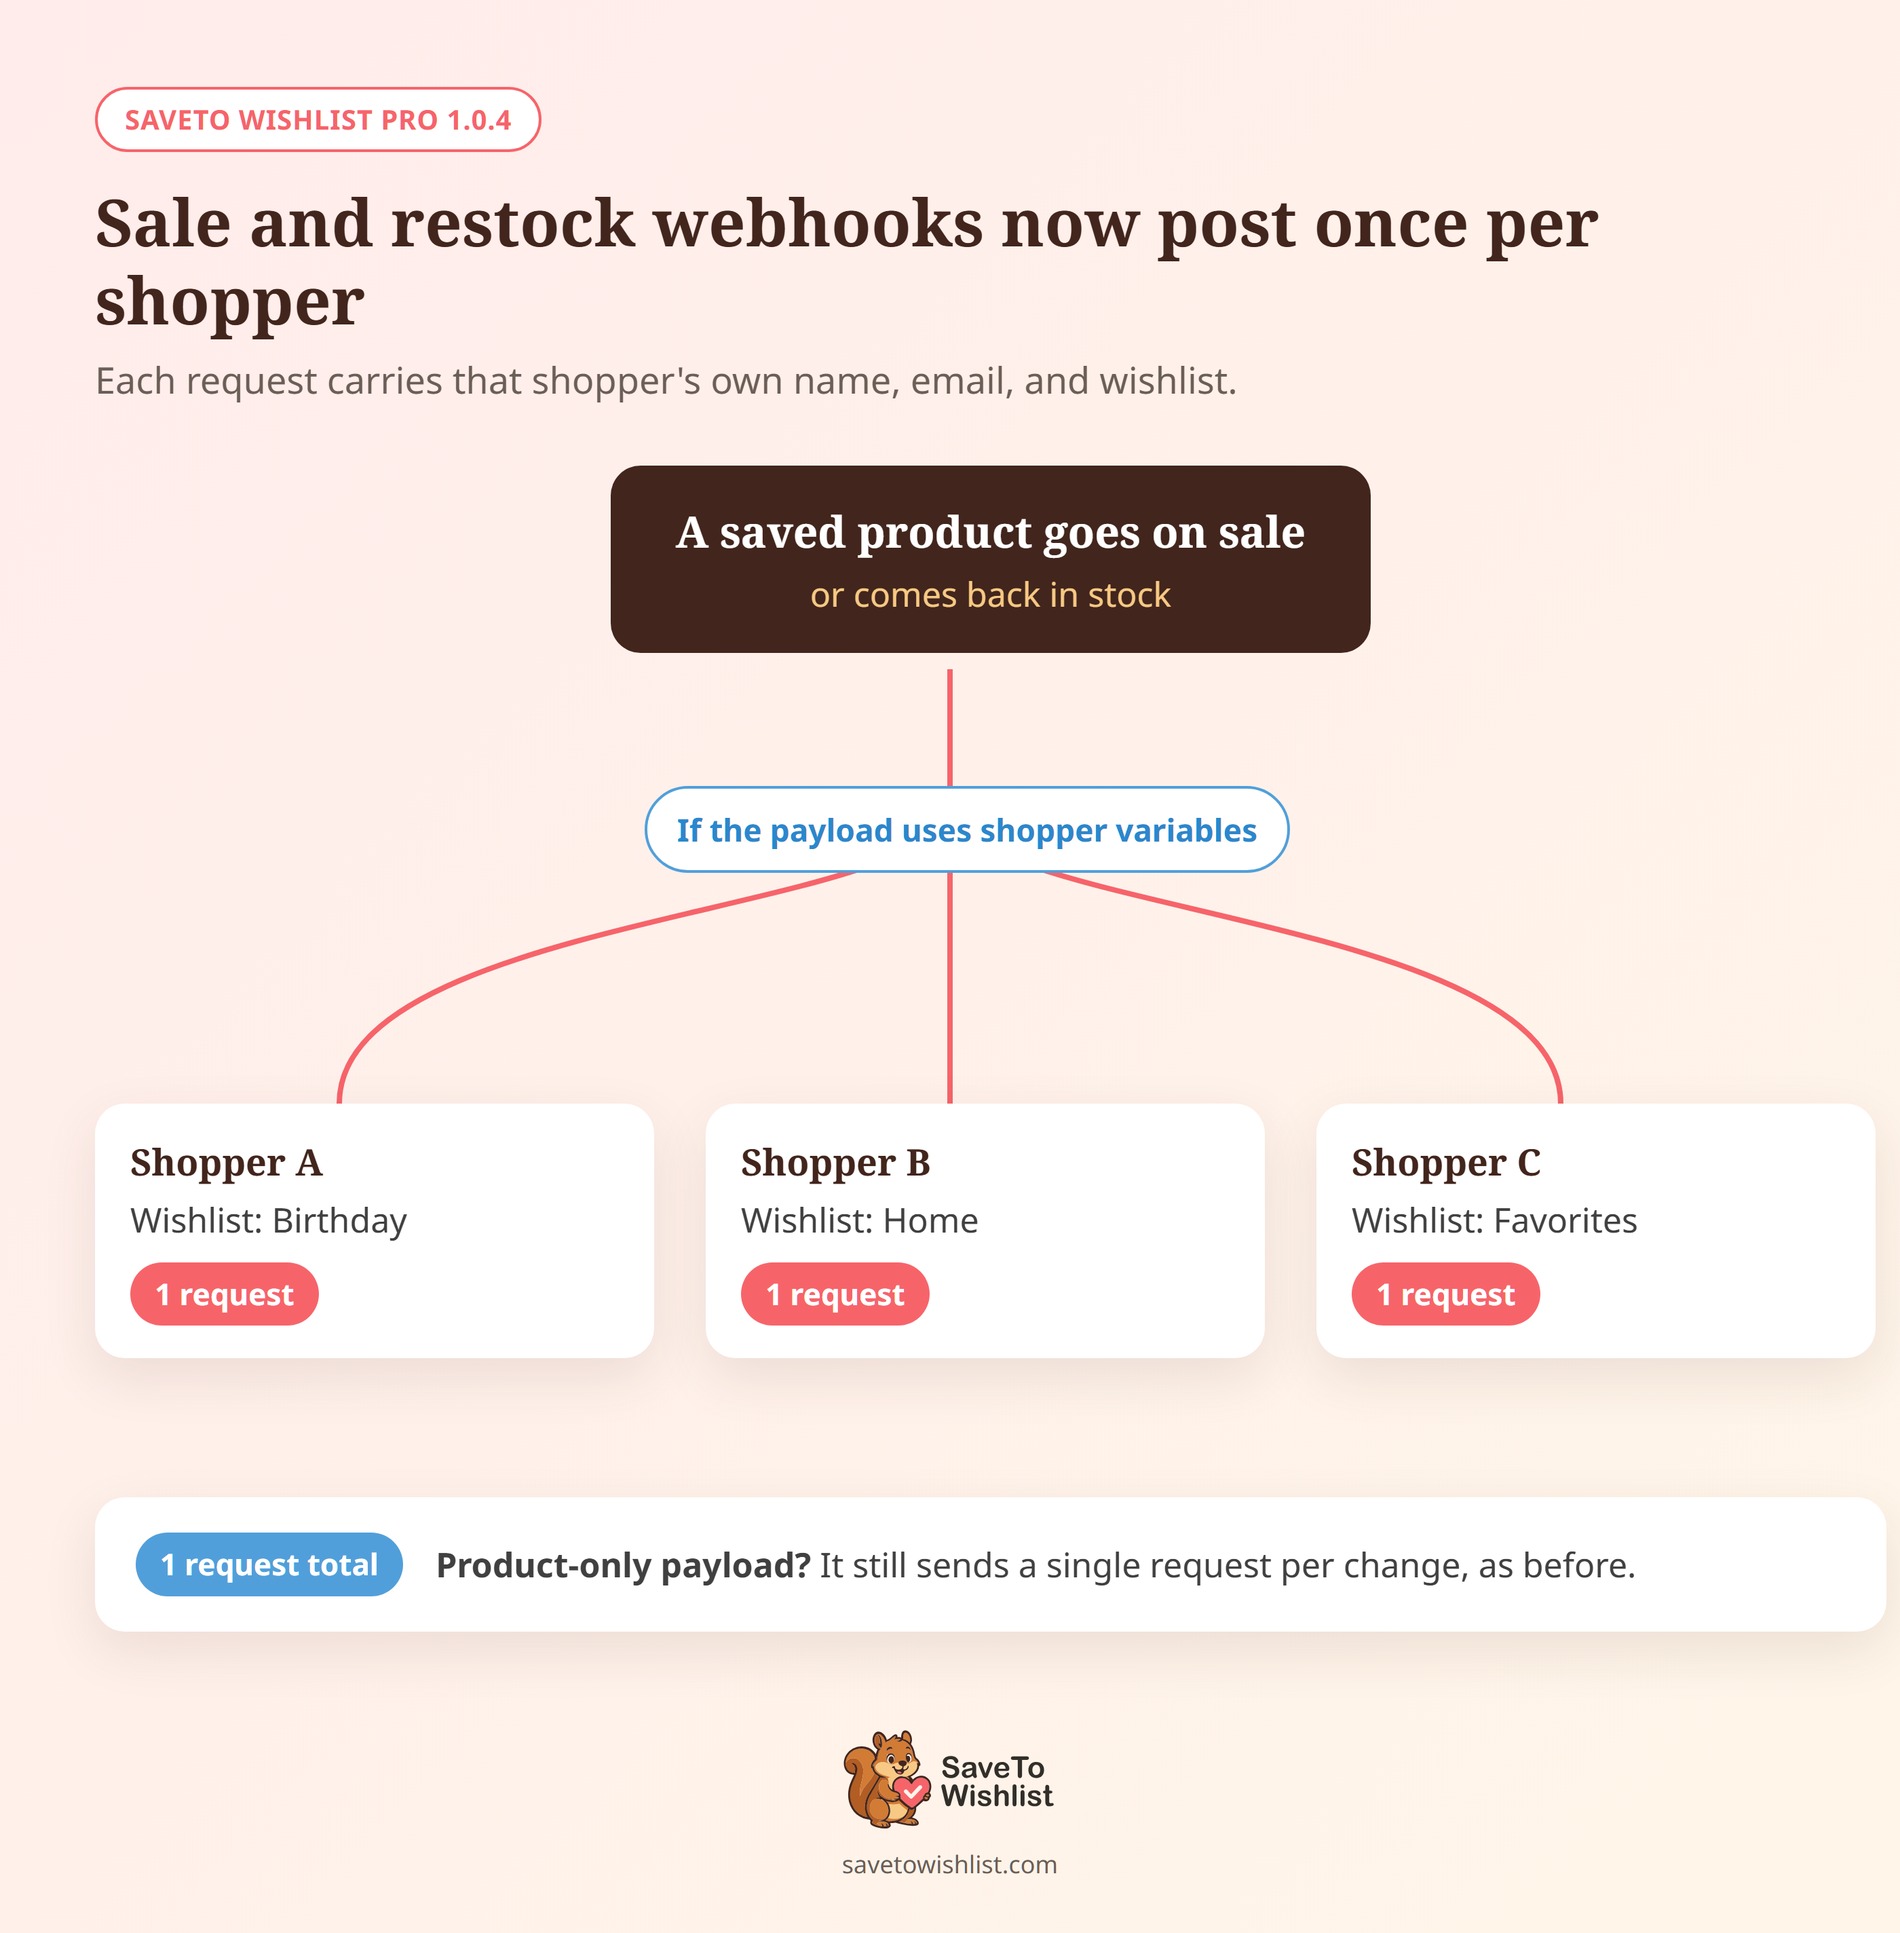
- Product-only payloads send once: If your payload uses only product variables, you get a single request per change.
- Every request names a real shopper: When your payload uses
{customer_email}, wishlists with no reachable customer are left out. - A new trigger variable:
{trigger_type}readsproduct_on_saleorproduct_back_in_stock, so one receiver can handle both events.
That opens the door to one-to-one follow-ups. For instance, a CRM can now tag the exact shoppers who saved a discounted product.
A new Advanced Coupons quick start
The Quick start (optional) menu also gains an Advanced Coupons preset on these two triggers. It pre-fills POST, a JSON content type header, and a payload with the product, the shopper, and the trigger type.
As with the other quick starts, you still paste in the receiving webhook URL yourself. The preset only appears on the sale and restock triggers, where every field can be filled in.
4. Sale And Restock Emails That Reach The Right Shoppers
Email alerts on the same two triggers now handle variable products gracefully. When a variation goes on sale or restocks, the email reaches shoppers who saved the parent product.
- One email per shopper: Even when several variations change in one save, each shopper receives a single email.
- The product name reads naturally:
{product_name}shows the parent product’s name. - Category rules work with variations: Automations limited to certain categories check the parent product’s categories.
- Every alert goes to a real shopper: If no wishlist owner can be found, that send is skipped.
In practice, that makes sale alerts a dependable part of seasonal campaigns. Our Black Friday wishlist ideas show where they fit in a bigger plan.
5. An Automations Screen You Can Count On
The Automations screen is more dependable, too. Here’s what you’ll notice:
- Messages are clear: If the list can’t load, a red banner with a Retry button explains why. When the screen is busy, it reads “Too many requests. Please wait a moment and try again.”
- Your work stays put: A failed refresh keeps your automations on screen. Likewise, a failed save keeps the form open with everything you typed.
- Deletes report back: If a delete doesn’t go through, you’ll see a notice and the automation stays in your list.
None of this needs a setting. It all arrives with the update.
Frequently Asked Questions
Do my existing emails that use {product_image} still work?
Yes. {product_image} still returns the image URL, exactly as before. So an email body that wraps it in its own image tag keeps showing one image.
What if a product has no featured image?
The email still shows an image. Products without a photo use the WooCommerce placeholder image, so the layout stays intact.
Does every webhook now send one request per shopper?
No. Per-shopper requests apply to the sale and restock triggers, and only when your payload uses shopper or wishlist variables. Every other trigger sends one request, as it always has.
Why did no restock email send for a backordered product?
The restock trigger fires when a product moves out of Out of stock. If you allow backorders with Allow, but notify customer, WooCommerce marks the item On backorder instead. So that item never goes out of stock, and no restock alert sends.
Which plan includes wishlist automations?
Automations are part of SaveTo Wishlist Pro and need an active license. You can compare what each plan includes on our pricing page.
Conclusion
That covers the new automation updates. So you can start using them now by updating SaveTo Wishlist Pro from your WordPress dashboard.
Here’s what we covered:
- Product images in wishlist emails with one variable.
- Labeled variables, an Insert variable menu, and formatted prices.
- Per-shopper sale and restock webhooks, plus the Advanced Coupons quick start.
- Sale and restock emails that handle variable products gracefully.
- A more dependable Automations screen.
My take: add {product_image_html} to your sale alert first. It’s a one-minute change, and it gives shoppers something to recognize at a glance.
If you’re ready to send richer wishlist emails, upgrade to SaveTo Wishlist Pro today.