
 Reviewed by
 You build your product pages in Elementor, and everything looks right. Then you notice the Elementor wishlist button is missing. Not misplaced. Gone.
Your plugin settings promise a button. Your product page shows nothing. There isn’t even an error to chase.
That silence costs you. A wishlist button nobody can see is a save that never happens. And a save that never happens is a shopper you can’t bring back.
SaveTo Wishlist ships two Elementor integrations that close the gap. We’ll walk through setting up both, picking the right one, and what to do with the saves afterwards.
Jump to:
- Why The Wishlist Button Vanishes On Elementor Product Pages
- What The Two Elementor Integrations Actually Do
- What You Need Before You Start
- How To Add The Wishlist Button With The Elementor Widget
- How To Show The Wishlist Button In Loop Grid And Loop Carousel
- Where To Put The Button So Shoppers Actually Use It
- Five Ways To Put Elementor Wishlist Saves To Work
- Elementor Wishlist Problems And How To Fix Them
- Frequently Asked Questions: Elementor Wishlist Button
- Wrapping Up
Why The Wishlist Button Vanishes On Elementor Product Pages

The button requires a manual step because Elementor relies on custom visual widgets rather than traditional WooCommerce PHP templates.
SaveTo Wishlist places its button using WooCommerce action hooks. A standard product template fires those hooks at set points. So the plugin always knows where to inject the button.
However, an Elementor template is assembled from Elementor widgets instead. If yours uses a custom add to cart button, those hooks never fire. As a result, the plugin has nothing to attach to.
Archive pages face the same hook limitations, just on a broader scale. An Elementor Pro Loop Grid doesn’t render the classic shop loop at all. Instead it renders the loop item template you designed. Because it uses a custom layout instead of default shop loop hooks, the button requires manual placement.
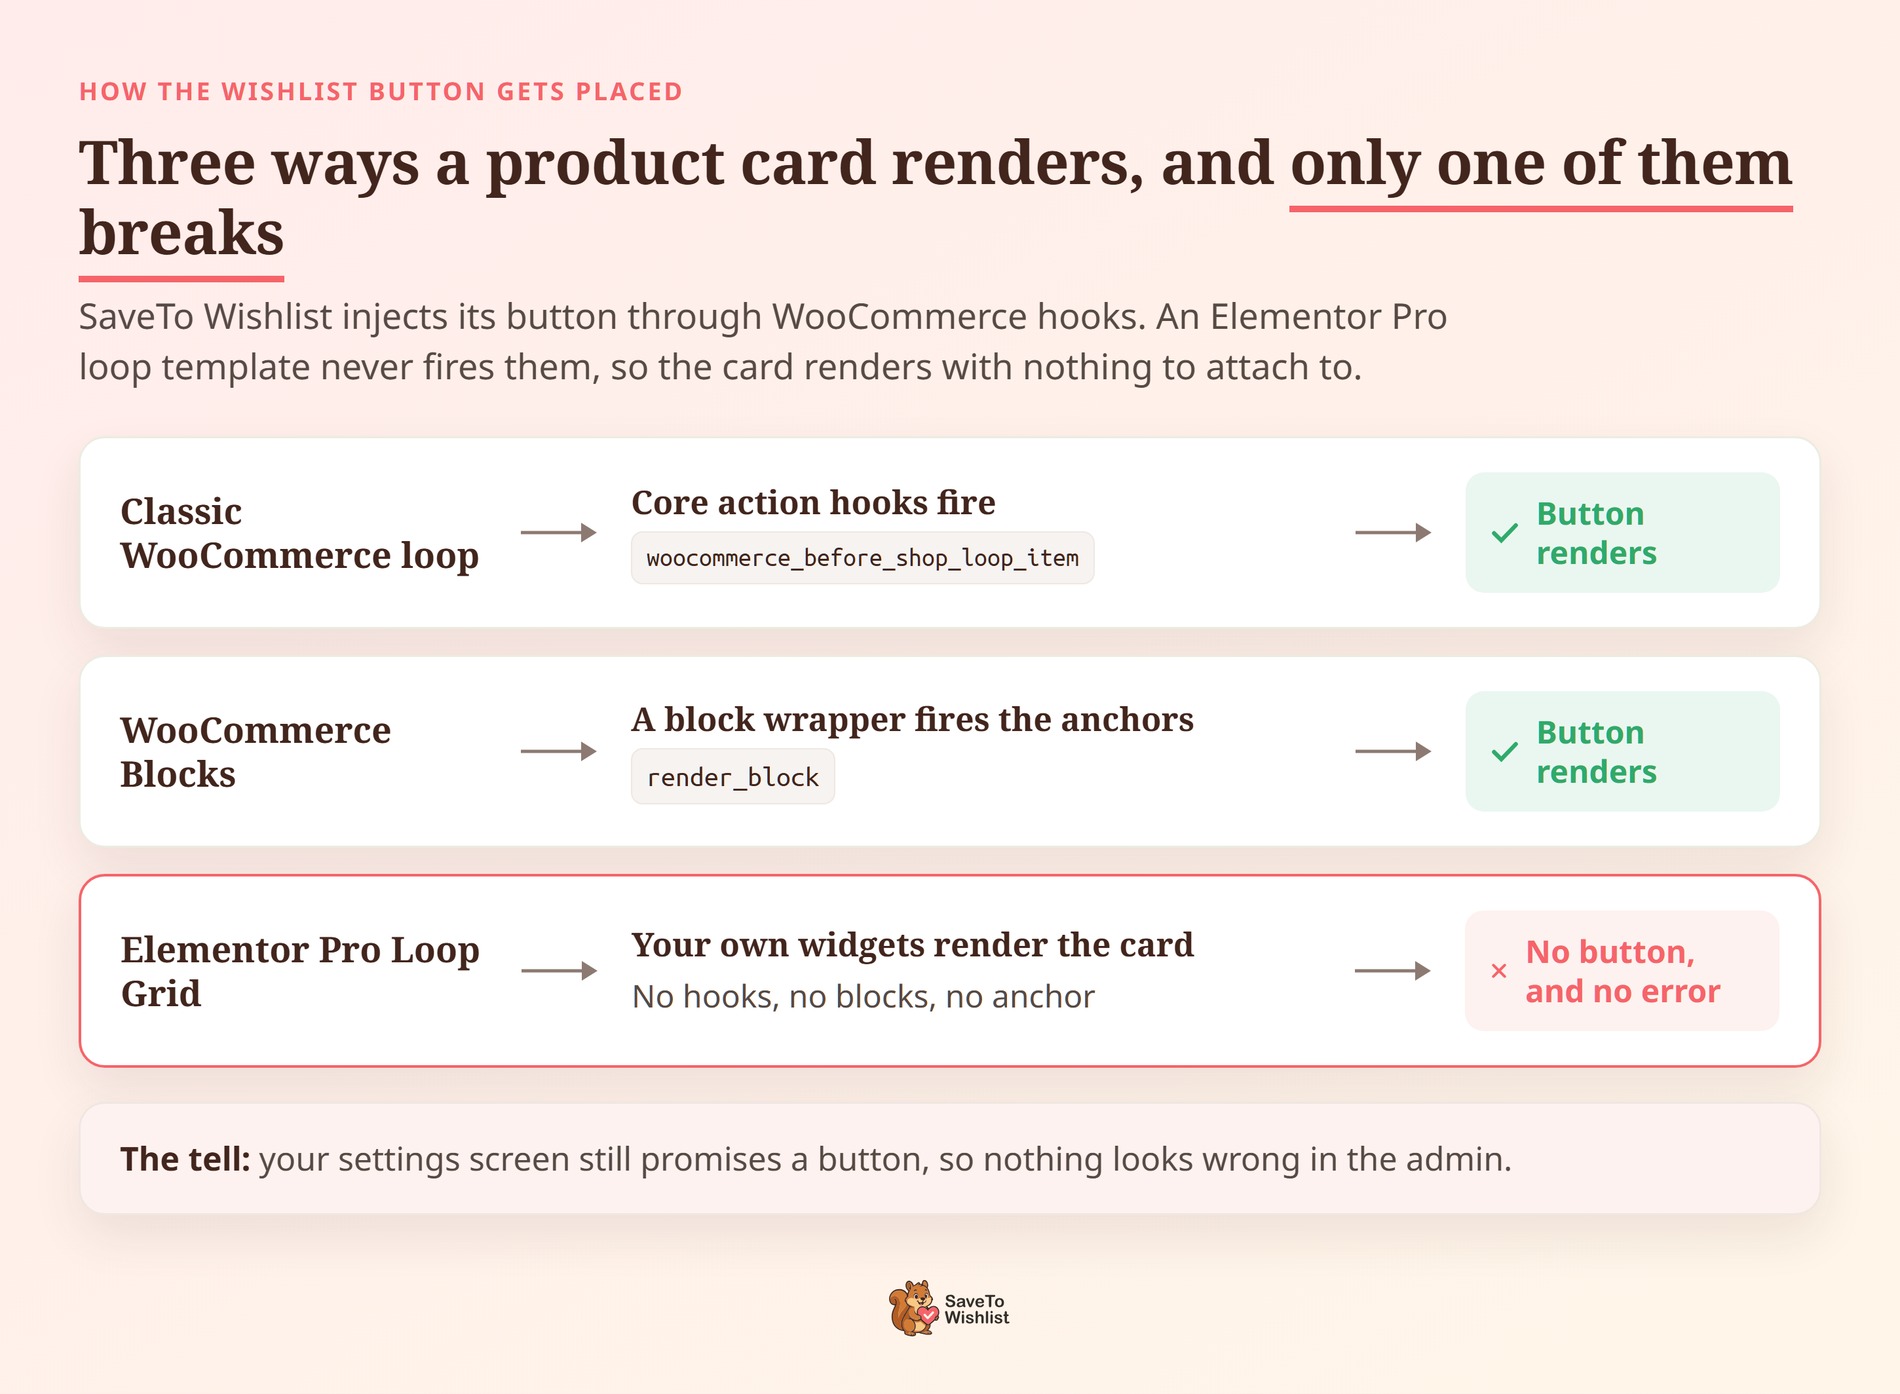
What makes this tricky to diagnose is that it happens silently. No error appears. No warning shows in your admin. And no setting in the plugin fixes it.
This isn’t a niche stack either. According to W3Techs, Elementor runs on 12.8% of all websites.
🔍️ What we’ve seen: Store owners often reach support concerned that the plugin isn’t working. The reality is just a difference in architecture. The button rendering works fine, but it needs to be explicitly placed within the Elementor template.
What The Two Elementor Integrations Actually Do
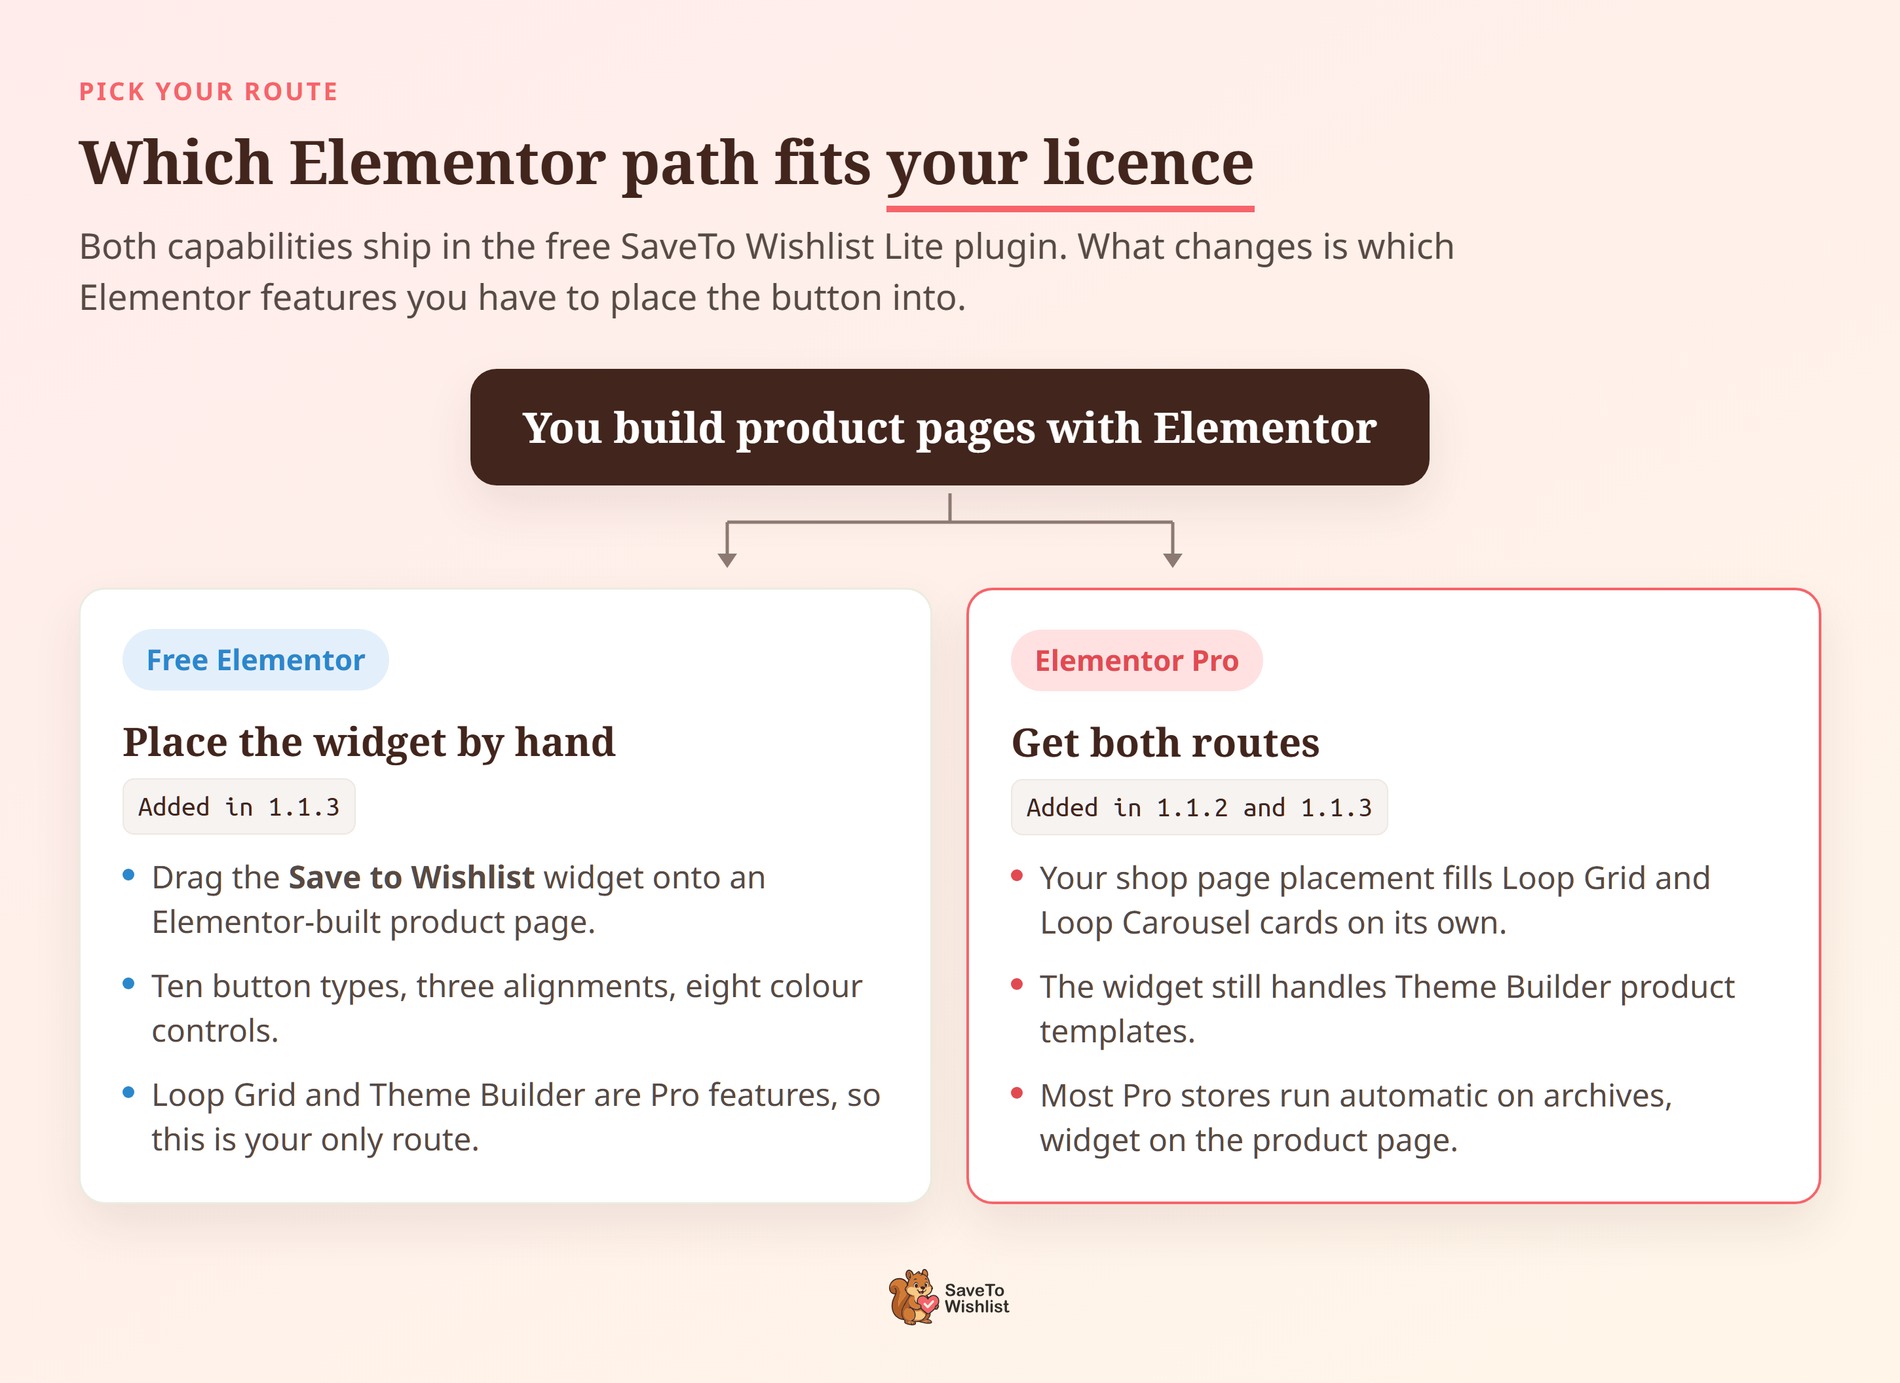
SaveTo Wishlist covers Elementor in two separate pieces. Which one you need depends on your Elementor licence.
| Capability | What it does | Elementor needed | Added in |
|---|---|---|---|
| Save to Wishlist widget | A native Elementor widget you drag into any template to place the button by hand | Free Elementor or Pro | 1.1.3 |
| Loop Grid and Loop Carousel placement | Automatic button placement on every product card, driven by your existing shop page setting | Elementor Pro | 1.1.2 |
Both ship in SaveTo Wishlist Lite, the free plugin, so Pro licence holders inherit them too. Update to version 1.1.3 or later and you have both.
Your route depends on your licence. Build product pages in free Elementor, and the widget is your option. Loop Grid, Loop Carousel and Theme Builder are all Elementor Pro features.
In practice, most Pro stores end up using both. Automatic placement handles the archives. The widget handles the single product template.
One distinction saves a lot of confusion later. The Elementor widget places the wishlist button on a product. It doesn’t display the wishlist itself. For that, use the wishlist block or the [saveto_wishlist] shortcode.
What You Need Before You Start
Four things need to be in place before the widget renders anything.
- Elementor, free or Pro: the widget works in either. Loop Grid and Loop Carousel need Elementor Pro.
- SaveTo Wishlist Lite 1.1.3 or later: earlier versions don’t include the widget. Check your version under Plugins.
- WooCommerce with a published product: the widget only renders where there’s a product to work with.
- A template bound to a product: a single product template, a loop item template, or a product-aware page.
Beyond that, there’s no separate configuration step. The widget reads your existing wishlist settings. So one dropped in unchanged renders the same button your store already shows.
How To Add The Wishlist Button With The Elementor Widget
Adding the widget takes four steps. Styling it takes three more.
Drop the widget onto your template
- Open the product template or page you want to edit in Elementor.
- Search the widget panel for Save to Wishlist.
- Drag the widget onto your layout, where you want the button to sit.
- Click Update to save.
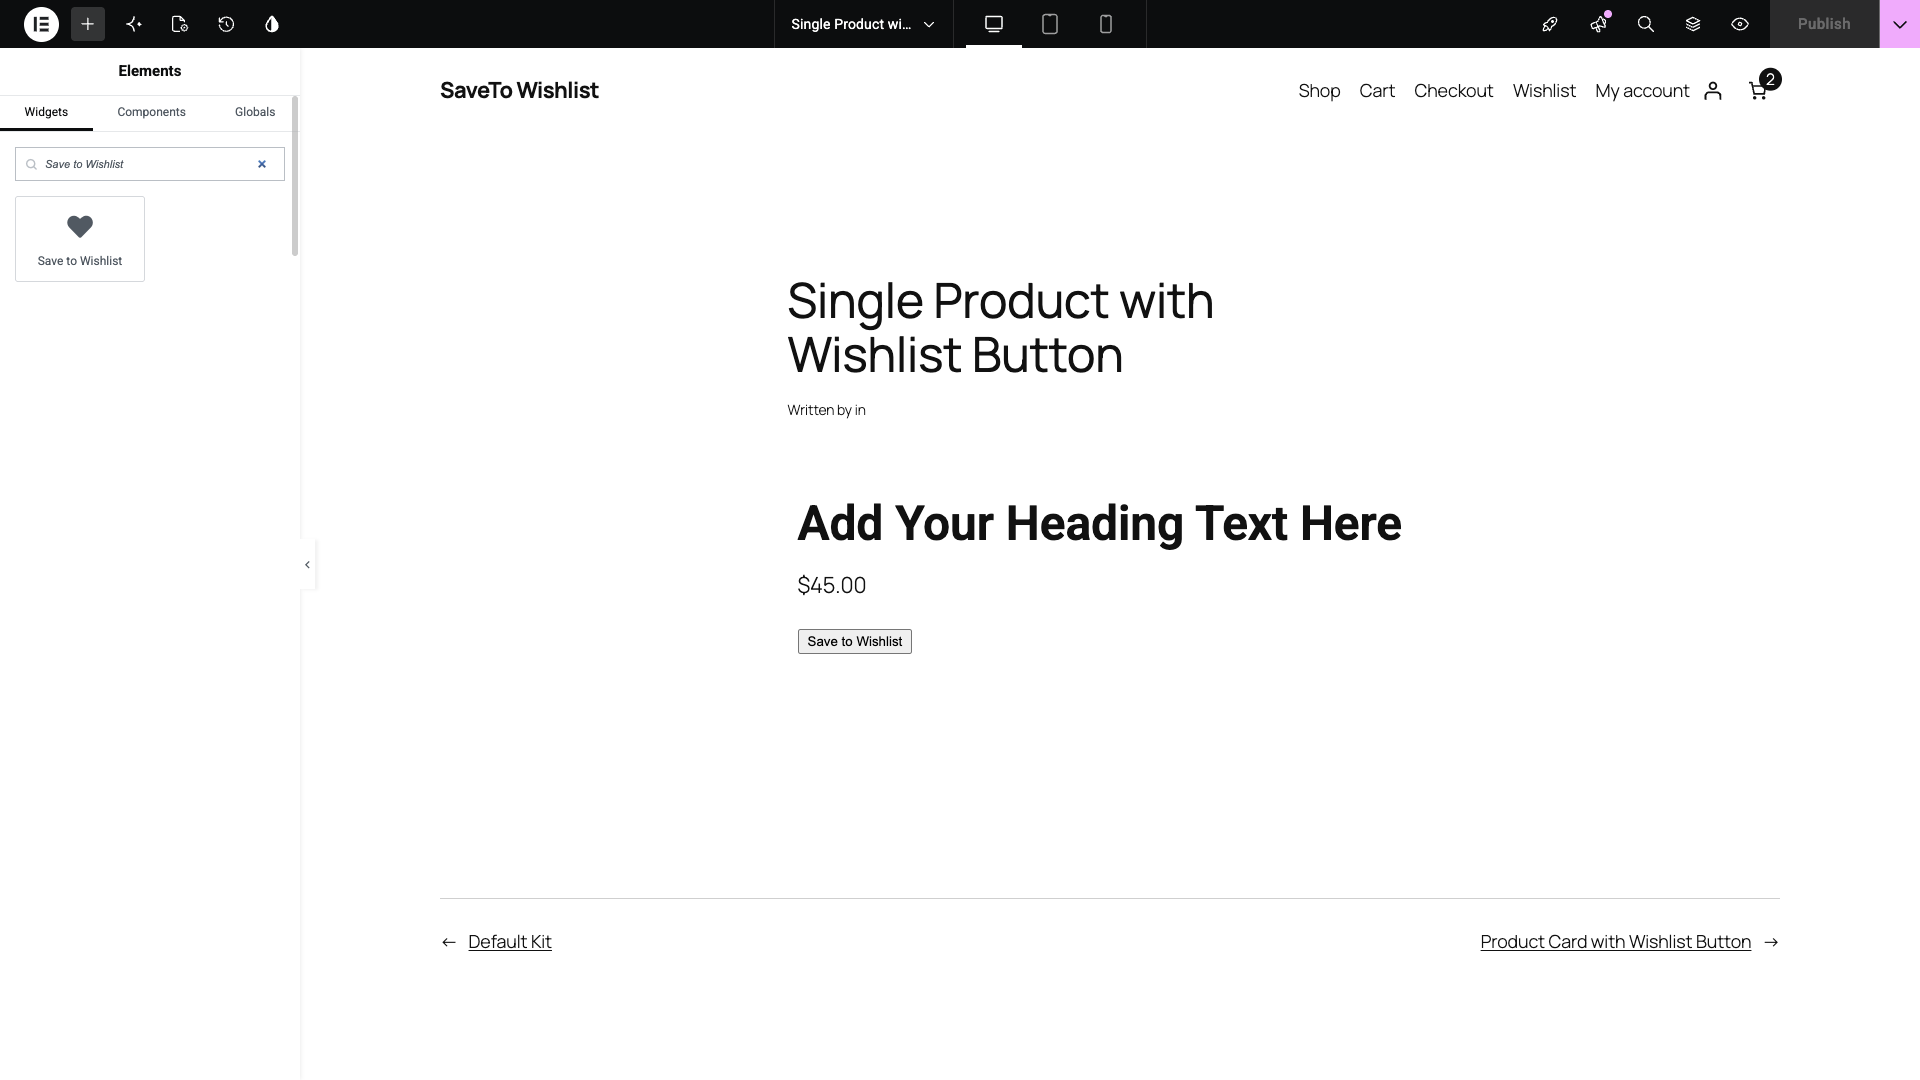
The widget is filed under both the WooCommerce and General categories. So browsing works as well as searching. Typing wishlist, save, favorite or favourite surfaces it too.
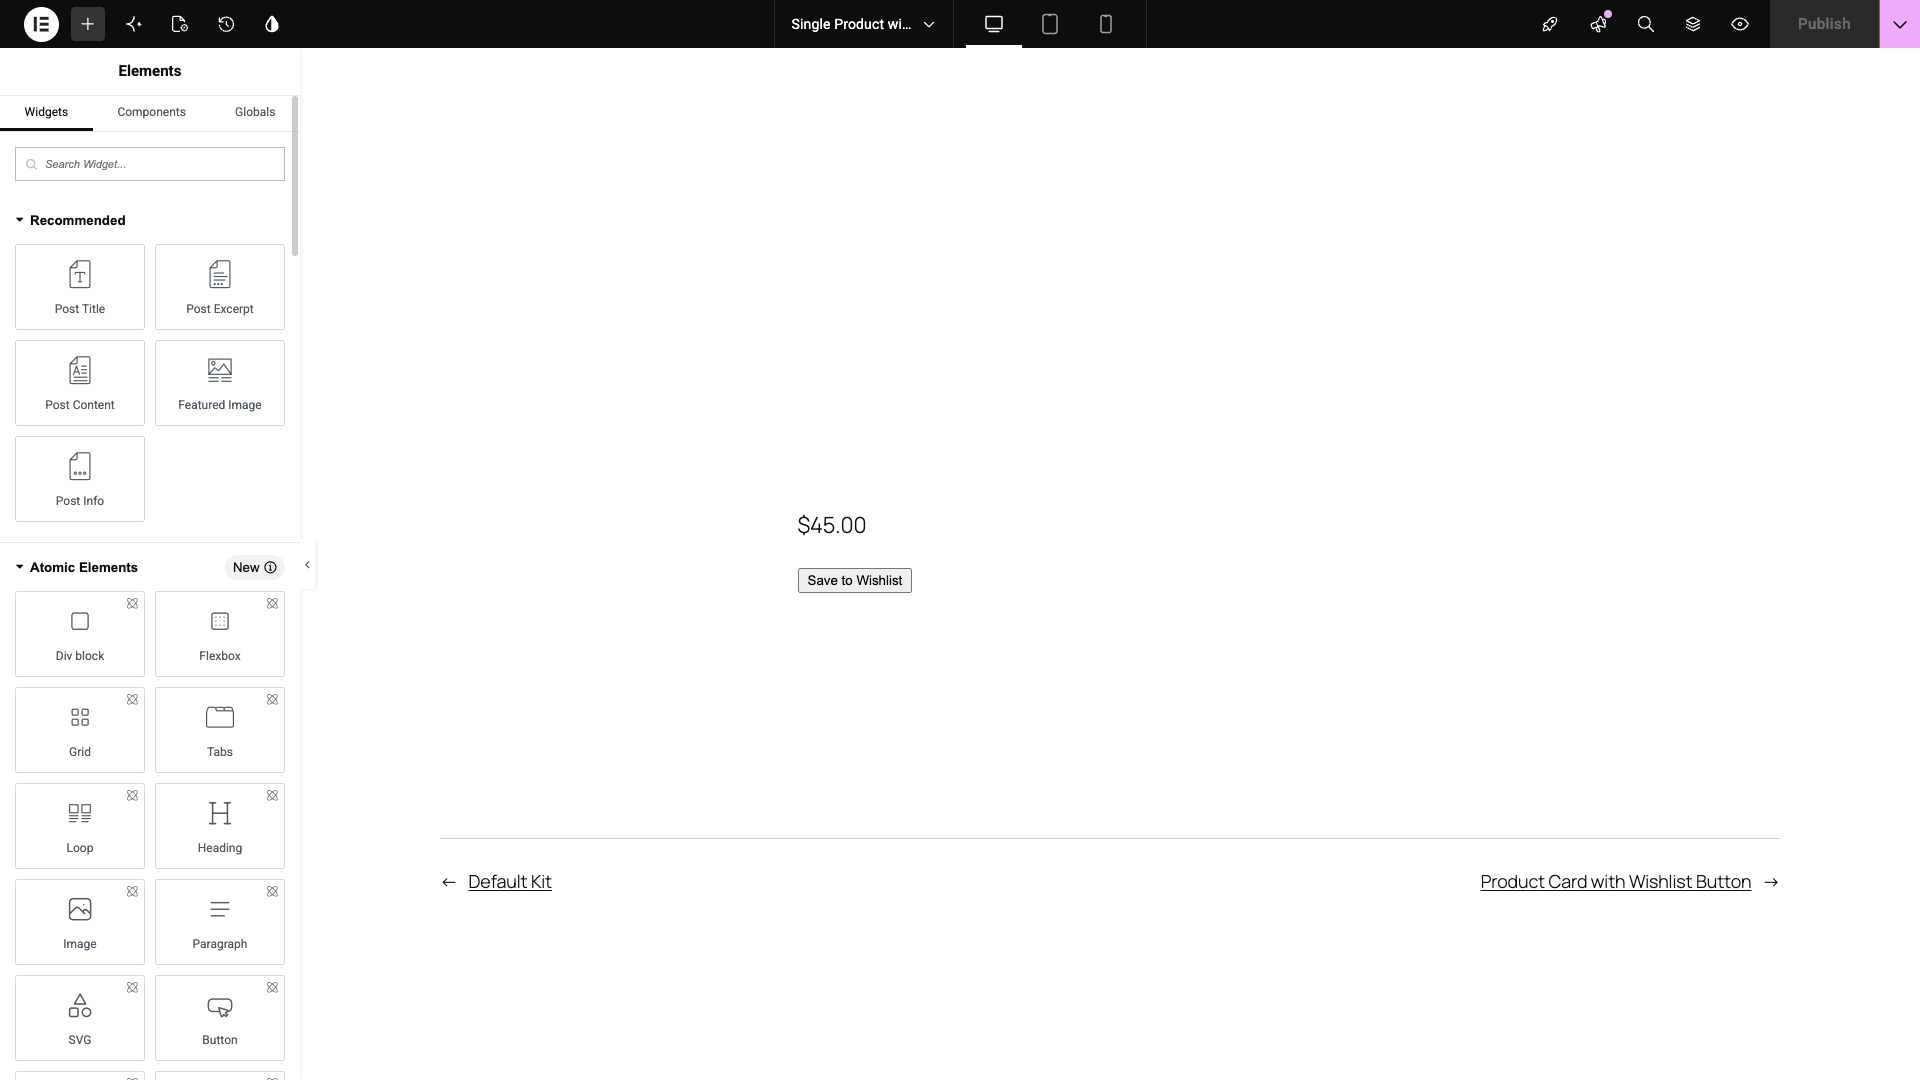
It renders straight away using your current wishlist settings. That means you see the real button on the canvas, not a grey placeholder.
Choose the button type
Button Type sits in the Wishlist Button section on the Content tab. It’s the only setting there.
Ten styles ship with the widget:
- Text Only, Icon Only, and Icon and Text
- Icon and Text Pill, Solid Icon, and Solid Icon and Text
- Solid Icon and Text Pill, Minimal Icon, and Minimal Icon and Text
- Minimal Icon and Text Pill
Pill variants use fully rounded corners. Solid fills the icon shape, while Minimal uses a lighter outline.
The control defaults to your product button style from the wishlist settings. Changing it here affects this one widget, not your whole store.
Set the alignment
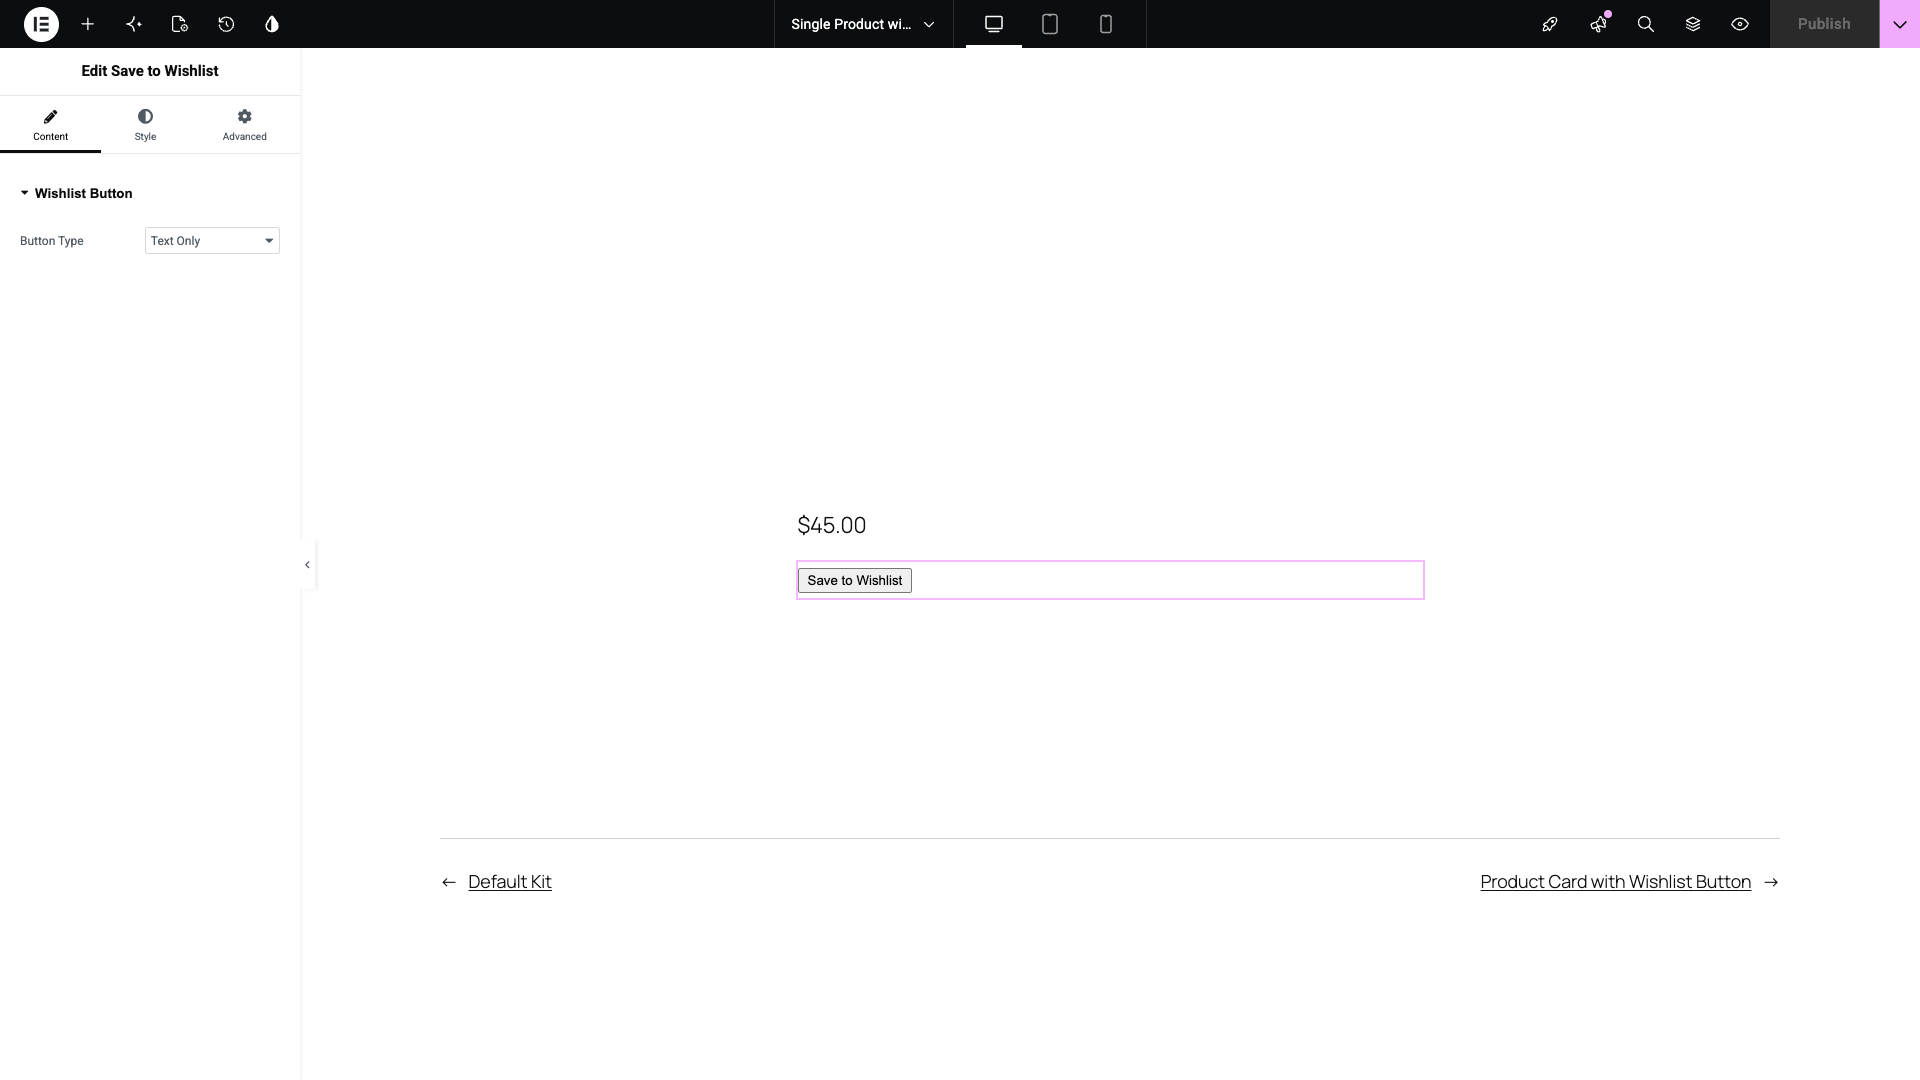
Alignment lives on the Style tab under Layout. That’s where Elementor keeps alignment for its own widgets.
Open Layout, then set Alignment to Left, Center or Right. It defaults to Left.
Change the button colors
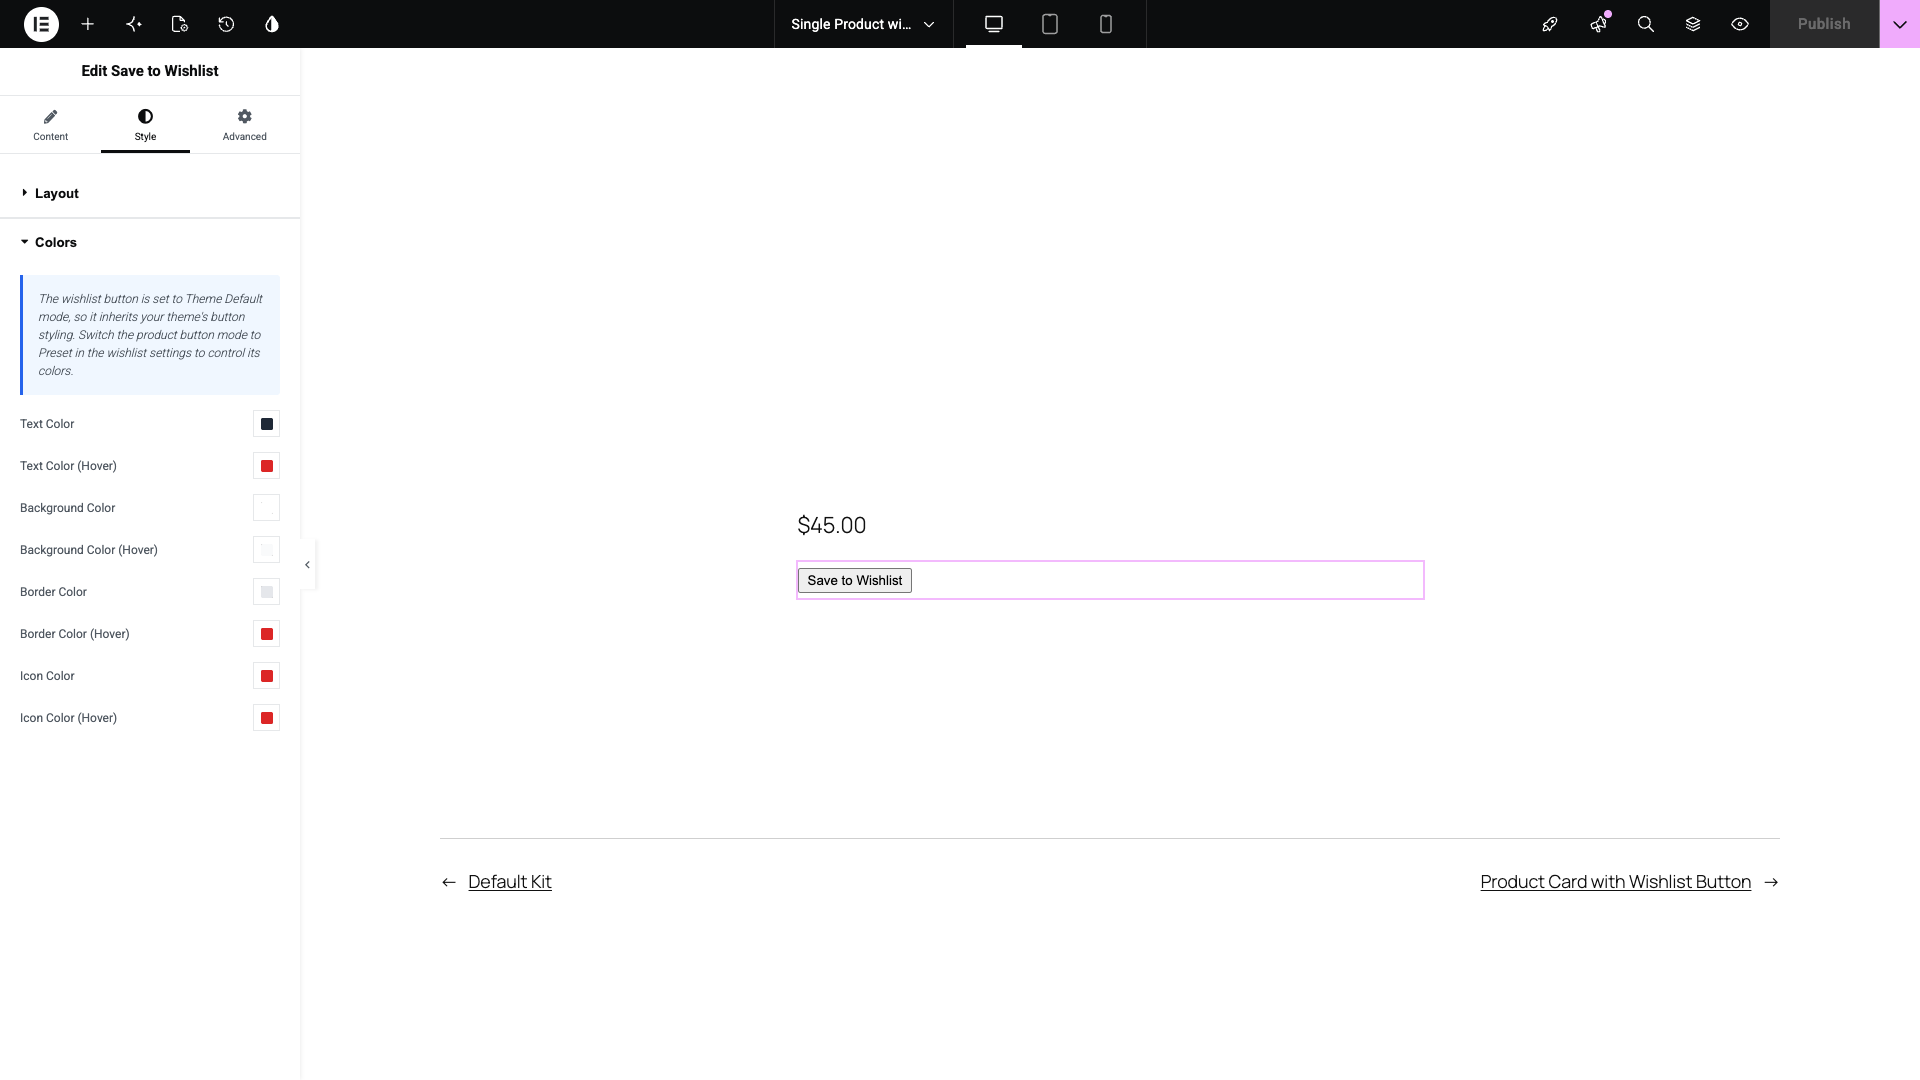
The Colors section on the Style tab gives you eight controls. Each one has a normal and a hover state: Text Color, Background Color, Border Color and Icon Color.
Every picker starts at the color already saved in your wishlist settings. So an untouched widget matches the rest of your store.
Change one and it overrides that color for this widget alone. That helps when a single template sits on a dark section or a photo background.
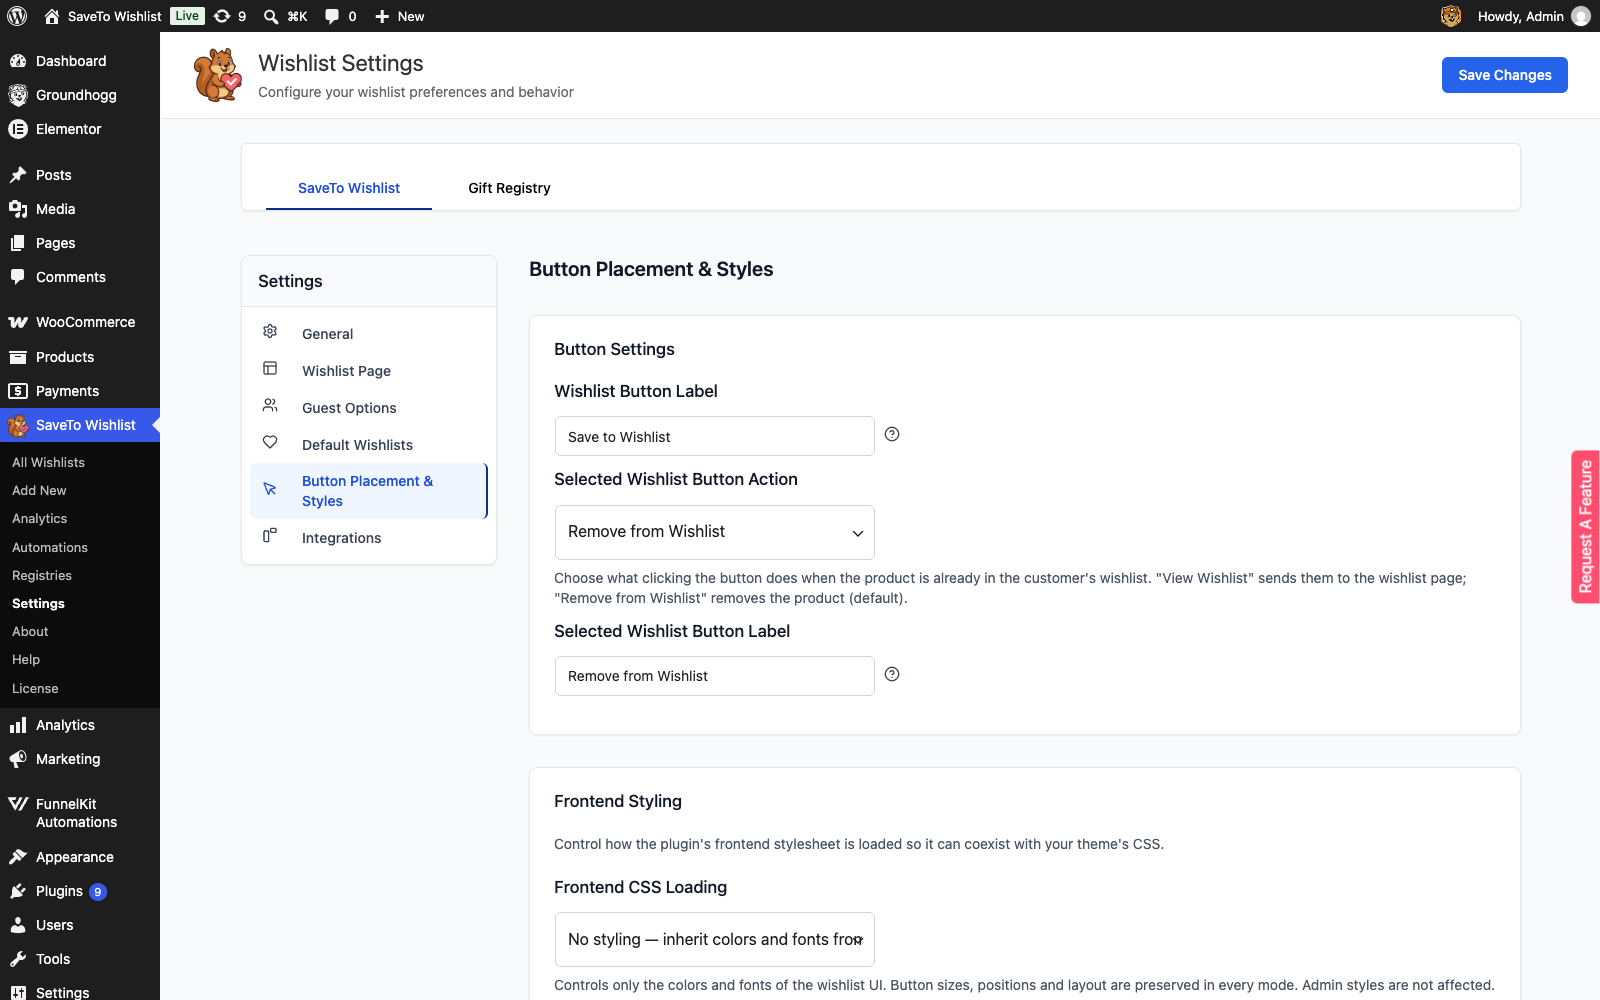
Colors are the only thing the widget overrides. Size, padding, border width and icon shape live elsewhere.
You’ll find those under SaveTo Wishlist > Settings > Button Placement & Styles. So you restyle them once and every button follows.
One limitation is worth knowing up front. The pickers accept solid colors only, with no transparency slider and no global colors tab.
That’s because the wishlist button stores plain hex values. A global color would preview correctly but wouldn’t carry over to the live page, so the option is disabled to ensure your settings are accurate.
For the same walkthrough with every screen captured, see our knowledge base guide to the Elementor widget.
How To Show The Wishlist Button In Loop Grid And Loop Carousel
With Elementor Pro you have two routes onto product cards. They suit different levels of control.
Let the plugin place it for you
Your existing shop page placement already applies to Loop Grid and Loop Carousel cards.
Head to SaveTo Wishlist > Settings > Shop Page, pick a placement, then save. The button appears on every card without you touching the template.
Behind the scenes, the integration anchors itself to four Elementor widgets in your loop item template:
- Product Image: carries the placements anchored on the product image.
- Product Title: carries the placements anchored on the title.
- Product Add To Cart: carries the placements above or below the button.
- Add To Cart: Elementor’s second add to cart variant, treated the same way.
Your loop item template needs at least one of those four. When a card is built entirely from custom widgets, the plugin simply needs you to place the button manually.
If a template holds both add to cart variants, the anchor still fires once per card. So the button is never doubled that way.
Not using a grid? We cover the same button inside WooCommerce product tables.
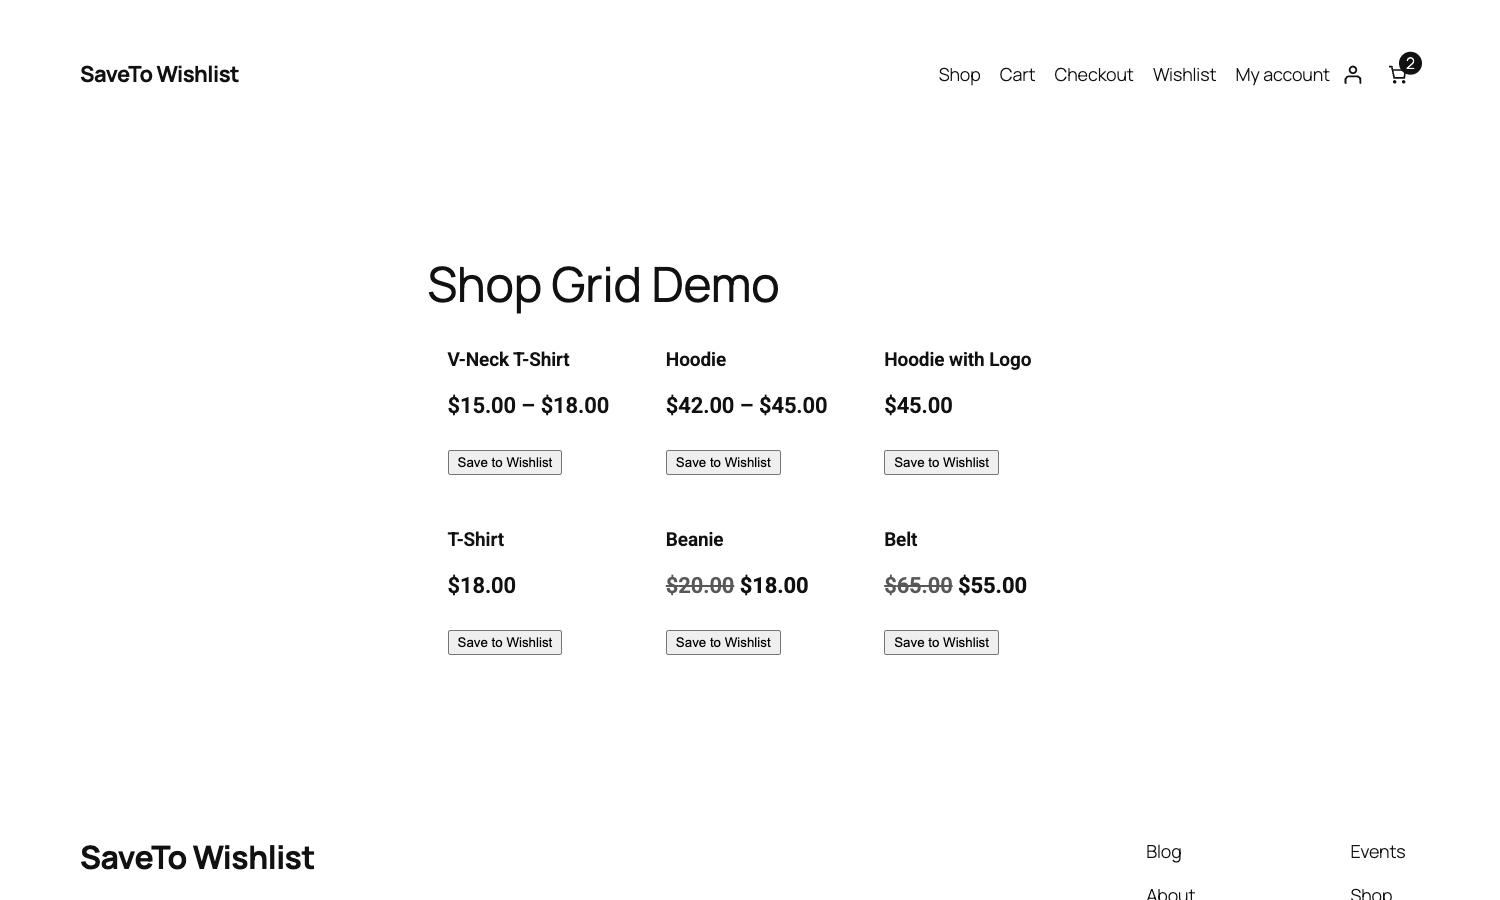
Place the widget yourself
Edit the loop item template and drop the Save to Wishlist widget into the card layout. You get exact control over where the button sits on each card.
There’s one behavior to plan around here. Inside a loop item, the plugin treats your widget as a per-card button rather than a duplicate. Your shop placement keeps rendering alongside it.
So pick one route or the other. If you place the widget by hand, set your shop page placement to Don’t show. Otherwise each card ends up with two buttons.
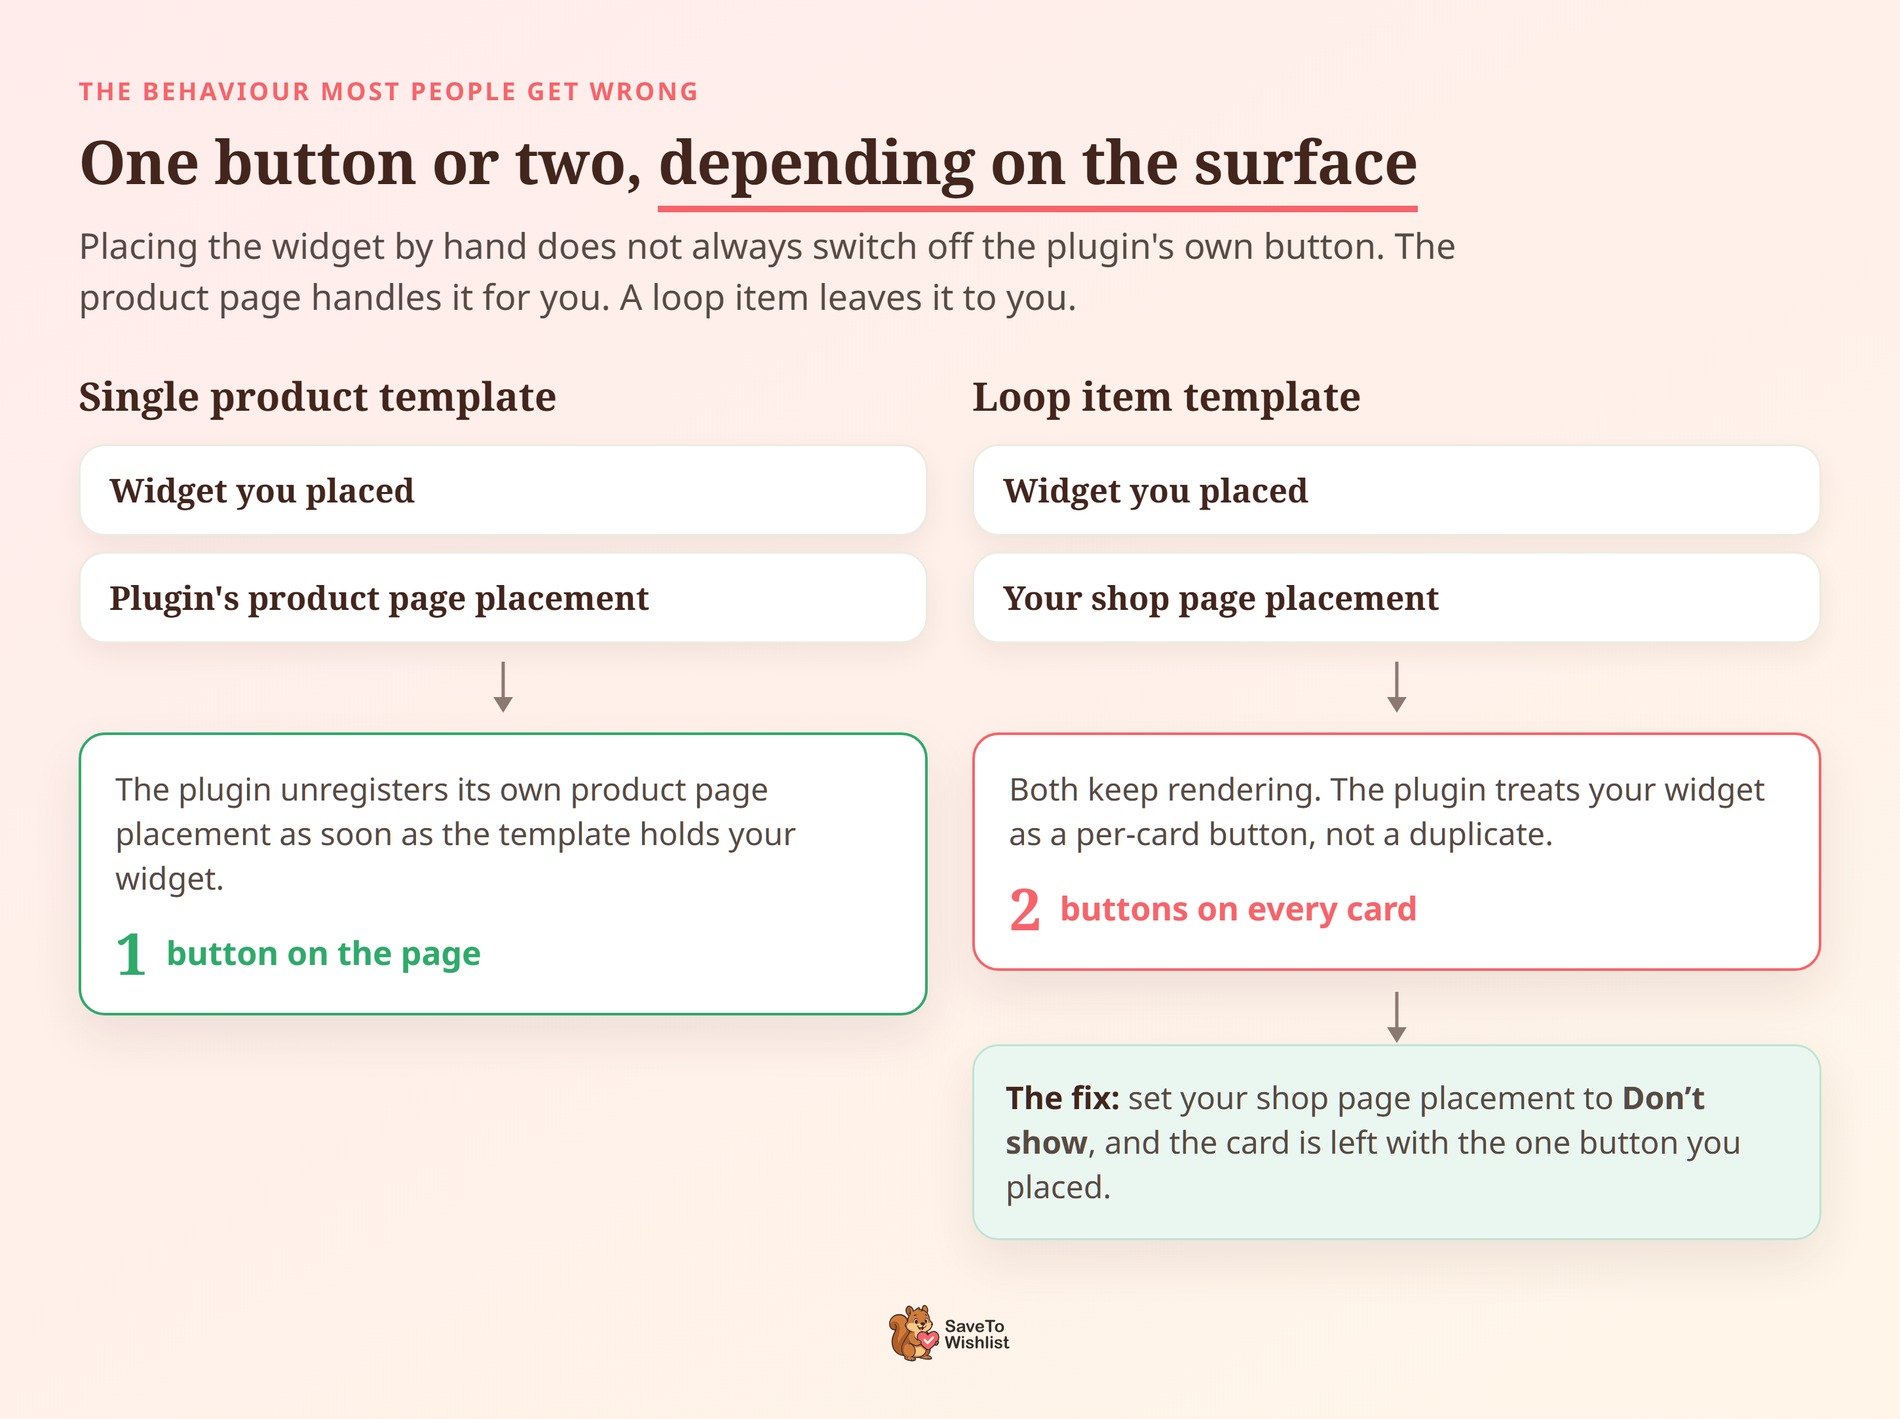
🔍️ What we’ve seen: the single product page works differently, and that catches people out. Put the widget on an Elementor product template, and the plugin switches off its own product page placement for you. Loop items are the exception, so they need the manual step above.
Where To Put The Button So Shoppers Actually Use It
Once you can put the button anywhere, the harder question is where it earns the most saves.
Start with why shoppers leave. According to the Baymard Institute, the average documented cart abandonment rate across 50 studies is 70.22%.
More telling still, 42% of US online shoppers say they abandoned because they were just browsing. Those people aren’t rejecting your product. They have bad timing.
Advanced Coupons has a guide on reducing abandoned carts if you want the checkout side too.
A wishlist is the only thing on the page built to catch them. That reframes what the button is for. It’s the second call to action for everyone who isn’t buying today.
Three placement rules hold up well across most stores:
- Keep it inside the buy box: put the button beside the price and Add to Cart. A shopper deciding whether to leave is looking right there.
- Give it less visual weight than Add to Cart: the Minimal and Icon Only types exist for this. A wishlist button styled as loudly competes with the sale you want today.
- On cards, favour the image corner or under the title: card space is tight. A full width button below Add to Cart breaks grid alignment on smaller screens.
We go deeper on both surfaces in our guides to product page best practices and shop page best practices.
Getting the button onto Loop Grid cards matters more than it first appears. Most browse abandonment happens on the archive, before a shopper opens a product page.
So if your only button lives on the product template, you’re catching the few who click through. Everyone else slips past.
Five Ways To Put Elementor Wishlist Saves To Work
A save is worth exactly as much as what you do next with it. Five plays turn a growing wishlist into revenue.
- Trigger price drop alerts: when a saved product’s price falls, the shopper hears about an item they already wanted. See how wishlist price drop alerts work.
- Send back in stock notifications: a sold out product sitting in a wishlist is a queued order. Telling that shopper when stock returns beats hoping they check back.
- Read saves as demand data: products saved often and bought rarely tell you something about price, shipping or page copy. Wishlist analytics make the pattern visible.
- Segment by intent: a shopper with five saves and no orders needs a different email from a repeat buyer. Wishlist activity gives you a segment order history never would.
- Plan seasonal campaigns around saved items: gift seasons reward stores that know what each customer wants. A wishlist is that list, volunteered rather than guessed.
It’s worth being clear about which parts are free. Everything above about placing the Elementor wishlist button ships in the free Lite plugin.
Analytics, price drop alerts, back in stock emails and webhooks are Pro features. They start on the Growth plan.
Whichever plays you run, wishlist conversion rate is the number to watch. It tells you whether saves are turning into orders.
Visser Labs covers reading your store reports if you want the wider picture.
Elementor Wishlist Problems And How To Fix Them
Four issues account for most of what goes wrong here. Each one has a specific cause.
The button does not appear at all
Work through these in order.
- No product in context. The widget only renders where WooCommerce has a product to work with. A plain page gives it nothing, so it stays empty. Move it to a single product template, a loop item template, or a page that sets a product.
- Guest wishlists are turned off. If Disable Guest Wishlist is on and you’re logged out, the button is hidden on purpose. Log in, or reconsider whether allowing guest wishlists suits your store.
- The plugin is older than 1.1.3. The widget doesn’t exist in earlier versions. Update SaveTo Wishlist and it appears in the panel.
Two wishlist buttons show on the product page
This one usually resolves itself. When your Elementor product template holds the widget, the plugin unregisters its own single product placement.
Related products, upsells and cross-sells are deliberately left alone. Those cards render through your shop placement instead.
So a second button there is the shop setting doing its job. You change it in SaveTo Wishlist > Settings > Button Placement & Styles.
The color pickers do nothing
Two settings switch the color controls off. Each one shows a message in the Elementor panel explaining why.
If your product button mode is set to Theme Default, the button inherits your theme’s styling. The plugin applies no color of its own. Switch the mode to Preset to take control.
If your wishlist icon is a custom uploaded image, the two icon color controls do nothing. An uploaded image can’t be tinted. Swap it for a built-in icon shape if color control matters more.
A blog layout appears instead of the wishlist
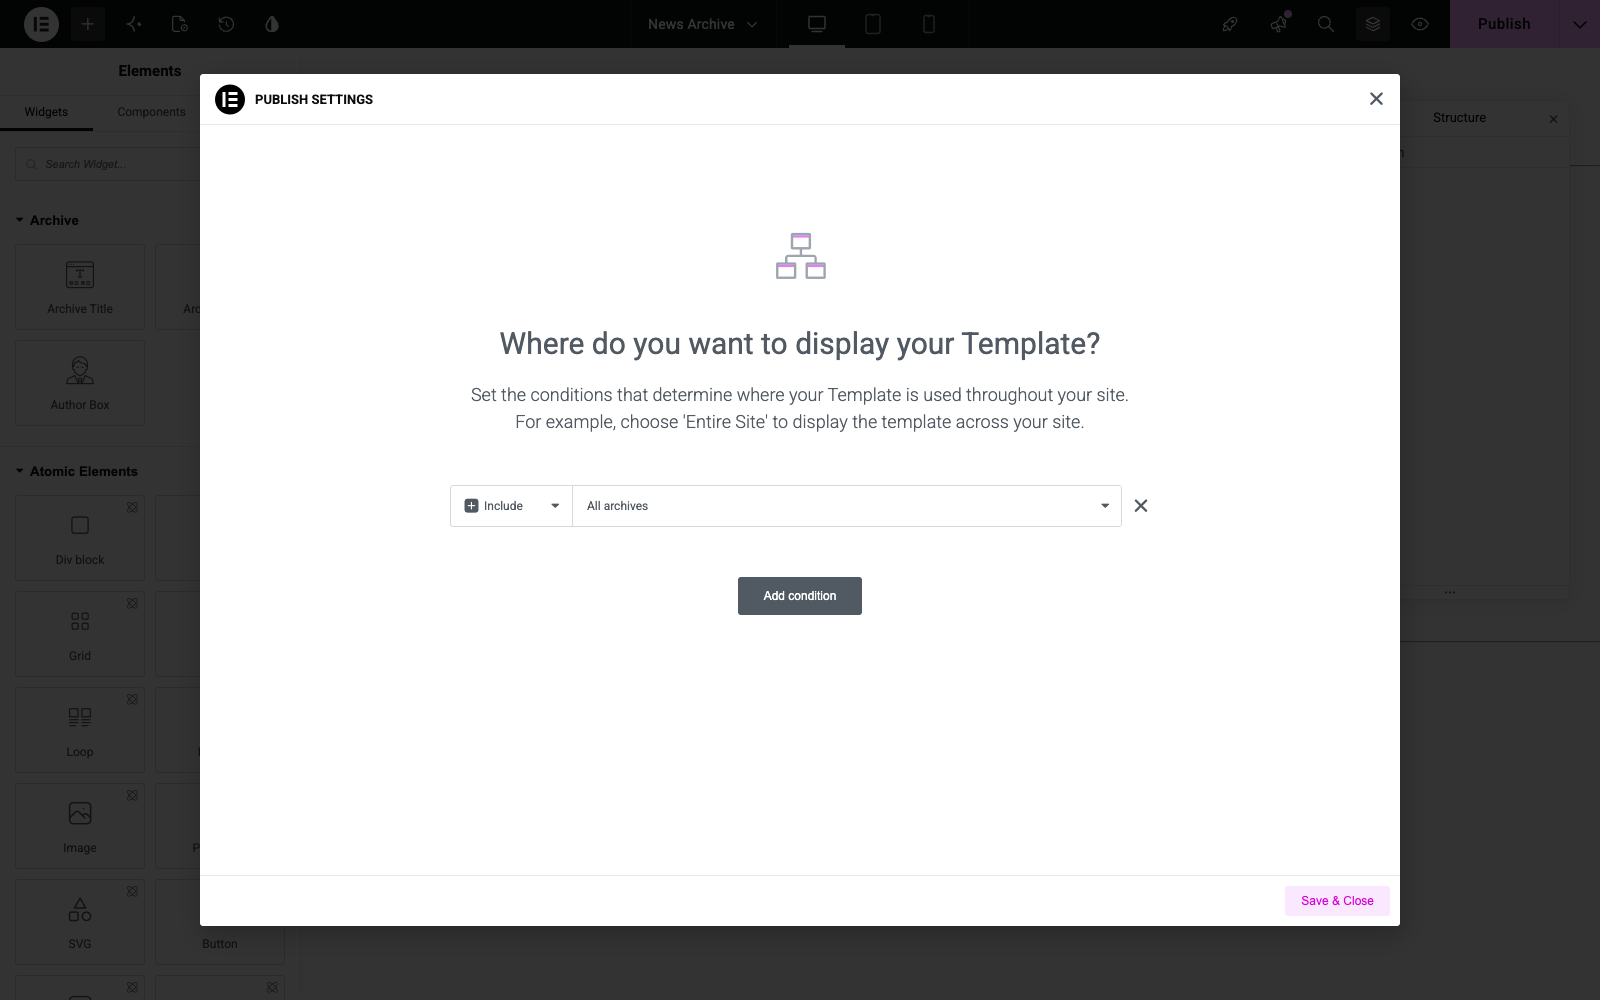
If a wishlist link opens your posts archive design, an Elementor Theme Builder display condition is likely applying too broadly. It happens when that template’s display condition targets the posts archive.
That condition also matches individual wishlist views. Here’s the fix:
- Open Templates > Theme Builder and select your archive template.
- Open its Display Conditions.
- Remove the condition that targets the posts archive.
- Build your posts archive as a standalone page instead.
Frequently Asked Questions: Elementor Wishlist Button
Do I need Elementor Pro to use the wishlist widget?
No. The Save to Wishlist widget works in free Elementor.
Elementor Pro is only needed for Loop Grid, Loop Carousel and Theme Builder templates. On free Elementor, the widget is how you place the button.
Will the widget override my wishlist settings?
Only the eight colors, and only for that one widget. Button type and alignment are per widget too.
Everything else still comes from your wishlist settings. That covers size, padding, border width and icon shape. So a store-wide restyle stays a single change in one place.
Can I use the widget and automatic placement together?
Yes, though the two surfaces behave differently.
On a product template holding the widget, the plugin switches off its own product page placement. You get one button.
Inside a loop item template, both the widget and your shop placement render. Set the shop placement to Don’t show if you only want the widget.
Why is there no transparency slider on the color pickers?
The wishlist button stores solid hex colors only.
A transparent or global color would preview correctly and then fall back on the live page. Those options are switched off rather than left to mislead you.
Which SaveTo Wishlist version do I need?
Loop Grid and Loop Carousel support landed in version 1.1.2. The Elementor widget arrived in 1.1.3.
Running 1.1.3 or later gives you both. Both ship in the free Lite plugin, so neither needs a Pro licence.
Does the widget display the wishlist itself?
No. The widget places the Save to Wishlist button on a product.
To show a customer’s actual wishlist on a page, use the wishlist block or the [saveto_wishlist] shortcode instead.
Wrapping Up
Displaying the Elementor wishlist button was never really about styling. It was about bridging the gap between traditional WordPress hooks and custom visual builders.
Both halves of that gap are closed now, on free Elementor and on Elementor Pro.
Setup is the easy part and takes minutes. The real work is deciding where the button sits. After that, it’s deciding what happens once a shopper uses it.
Here’s what to do next:
- Update to version 1.1.3 or later, then check which Elementor path fits your licence.
- Drag the Save to Wishlist widget onto your product template and pick a button type.
- Switch on Loop Grid and Loop Carousel cards through your shop page placement.
- Place the button inside the buy box and on your product cards, not just one.
- Put the saves to work with alerts, segments and demand data.
Ready to put an Elementor wishlist button on every product in your store? Start with SaveTo Wishlist Lite for free, or see what the Growth, Plus and Business plans add on top.