
Give your customers a reason to share their wishlists far and wide: gift registries. SaveTo Wishlist Registry turns any wishlist into a public, event-ready registry for weddings, baby showers, and birthdays. Guests can browse and buy without picking the same gift twice. This guide walks you through activating the extension and getting your store ready for the first registry.
Requirements
Before you start, make sure you have:
- WooCommerce installed and active
- SaveTo Wishlist Lite for WooCommerce installed and active
- WordPress 5.8 or later and WooCommerce 4.0 or later
SaveTo Wishlist Registry is an extension, so it won’t run until both WooCommerce and SaveTo Wishlist Lite are active. If either one is missing, you’ll see a notice in your admin asking you to activate it first.
Step 1: Activate the registry extension
- Go to Plugins in your WordPress admin.
- Find SaveTo Wishlist Gift Registry Addon and click Activate.
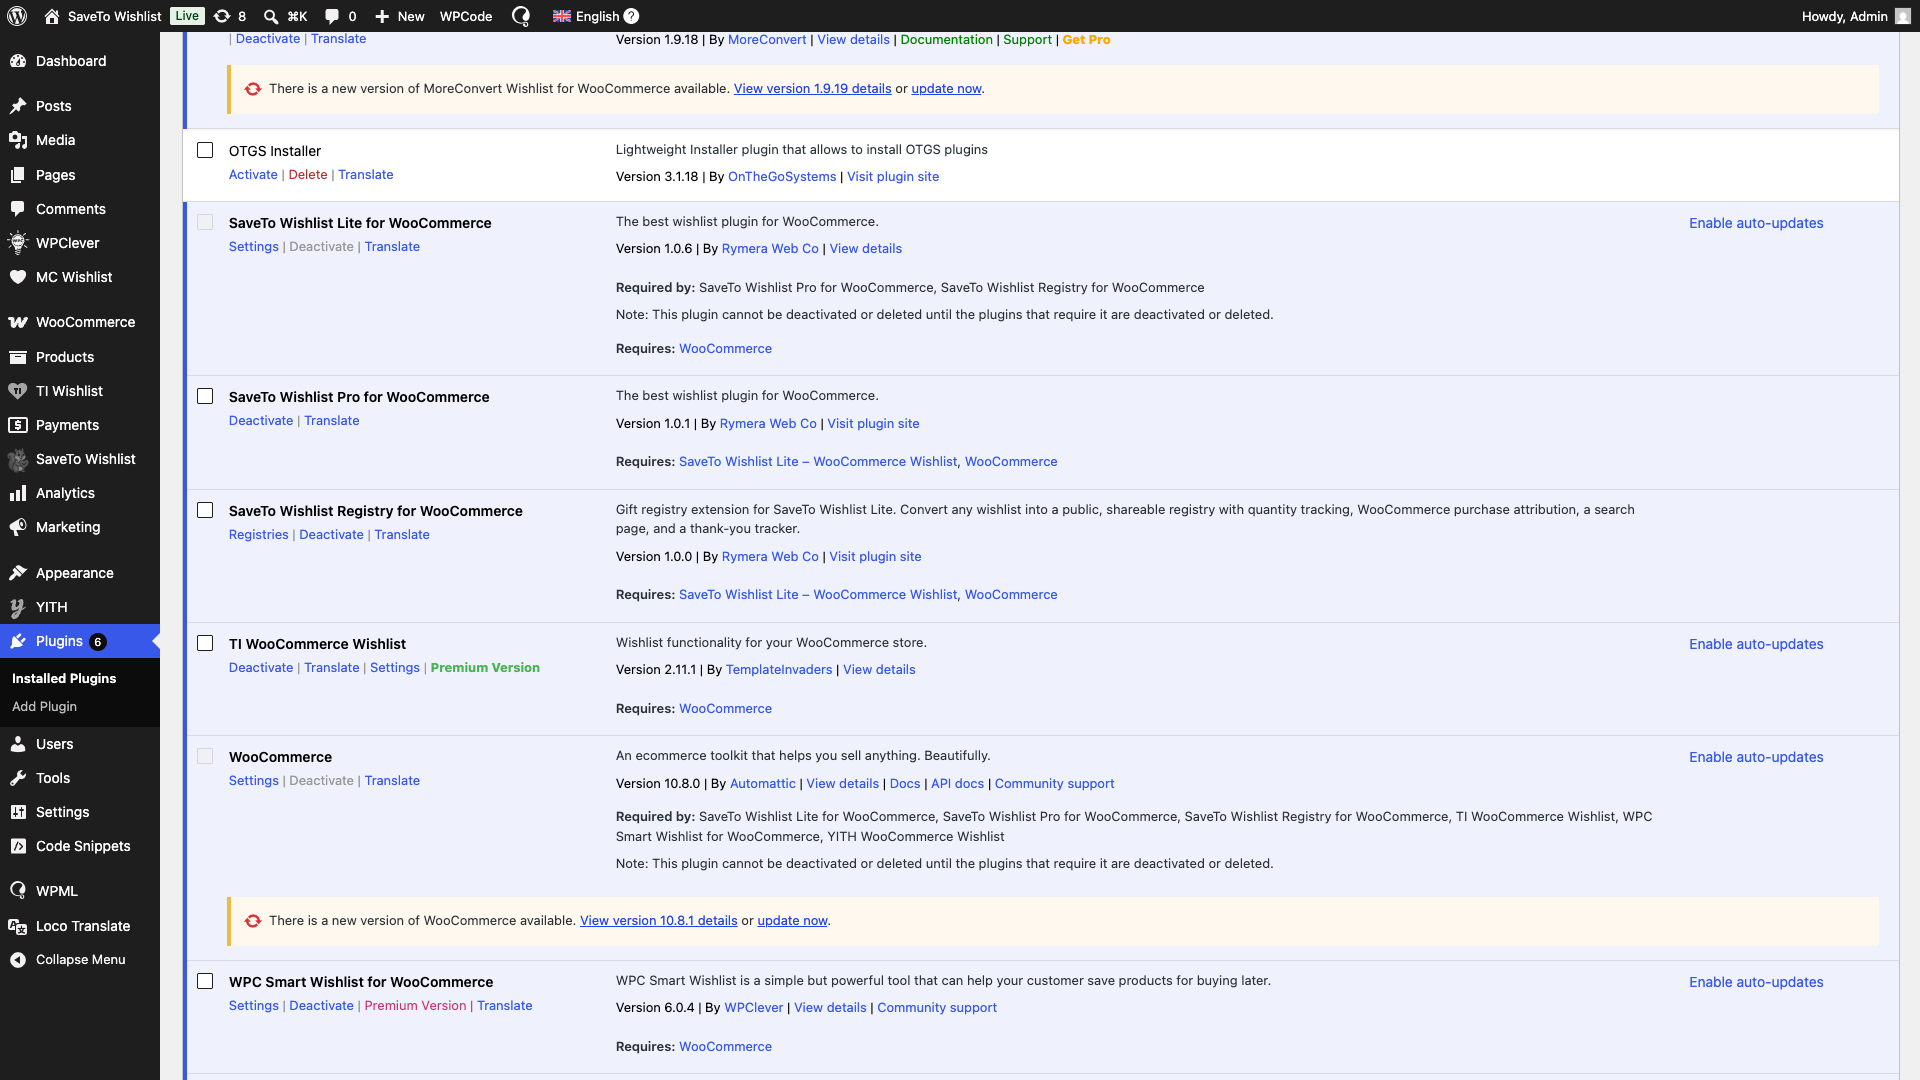
On activation, the extension sets everything up for you. It creates the two pages your registries need, adds a default list of event types, and switches on the registry owner’s purchase and refund emails. The admin email for new registries is off by default; you can turn it on under the Email Notifications tab. The next steps confirm those are in place.
Step 2: Confirm your registry pages
The extension automatically creates two published pages when you activate it:
- Registry: holds the
[saveto_registry]shortcode and displays each public registry. - Find a Registry: holds the
[saveto_registry_search]shortcode so guests can search for someone’s registry.
To check they’re assigned:
- Go to SaveTo Wishlist → Settings.
- Open the Gift Registry tab.
- Select the General tab.
- Under Page Assignments, confirm Registry Landing Page points to your Registry page and Find a Registry Page points to your Find a Registry page.
- Click Save Changes.
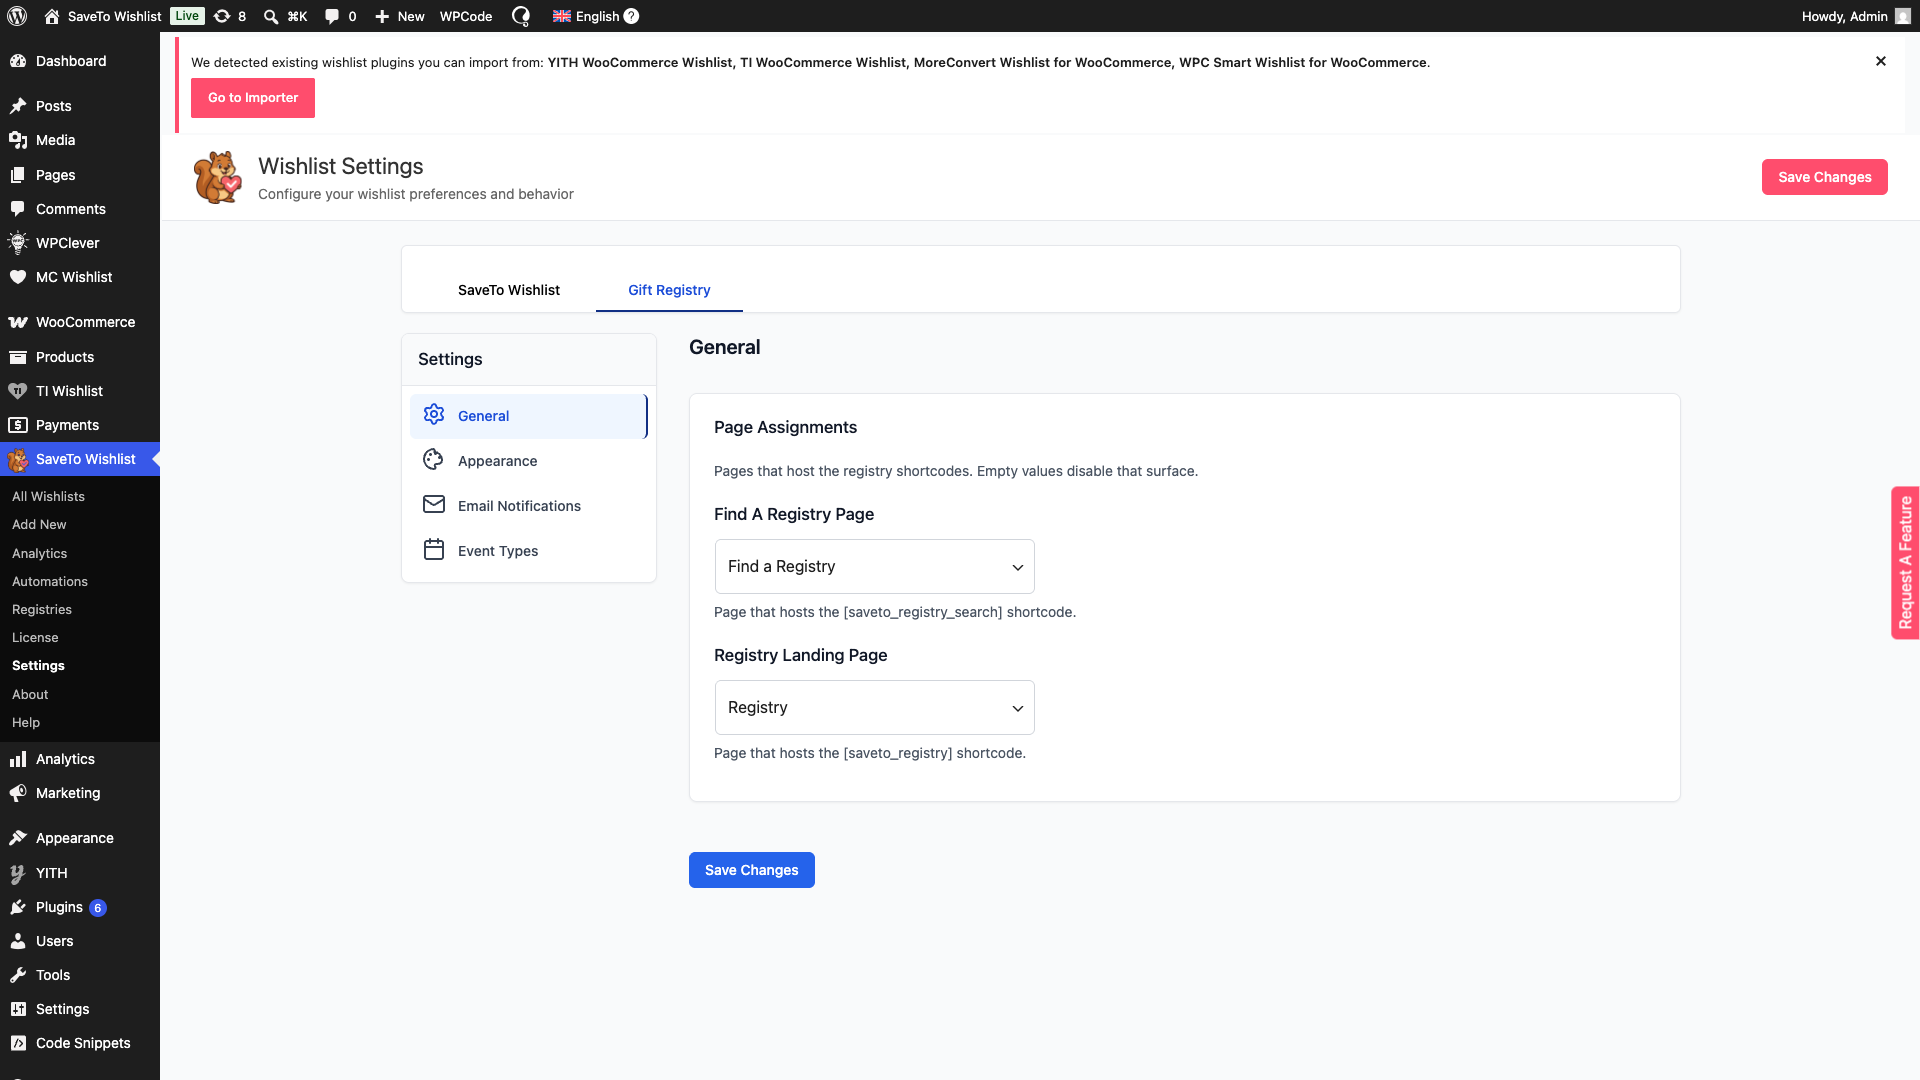
If a dropdown is empty, choose the matching page from the list. If you leave a dropdown empty, that page’s feature is turned off, so both should point to a published page.
Step 3: Tailor your registry (optional)
The defaults work straight away, but the Gift Registry settings tab gives you a few areas to make the experience your own.
Appearance controls the fonts, colors, and button styles on the public registry page, and you can adjust the registry landing page appearance settings to match your theme.
Email Notifications let you choose whether the registry owner gets an email when a gift is purchased or an order is refunded, and whether you get an email when a customer creates a new registry. Each email has its own switch, so you can set up gift registry email notifications exactly the way you want.
Event Types let you edit the event options a customer can pick from. Out of the box these are Wedding, Baby Shower, Birthday, Housewarming, and Other, but you can configure gift registry event types to suit your store.
How customers create and share a registry
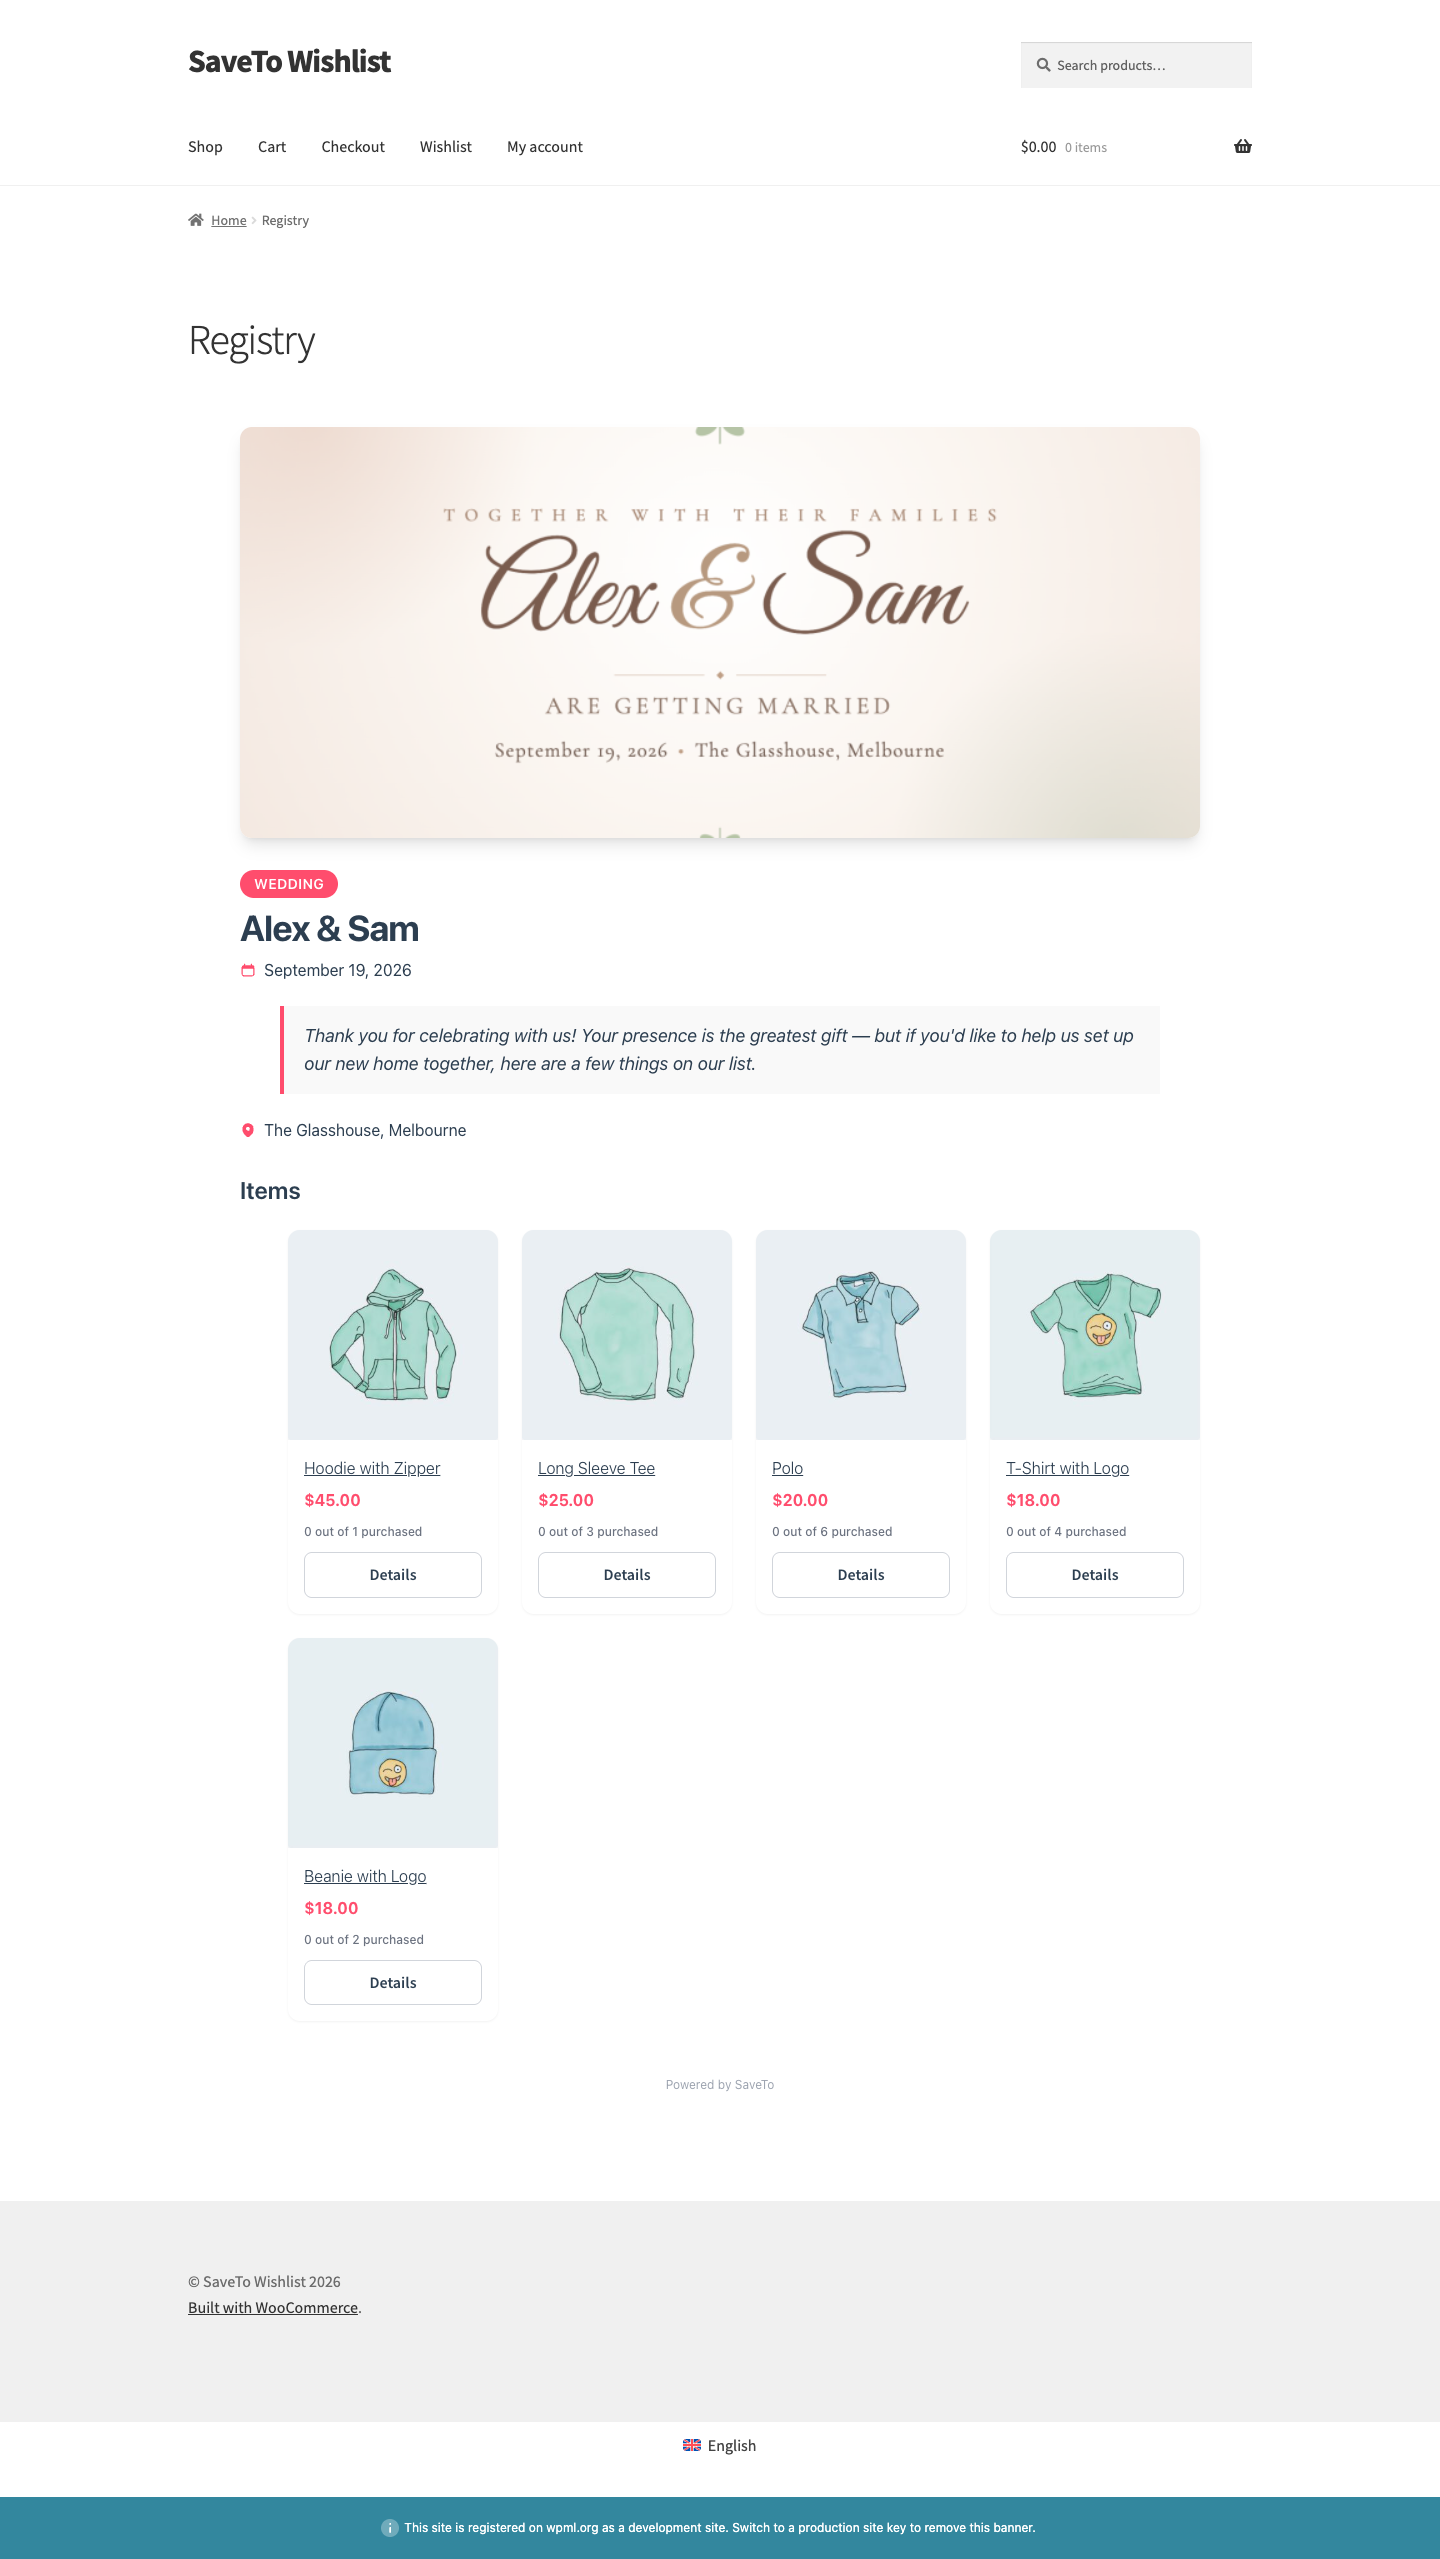
Customers create a registry by converting one of their wishlists into a gift registry. They pick an event type and date, add their name, and get a public link they can share with friends and family.
When someone buys a gift from the registry, the purchased quantity updates on its own, so other guests don’t buy duplicates. The registry owner can see who bought what, mark thank-you notes as sent, and do it all from their account.
What’s next
Once the extension is active and your pages are in place, here’s where to go next:
- How to convert a wishlist into a gift registry
- How to view gift purchases and send thank-you notes
- How to set up a find a registry search page
- How to manage gift registries as a store admin
Troubleshooting
The extension won’t activate
The registry extension requires both WooCommerce and SaveTo Wishlist Lite to be active. If either is missing, your admin will show a notice telling you which one to activate first. Install and activate both, then try activating the extension again.
Registry pages are empty or missing from Page Assignments
The extension creates the Registry and Find a Registry pages on first activation. If they don’t appear under Gift Registry → General → Page Assignments, check that the pages weren’t deleted. If they were, create new pages, add the [saveto_registry] and [saveto_registry_search] shortcodes respectively, publish them, then assign them in the Page Assignments section.
Frequently asked questions
Do I need SaveTo Wishlist Lite for the registry extension to work?
Yes. SaveTo Wishlist Registry is an extension of SaveTo Wishlist Lite, and it won’t activate unless both Lite and WooCommerce are active.
Does activating the extension create pages for me?
Yes. It creates a published Registry page and a Find a Registry page automatically. You can reassign them anytime under Gift Registry → General → Page Assignments.
Where do customers manage their registries?
From their WooCommerce account, under the Gift Registries tab, where they can edit details, view purchases, and track thank-you notes.
Can I change the event types customers can choose?
Yes. Edit them under Gift Registry → Event Types. The defaults are Wedding, Baby Shower, Birthday, Housewarming, and Other.
Need help?
- Premium users: submit a support ticket and our team will help you out.
- Free users: post in the WordPress.org support forum.

