Customers who get a wishlist automation email see the heading “Automation Email” at the top and a small “Powered by SaveTo Wishlist” line at the bottom. If you want your own wording in the heading, or no branding line, a short code snippet does it. This guide shows you how to set your own heading and how to hide the line in emails from SaveTo Wishlist Pro.
Before you start
- SaveTo Wishlist Pro 1.0.4 or later, active, with at least one email automation. If you have not made one yet, see How to set up automated wishlist email notifications.
- A place to add code, such as a code snippets plugin or a small custom plugin. Do not edit the SaveTo Wishlist Pro files, because plugin updates replace them.
SaveTo Wishlist Pro has no settings screen for the email heading or the Powered by line. The Email Subject field in the automation editor sets the subject line only. It does not change the heading.
Where the heading and the line appear
The heading is the large text at the top of the email body, under your store name. The “Powered by SaveTo Wishlist” line sits under the email footer.
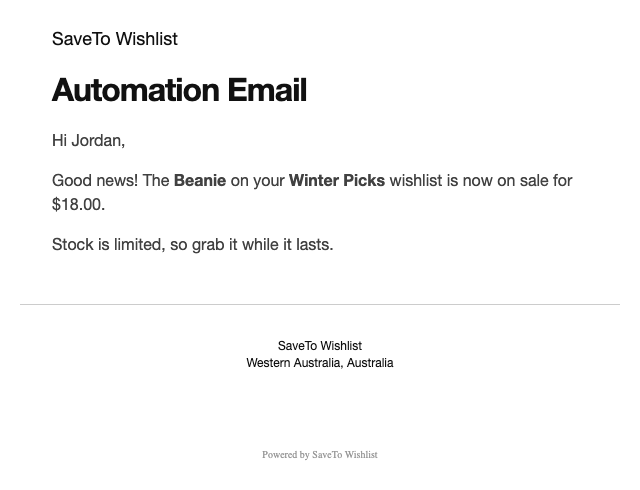
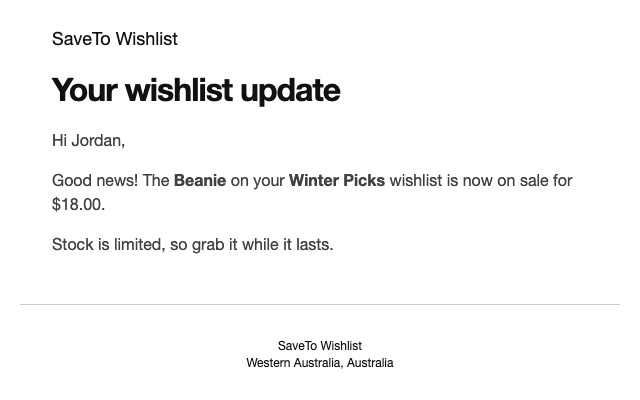
Change the heading
- Open your code snippets plugin and add a new PHP snippet, or open your custom plugin file.
- Add the code shown below this list.
- Replace
Your wishlist updatewith the heading you want. - Save the snippet and make sure it is active.
- Send a test email from the automation, or trigger the automation. The new heading shows at the top of the email.
Snippet for step 2:
add_filter( 'stwpro_automation_email_title', function () {
    return 'Your wishlist update';
} );
Use plain text for the heading. The same heading shows in every email automation, because there is no heading setting for each automation. To send a test email, see How to send a test email for a wishlist automation action.
Hide the Powered by SaveTo Wishlist line
The line shows by default. To hide it, add this code the same way as above:
add_filter( 'stwpro_show_powered_by_in_email', '__return_false' );Send a test email to check it. To show the line again, remove the snippet. This hide filter also covers every other email that SaveTo Wishlist Pro sends. You can find it in the table of other hooks in How to extend SaveTo Wishlist Pro with hooks and the REST API.
Change the footer text
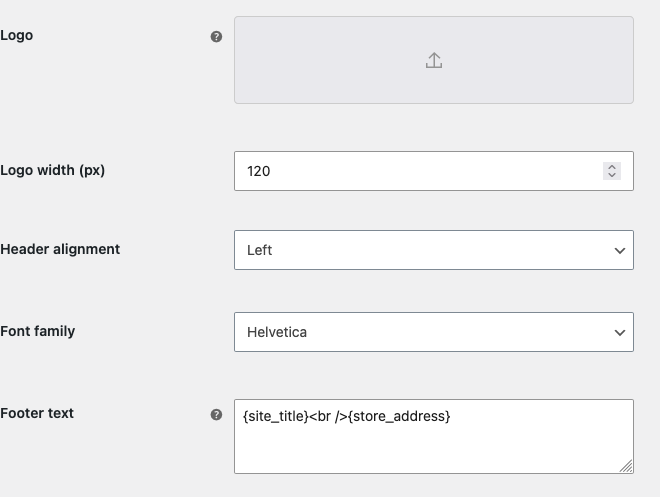
The footer text under the email body comes from WooCommerce, not from SaveTo Wishlist Pro. It is the same footer your other WooCommerce emails use.
- Go to WooCommerce → Settings → Emails.
- In the Email template section, edit Footer text.
- Click Save changes.
Troubleshooting
The heading did not change.
Check that the snippet is active and runs on the front end of your site, not only in the admin area. Then send a new test email. Emails that were already sent do not change.
The Powered by line still shows.
Check that the snippet is active, and that you typed the name stwpro_show_powered_by_in_email exactly. Then send a new test email.
Frequently asked questions
Does the Email Subject change the heading?
No. The subject is the line in the inbox list. The heading is the text inside the email. They are set in different places.
Does the snippet change wishlist share and edit permission emails?
No. SaveTo Wishlist Pro also sends an email when someone shares a wishlist or gets edit permission. Those emails keep their own headings. To change the heading in all emails from SaveTo Wishlist Pro, use this code instead:
add_filter( 'woocommerce_email_heading_stwpro_email', function () {
    return 'Your wishlist update';
} );
Will a plugin update remove my snippet?
No. The snippet lives in your own plugin or snippets tool, not in the SaveTo Wishlist Pro files.
Need help?
If you have a question or run into any issues, we’re here to help.
- Premium users: Open a support ticket
- Free users: Visit our community forum