
If you use external tools like a CRM or marketing platform to manage your store, Webhooks are a powerful way to keep your data in sync. SaveTo Wishlist Pro can “ping” these other apps the moment a wishlist event occurs, so you can automate your workflow across multiple platforms.
What is a webhook?
A webhook is a way for SaveTo Wishlist Pro to send real-time information to another application. Instead of you manually exporting data, the plugin pushes a data “payload” to a specific URL as soon as a customer takes action on your site.
Before you begin
- SaveTo Wishlist Pro is installed and active. Webhook automations are a Pro-only feature.
- For the Advanced Coupons and FluentCRM quick-start recipes and the
{trigger_type}variable, you’ll need SaveTo Wishlist Pro version 1.0.4 or later. - Have your external tool’s inbound webhook URL ready, along with any field names it expects.
Automation triggers
Triggers define when an automation should run. In other words, they determine the specific wishlist activity that sends a notification to the admin.
You can create automations based on the following wishlist events:
- A new wishlist is created
You can also enable the option “Also fire for admin-created wishlists” if you want automations to run when wishlists are created manually in the admin area. - An item is added to a wishlist
You can choose to trigger this for:- Products from all categories, or
- Products from a specific category only
- An item is removed from a wishlist
You can also limit this to:- All product categories, or
- A specific category
- When a wishlist product goes on sale
Perfect for notifying customers the moment a saved item becomes more affordable. - When an out of stock wishlist product comes back in stock
Ideal for recovering missed sales when inventory is replenished.
By selecting the appropriate trigger, you ensure you’re notified at the right moment to take action.
Step-by-step: setting up a webhook action
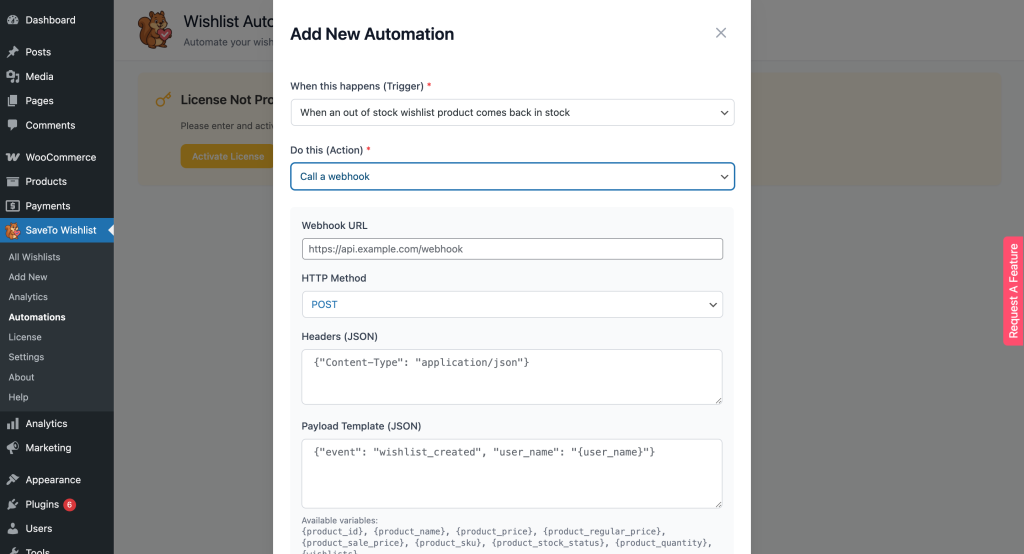
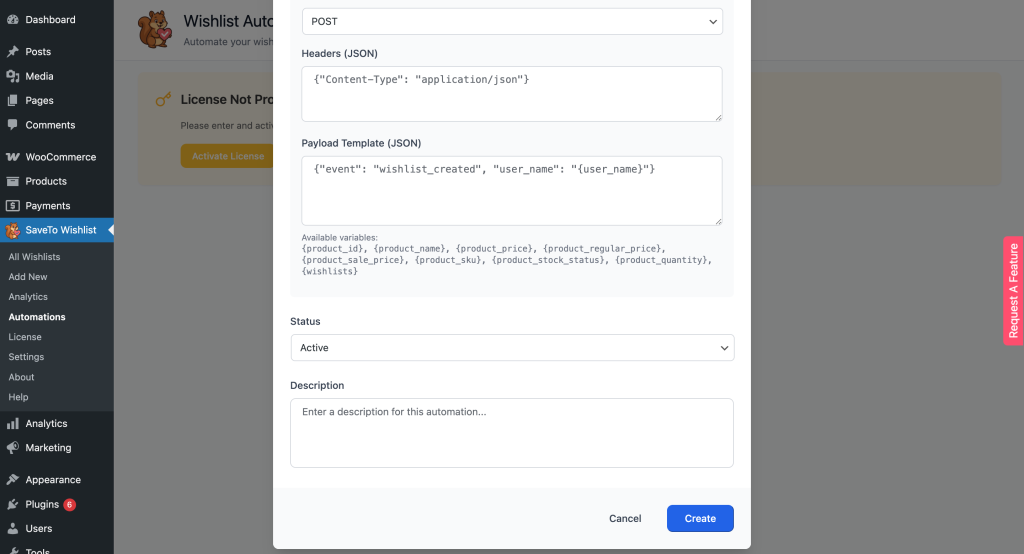
- Open Automations: Navigate to SaveTo Wishlist → Automations.
- Start a new automation: Click Add New Automation.
- Pick your trigger: Choose the event that should send data, such as When an item is added to a wishlist.
- Select webhook action: Choose Call a webhook as your action type.
- Enter connection details:
- Webhook URL: Paste the unique URL provided by your external app where the data should be sent.
- HTTP Method: Select the appropriate request method. GET, POST, PUT, and PATCH are available, though most integrations use POST.
- Headers (JSON): Add any necessary headers in JSON format, such as
Content-Type: application/jsonor authentication tokens required by the external app. - Payload Template (JSON): Define the data to send in JSON format. You can include dynamic variables to pass relevant information, such as:
{customer_id}– The unique ID of the customer{customer_name}– The customer’s name{customer_email}– The customer’s email address{wishlist_name}– The name of the wishlist{wishlist_url}– The direct URL to the wishlist{created_date}– The date the wishlist was created{wishlist_items}– The wishlist’s products, as a JSON array (each item’s ID, name, and quantity). This is only populated for triggers where items already exist, such as When an item is added to a wishlist. A wishlist has no items yet at the moment it’s created, so this variable isn’t part of the default “new wishlist created” payload below.{trigger_type}– Which event fired, as the literal trigger key:product_on_saleorproduct_back_in_stock. Only available on the When a wishlist product goes on sale and When an out of stock wishlist product comes back in stock triggers, so one webhook endpoint can tell them apart.{product_id}– The ID of the product involved (same two triggers as{trigger_type}){product_name}– The product’s name (same two triggers){product_price}– The product’s current price (same two triggers){product_regular_price}– The product’s regular, non-sale price (same two triggers){product_sale_price}– The product’s sale price (same two triggers){product_sku}– The product’s SKU (same two triggers)
- Activate: Set the status to Active and save your settings.
For example, your JSON payload might look like this:
{
  "customer_id": "{customer_id}",
  "name": "{customer_name}",
  "email": "{customer_email}",
  "wishlist": "{wishlist_name}",
  "wishlist_url": "{wishlist_url}",
  "created_at": "{created_date}"
}
This setup ensures your external app receives all the relevant wishlist and user information automatically.
Example use case
Every time a new wishlist is created for a user, you can trigger a webhook to add that customer’s details to a specific “Wishlist Users” segment in an external marketing tool like Mailchimp or Klaviyo.
Quick-start recipes
When you select Call a webhook as your action, a Quick start (optional) dropdown offers ready-made recipes for Mail Mint, Groundhogg, Noptin, Email Subscribers & Newsletters, Advanced Coupons, and FluentCRM. Picking one pre-fills the HTTP method (POST), the Content-Type: application/json header, and a payload template already shaped for that tool’s expected fields. For example, Noptin expects email and first_name. You only need to paste your inbound webhook URL from that tool.
Advanced Coupons is only offered for the When a wishlist product goes on sale and When an out of stock wishlist product comes back in stock triggers, and pre-fills a payload with the product’s ID, name, price, and SKU alongside the customer and wishlist fields. This is handy for triggering a price-drop coupon: paste Advanced Coupons’ own webhook endpoint as your Webhook URL, and it generates the coupon on its end. FluentCRM is offered for the A new wishlist is created, An item is added to a wishlist, and An item is removed from a wishlist triggers, and maps {customer_email} to FluentCRM’s own email field and {customer_name} to first_name, plus {wishlist_name} and {wishlist_url}. Each recipe only appears for triggers whose variables it needs. For example, Advanced Coupons won’t show up if you’ve picked A new wishlist is created.
Custom is still available in the same dropdown and behaves exactly as described in the steps above. You build the payload from scratch.
These recipes are a different mechanism from the tag/list sync available under Settings → Integrations for the same tools. See How to integrate SaveTo Wishlist with Mail Mint, How to integrate SaveTo Wishlist with Groundhogg, How to integrate SaveTo Wishlist with Noptin, How to integrate SaveTo Wishlist with Email Subscribers & Newsletters, and FluentCRM Integration for that separate setup.
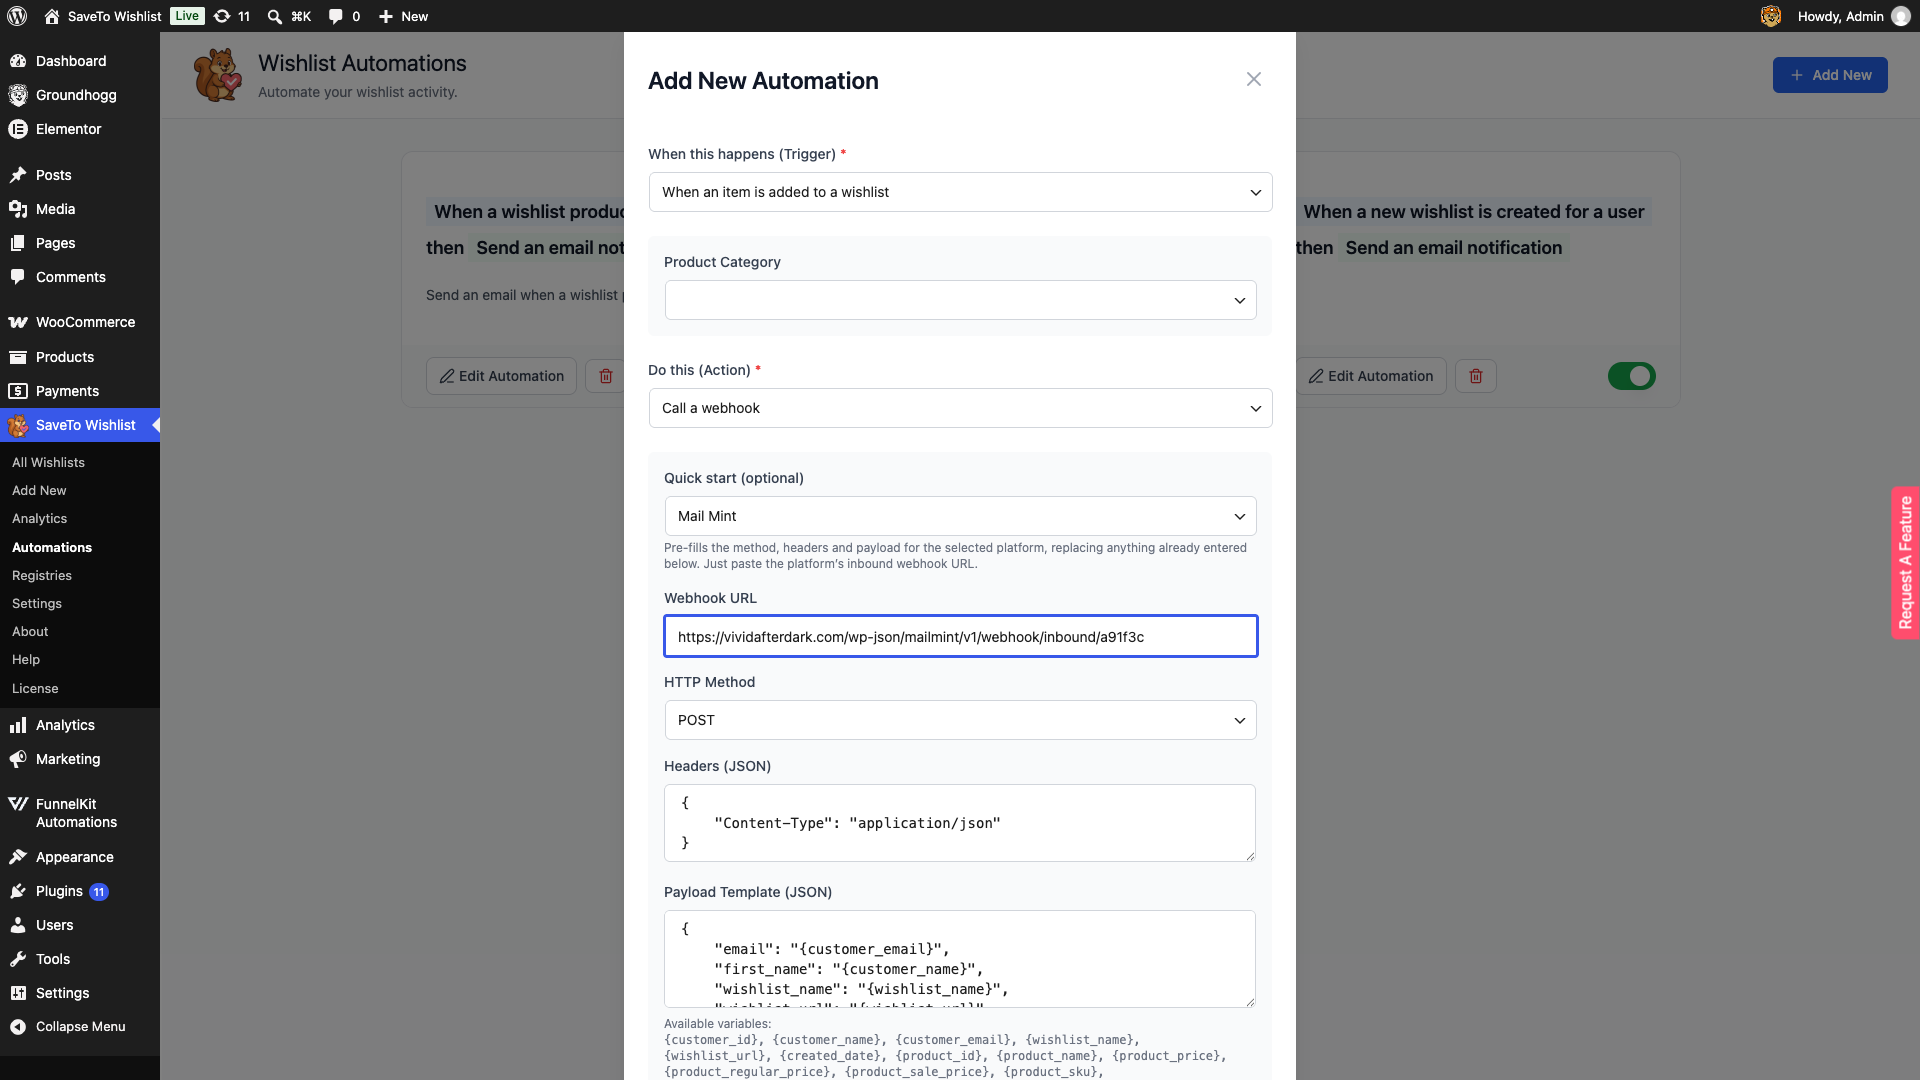
A ready-made webhook automation
You don’t always have to build a webhook from scratch. The first time SaveTo Wishlist Pro is activated, it creates a starter When a new wishlist is created for a user webhook automation for you. It ships switched off with an empty Webhook URL, so it never sends anything until you set it up. To use it, go to SaveTo Wishlist → Automations, click Edit Automation on that card, add your Webhook URL, then switch the toggle on. The steps above show what each field does.
Next steps
Webhooks bridge the gap between your WooCommerce store and the rest of your tech stack. Once configured, your customer data flows effortlessly to your chosen CRM. Try setting up a webhook with a service like Zapier to see how wishlist events can trigger hundreds of different third-party app actions.
Troubleshooting
The webhook never fires
Check the automation’s status is set to Active, and that its Webhook URL field isn’t empty. The seeded default automation ships switched off with no URL, so it stays silent until you fill it in and activate it.
The external app rejects the payload
Check that the Content-Type: application/json header is set, and that your Payload Template is valid JSON. A missing comma or quote anywhere in the template will send a malformed request.
A variable shows up literally instead of being replaced
Check the variable’s spelling against the list above, and confirm it’s available for the trigger you selected. Some variables, like {trigger_type} and the product fields, only resolve on specific triggers.
An expected recipe isn’t in the Quick start (optional) dropdown
Recipes are filtered by trigger, so each one only appears when the trigger you’ve picked can supply the variables it needs. Switch to a trigger the recipe supports, such as those listed for each recipe above.
Frequently asked questions
Do I need to write code to use webhooks?
No. The Quick start (optional) recipes need no coding at all. A Custom payload just needs valid JSON, which you can build by copying the example template above and swapping in the variables you need.
Why don’t I see a recipe I expected in the Quick start (optional) dropdown?
Each recipe only appears for triggers that can supply the variables it needs. Advanced Coupons only appears for the on-sale and back-in-stock triggers, and FluentCRM only appears for the wishlist-created, item-added, and item-removed triggers.
Need help?
- Premium users: submit a support ticket
- Free users: post in the WordPress.org support forum

