
If you run your email marketing with Noptin, SaveTo Wishlist can tag your subscribers automatically based on wishlist activity, so you can build automations around what customers want. This article explains what gets synced and how to use it.
Before you start
- Noptin installed and active.
- SaveTo Wishlist active. No extra settings are needed, the sync runs automatically once both are active.
- This works for logged-in customers, since a subscriber needs an email address.
What gets synced
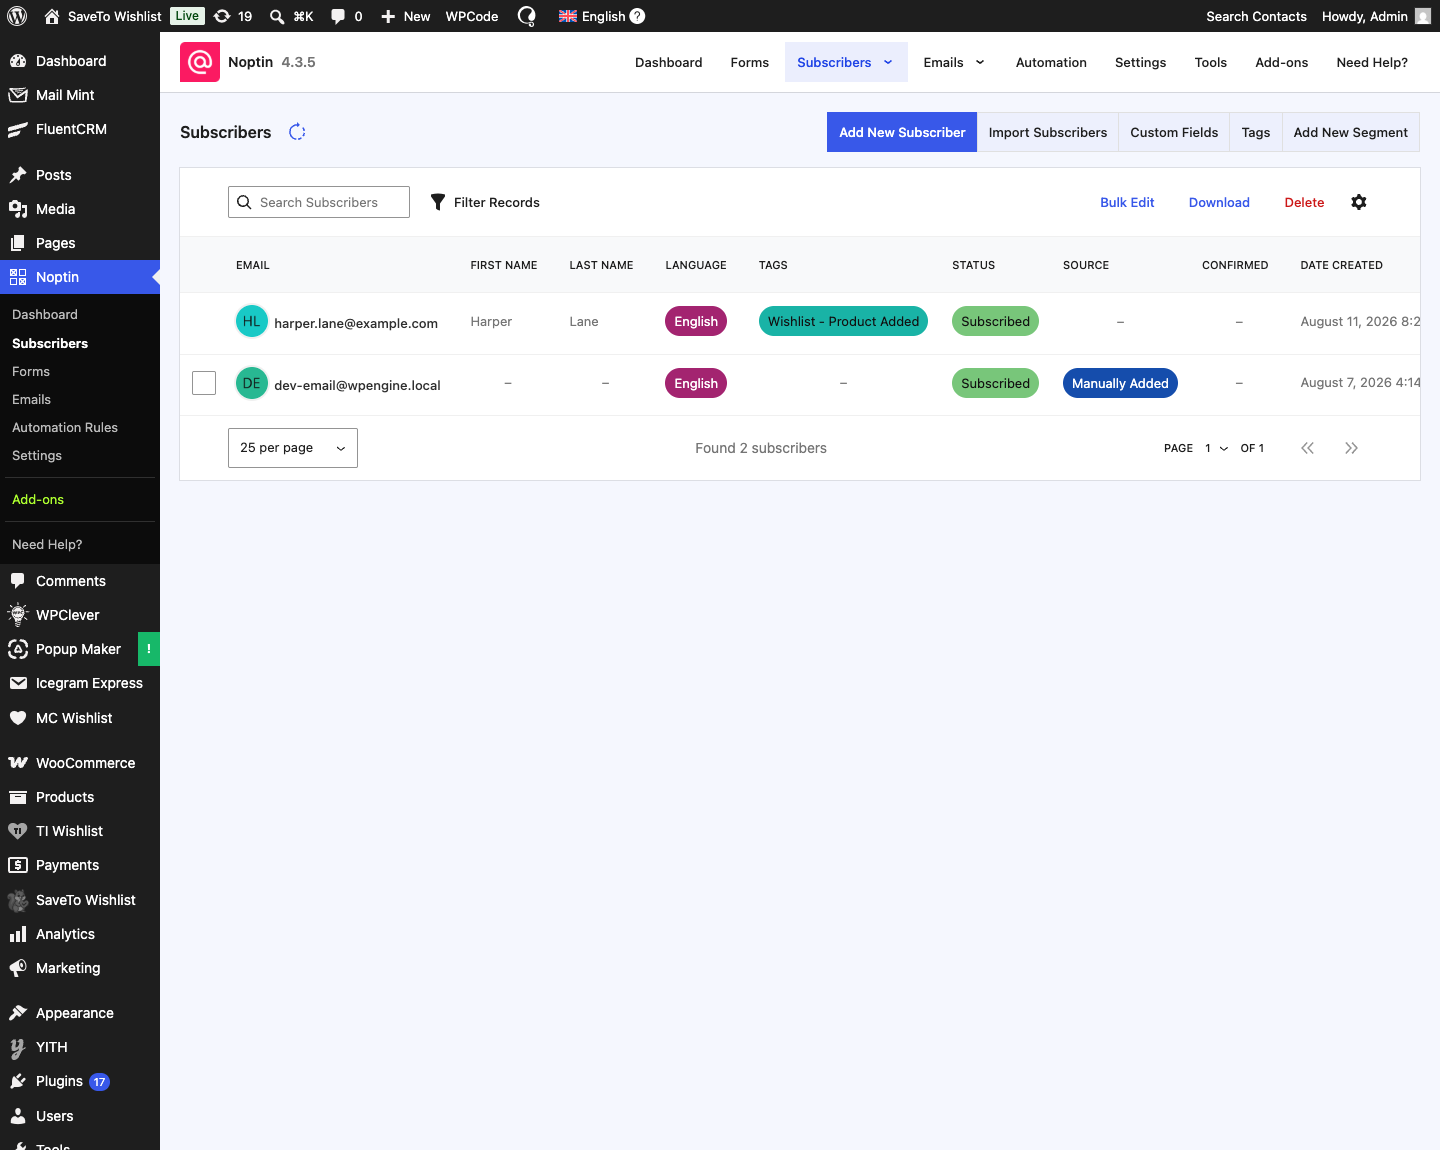
When a logged-in customer acts on a wishlist, SaveTo adds or updates their Noptin subscriber and applies a tag that matches the event. The tags are created automatically the first time each event happens:
- Wishlist – Product Added, when a product is added to a wishlist.
- Wishlist – Product Removed, when a product is removed.
- Wishlist – Saved, when a customer saves a wishlist.
How to use it in Noptin
- Make sure both Noptin and SaveTo Wishlist are active.
- As a logged-in customer, add a product to a wishlist to generate the first event.
- In Noptin, open the subscriber and confirm the wishlist tag appears.
- Create a Noptin automation that starts when one of these tags is applied, then add your follow-up steps.
Send wishlist events to Noptin with a webhook
SaveTo Wishlist Pro can post wishlist events straight to Noptin. A built-in quick start fills in the method, headers and payload for you, so there is no code to write. This is separate from the automatic sync above, and you can run both.
- In Noptin, create an inbound webhook and copy its URL.
- In WordPress, go to SaveTo Wishlist > Automations and create an automation.
- Pick a trigger under When this happens (Trigger).
- Set Do this (Action) to Call a webhook.
- Set Quick start (optional) to Noptin.
- Paste your webhook URL into Webhook URL.
- Save the automation.
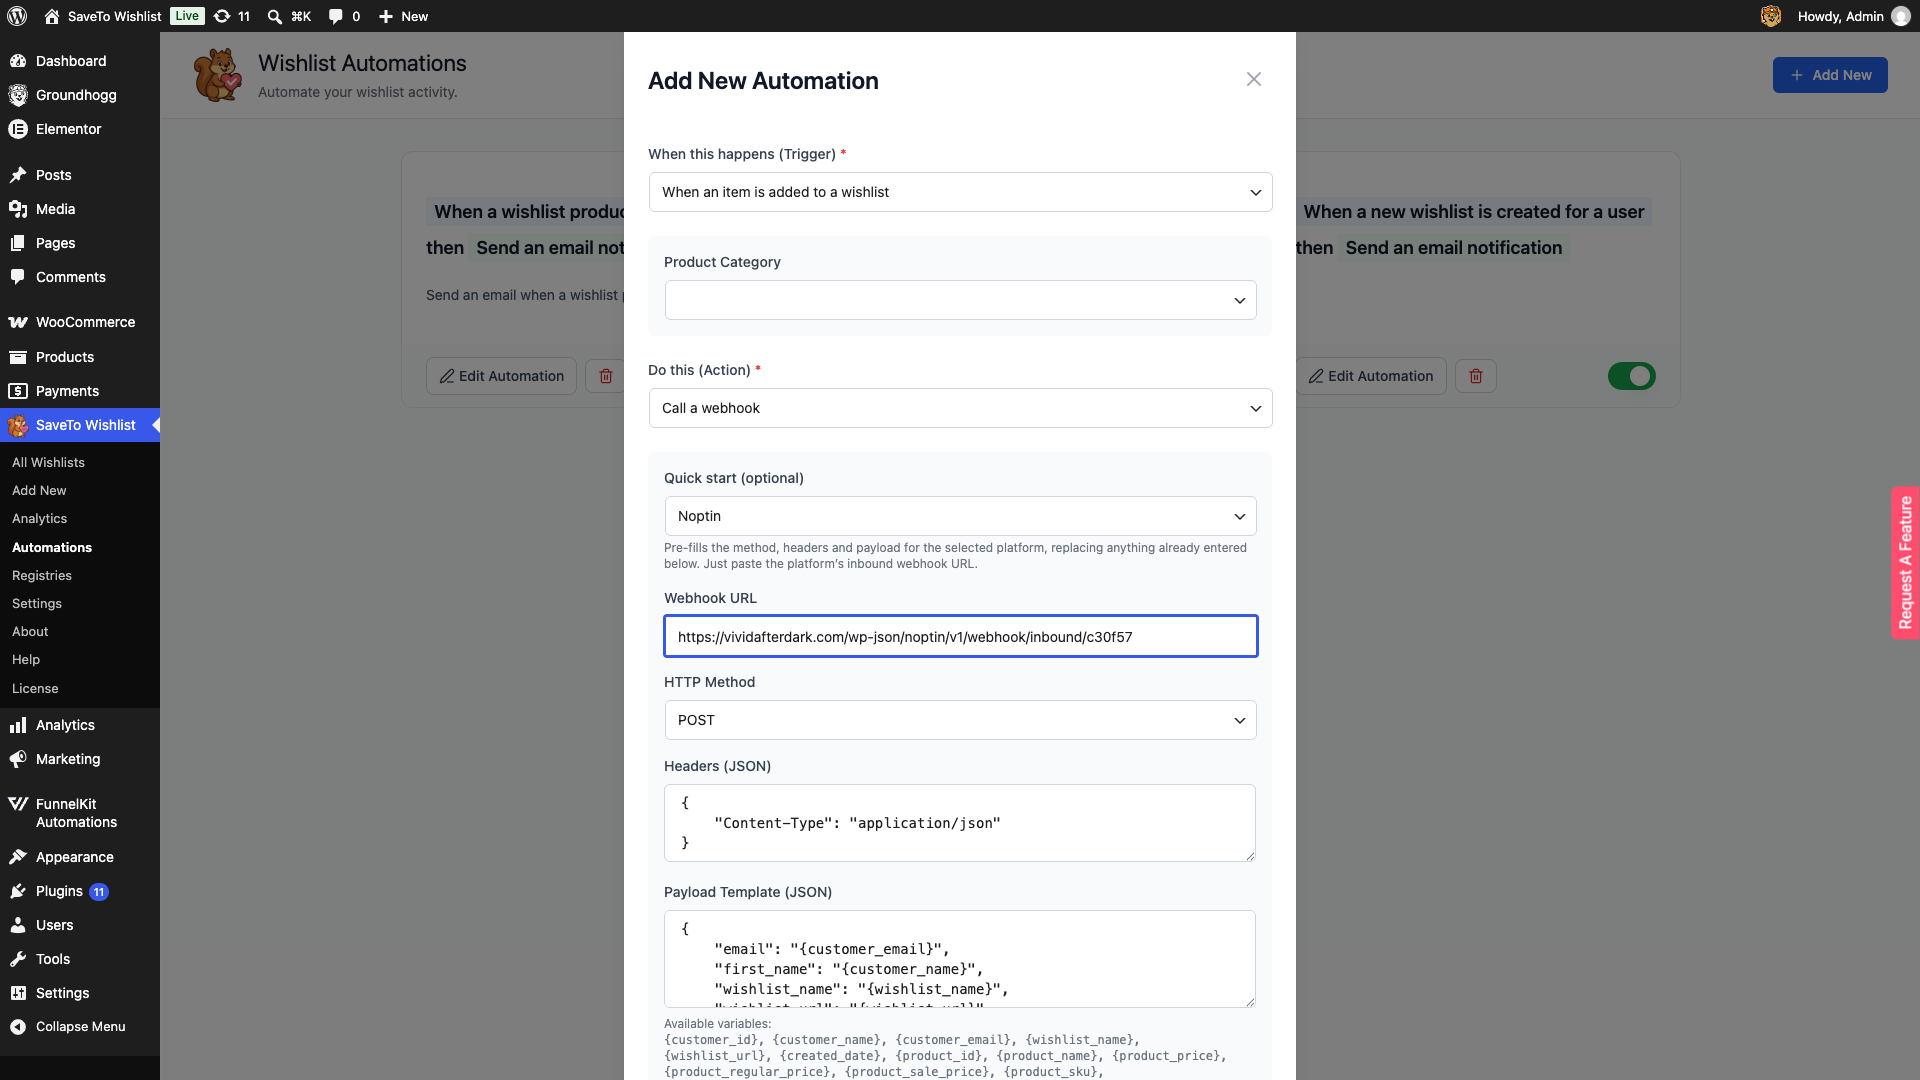
Choosing Noptin sets HTTP Method to POST, adds a Content-Type: application/json header, and writes a ready-made payload. It replaces anything already entered in those fields, so pick the quick start before you customise them.
Triggers the quick start supports
The quick start is offered on three triggers:
- When a new wishlist is created for a user
- When an item is added to a wishlist
- When an item is removed from a wishlist
It is not offered on When a wishlist product goes on sale or When an out of stock wishlist product comes back in stock. Those two triggers work across a list of wishlists rather than one customer, so the customer details in the payload have nothing to resolve to. Use the email action for those instead.
Available placeholders
The payload uses these variables. Each resolves per customer when the automation runs.
| Placeholder | Resolves to |
|---|---|
{customer_email} | The customer’s email address, used to match or create the Noptin contact |
{customer_name} | The customer’s name, sent as first_name |
{wishlist_name} | The name of the wishlist that triggered the event |
{wishlist_url} | A link to that wishlist |
You can edit Payload Template (JSON) after applying the quick start to add or remove fields.
Frequently asked questions
Do I need to configure anything in SaveTo?
No. As long as Noptin is active, the sync runs on its own.
Are guests synced?
No. Only logged-in customers with an email address are added as subscribers.
What happens if someone has unsubscribed?
They are left alone. A contact who opted out is never re-subscribed or re-tagged by wishlist activity.
Can I rename the tags?
The default names are shown above. A developer can change them with the stwlite_noptin_event_tags filter.
Need help?
If you have a question or run into any issues, we’re here to help.
- Premium users: Open a support ticket
- Free users: Visit our community forum

