
 Reviewed by
 Your customers are telling you what they want to buy. Every time someone saves a product to a wishlist, that’s a clear buying signal sitting in your WooCommerce store. The problem is that most of those signals never leave your database. They don’t reach your email tool, your CRM, or the person who could act on them.
That’s a lot of intent going to waste. Shoppers who save items are far closer to buying than a random visitor. Yet their wishlist activity usually stays locked inside WordPress.
This guide shows how to set up a WooCommerce Zapier connection for your wishlist using webhooks. A saved product can then trigger an email, a Slack ping, new Google sheets rows, or a Klaviyo flow. No custom code required.
Table of Contents
- What Is A Wishlist Webhook, And Why Does It Matter?
- What You Can Automate With Wishlist Webhooks
- How To Connect WooCommerce Wishlists To Zapier
- Real Wishlist Automations Worth Setting Up
- Webhooks Vs The Wishlist REST API: Which Should You Use?
- Frequently Asked Questions: WooCommerce Zapier + Wishlists
- Put Your Wishlist Data To Work
What Is A Wishlist Webhook, And Why Does It Matter?
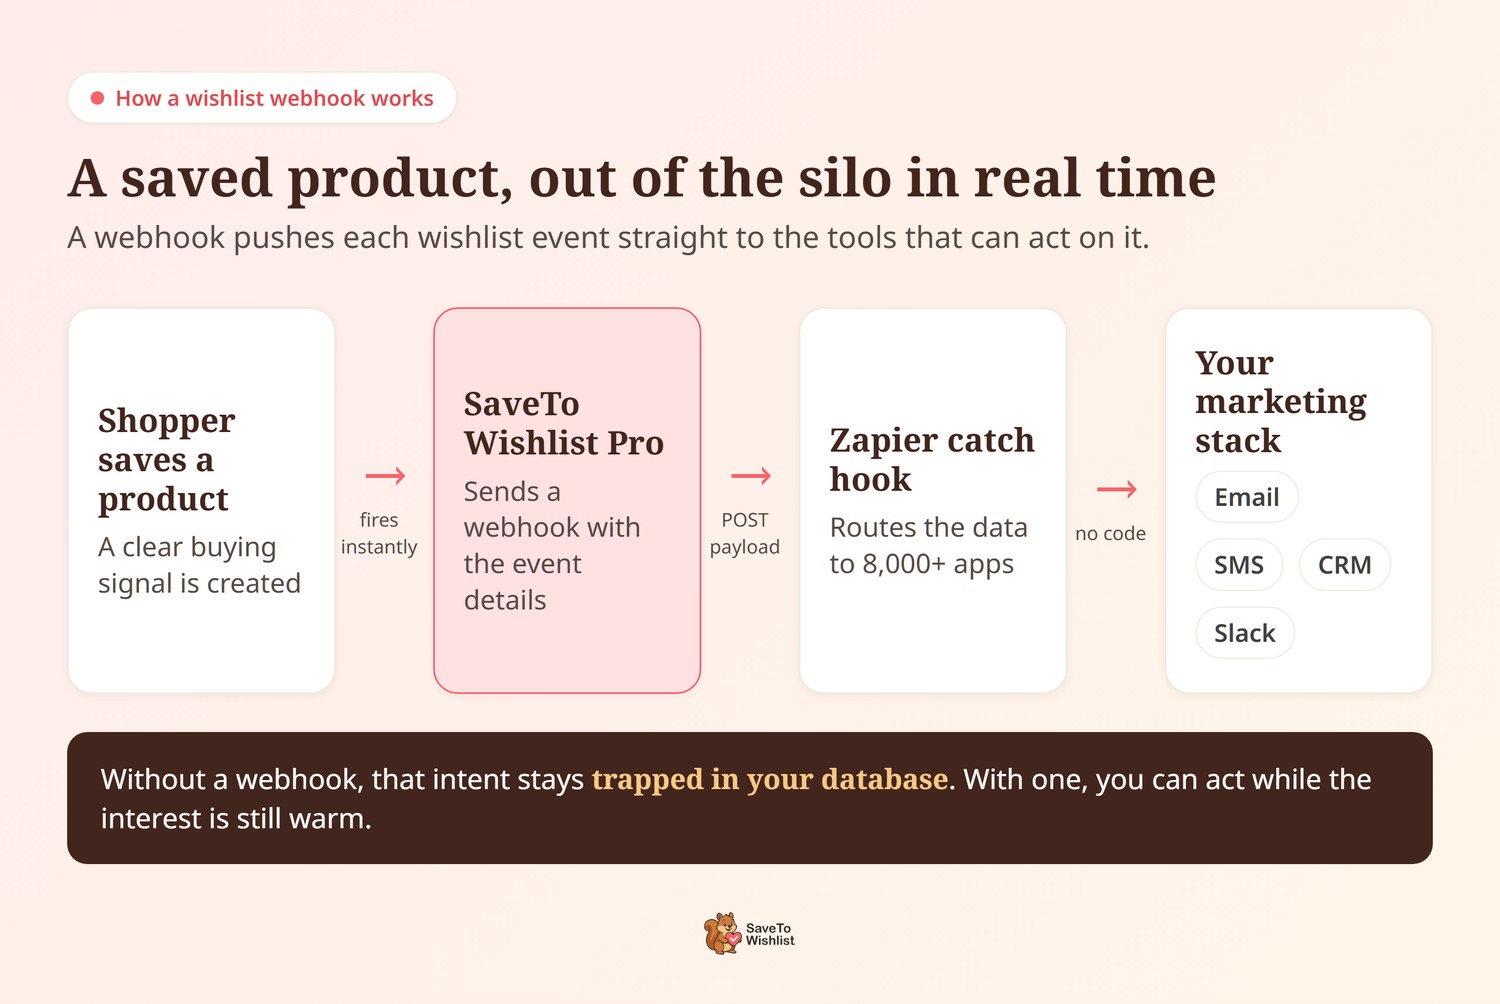
A webhook is like a small, automatic digital messenger. The exact second a shopper creates a wishlist or saves a product, SaveTo Wishlist Pro fires off a webhook. This messenger instantly carries all the details of that event to any digital destination you choose.
That destination can be almost anywhere. By pointing the webhook at a Zapier account, you can route your wishlist activity into more than 8,000 different apps, all without touching a single line of code.
But why should you go through the trouble of setting this up? The answer comes down to breaking down data silos.
In most WooCommerce stores, brilliant customer data gets trapped inside the WordPress database. Your store knows exactly what your shoppers want to buy next, but your email platform, your text messaging software, and your CRM are completely blind to it. That data is sitting in a silo, doing absolutely nothing.
Webhooks smash those silos. Moving this wishlist data into your favorite marketing tools in real time means you can act while a customer’s interest is still fresh. Instead of letting warm leads go cold inside your database, you can use that instant data to drive real sales.
What You Can Automate With Wishlist Webhooks
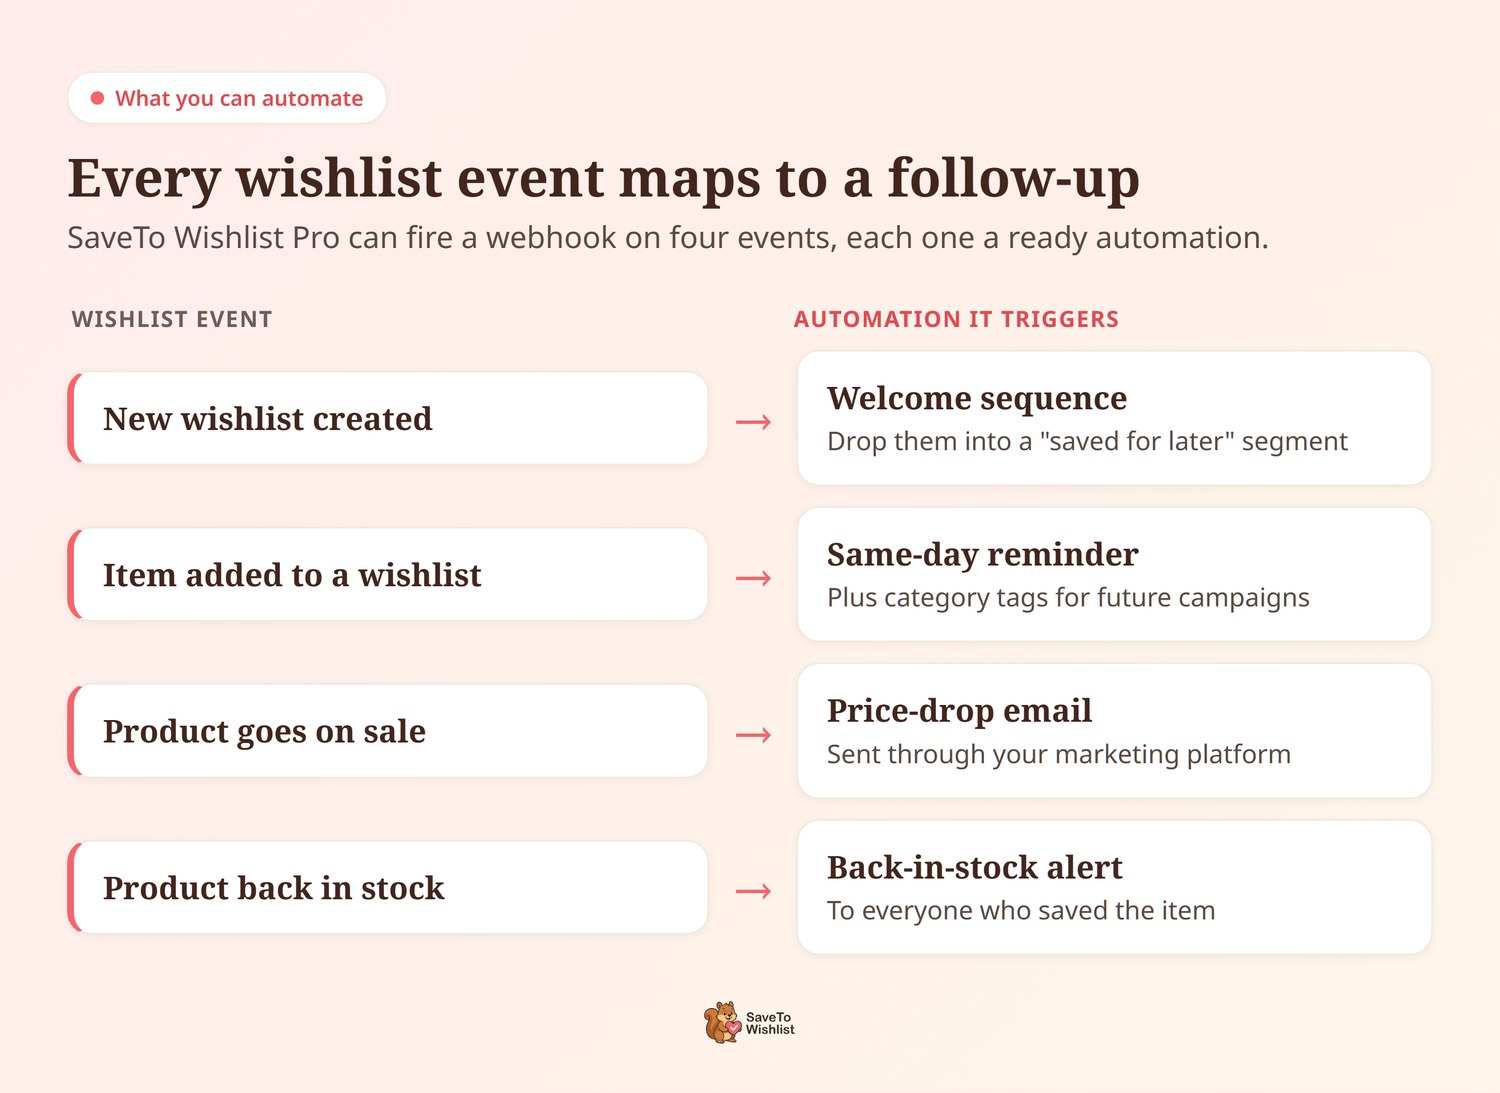
Once wishlist events flow into Zapier, you can build almost any follow-up you want. SaveTo Wishlist Pro can trigger a webhook on several events. Each one opens up a different automation.
- New wishlist created: Instantly add new WooCommerce customers to a welcome sequence or a “saved for later” segment.
- Item added to a wishlist: Send a gentle reminder later that day, or trigger an automated email showcasing related products based on the exact category they saved.
- Product goes on sale: Trigger a price-drop email through your marketing platform.
- Product back in stock: Notify everyone who saved it that it’s available again.
The webhook itself carries useful details you can map in Zapier. That includes the customer’s name and email, the wishlist name, the wishlist URL, and the date. From there, the shopper’s next step is up to your imagination.
How To Connect WooCommerce Wishlists To Zapier
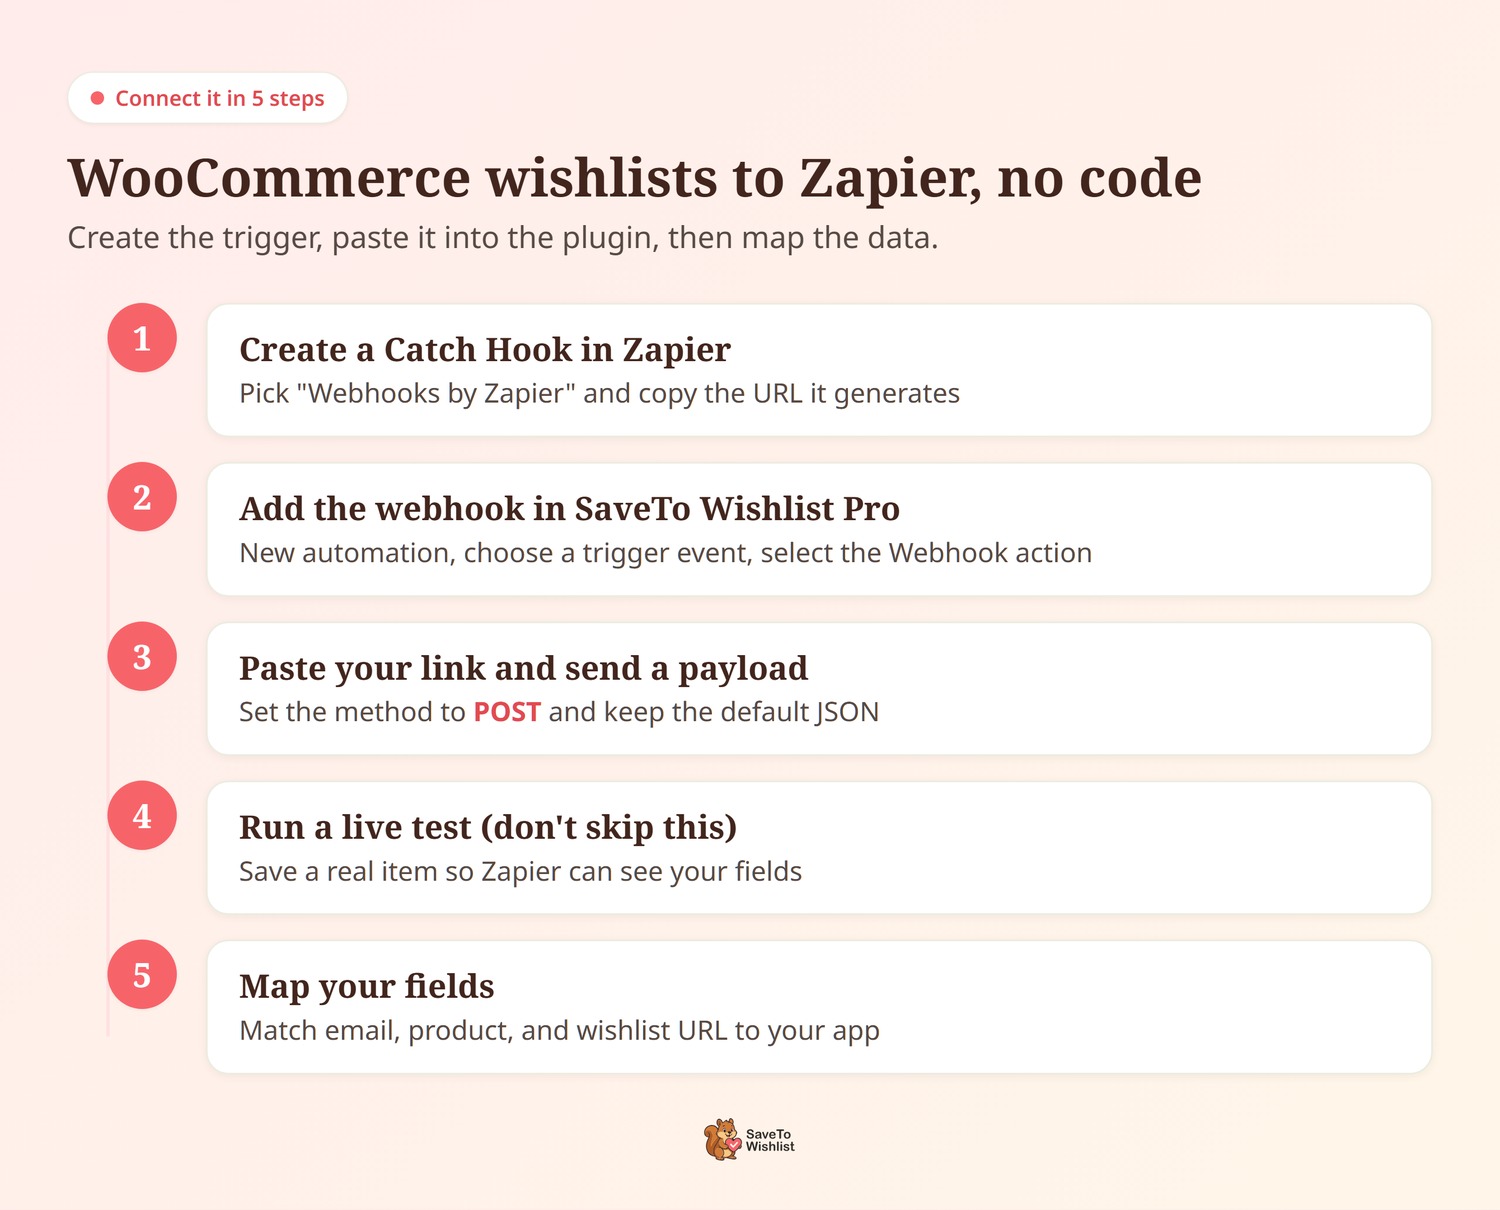
Setting up a Zapier integration for WooCommerce to handle your wishlist data is a lot easier than it sounds. You do not need to be a programmer or know how to write code. You just need to create a trigger link in Zapier, paste it into your WordPress dashboard, and tell the system where to send the data.
Here is exactly how to do it:
Step 1: Create a Catch Hook in Zapier
Log into your Zapier account and start a new “Zap.” For your trigger app, choose Webhooks by Zapier. Under the event settings, select Catch Hook and click continue. Zapier will instantly generate a unique, long URL link. Copy this link to your clipboard.
Step 2: Add the Webhook to SaveTo Wishlist Pro
Now, open up your WordPress dashboard. Navigate to your SaveTo Wishlist Pro settings and look for the Automations tab. Create a new automation and select your trigger event, like “Item added to wishlist.” Under the action settings, choose “Webhook.”
Step 3: Paste your link and send a payload
Paste the unique URL you copied from Zapier into the Webhook URL box. Set the request method to POST, and leave the payload set to the default JSON option. (Don’t worry about the word “JSON”—it just means the data is neatly packed into a standard text format that Zapier understands). Click save.
Step 4: Run a live test (Don’t skip this!)
The most common mistake store owners make is trying to finish the setup without running a test. Go to your front-facing online store, act like a regular shopper, and add an item to a wishlist. This forces the plugin to send a real chunk of data down the pipeline.
Step 5: Map your fields
Go back to Zapier and click “Test Trigger.” Because you just ran a live test, Zapier will successfully catch the data and display fields like the customer’s email, the product name, and the wishlist URL. Now, you can connect your destination app—like Mailchimp or Slack—and easily map those wishlist fields to the right spots.
If you skip the live test in Step 4, Zapier won’t know what kind of information your store is sending. You’ll be left trying to type out data fields completely blind. Always trigger that first test save to make sure everything connects smoothly.
Real Wishlist Automations Worth Setting Up
You might be wondering: If SaveTo Wishlist Pro already sends price-drop and back-in-stock emails natively, why do I need Zapier?
The answer is omnichannel marketing. While native plugin emails are great, Zapier allows you to connect your wishlist data to different communication channels and advanced marketing tools. This lets you build complex, multi-step campaigns that basic emails simply can’t handle.
Here are the highest-value automations you should build first:
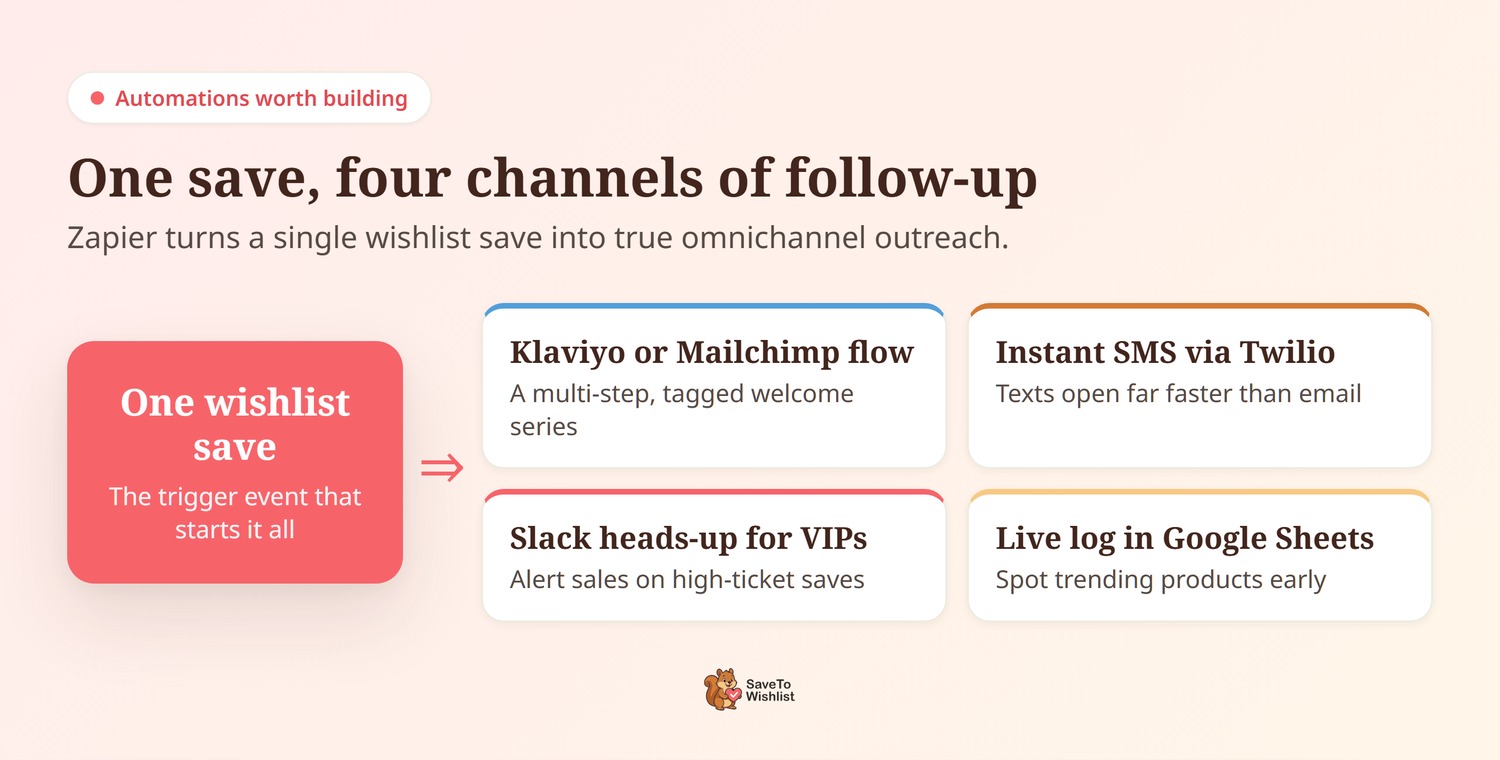
1. Trigger a highly personalized Klaviyo or Mailchimp flow
Native alerts are usually simple notifications. By routing a “wishlist created” trigger to a tool like Klaviyo through Zapier, you can drop that customer into a beautifully designed, multi-step welcome series. You can tag their profile with the exact product category they saved, allowing you to send them personalized content for months to come.
2. Send instant text alerts via Twilio
People open text messages much faster than they open emails. You can set up a Zap that fires when a high-intent item goes on sale, automatically texting the shopper a quick update like, “Hey! The item on your wishlist is 20% off today only.”
3. Give your VIP sales team a Slack heads-up
If you sell high-ticket items, like expensive jewelry or custom furniture, you don’t want to rely on automated emails alone. You can set up an automation that sends a message to your team’s Slack channel or triggers Zapier to create Trello cards for your sales reps whenever someone saves a product worth over $500. This gives your sales team a chance to reach out personally and offer a white-glove buying experience.
4. Log live intent on a Google Sheet
Sometimes you just want to see the big picture. You can set up a simple Zap that sends every single wishlist save into a running Google Sheet. Much like sending completed WooCommerce orders to Google Sheets for revenue tracking, this gives you a live, easily shareable dashboard where your inventory manager can spot trending products weeks before they actually sell out.
You don’t need all of these on day one. Even the saved-item reminder alone recovers interest that would otherwise disappear. For more on reading these signals, see how wishlist data feeds your WooCommerce CRM.
Webhooks Vs The Wishlist REST API: Which Should You Use?
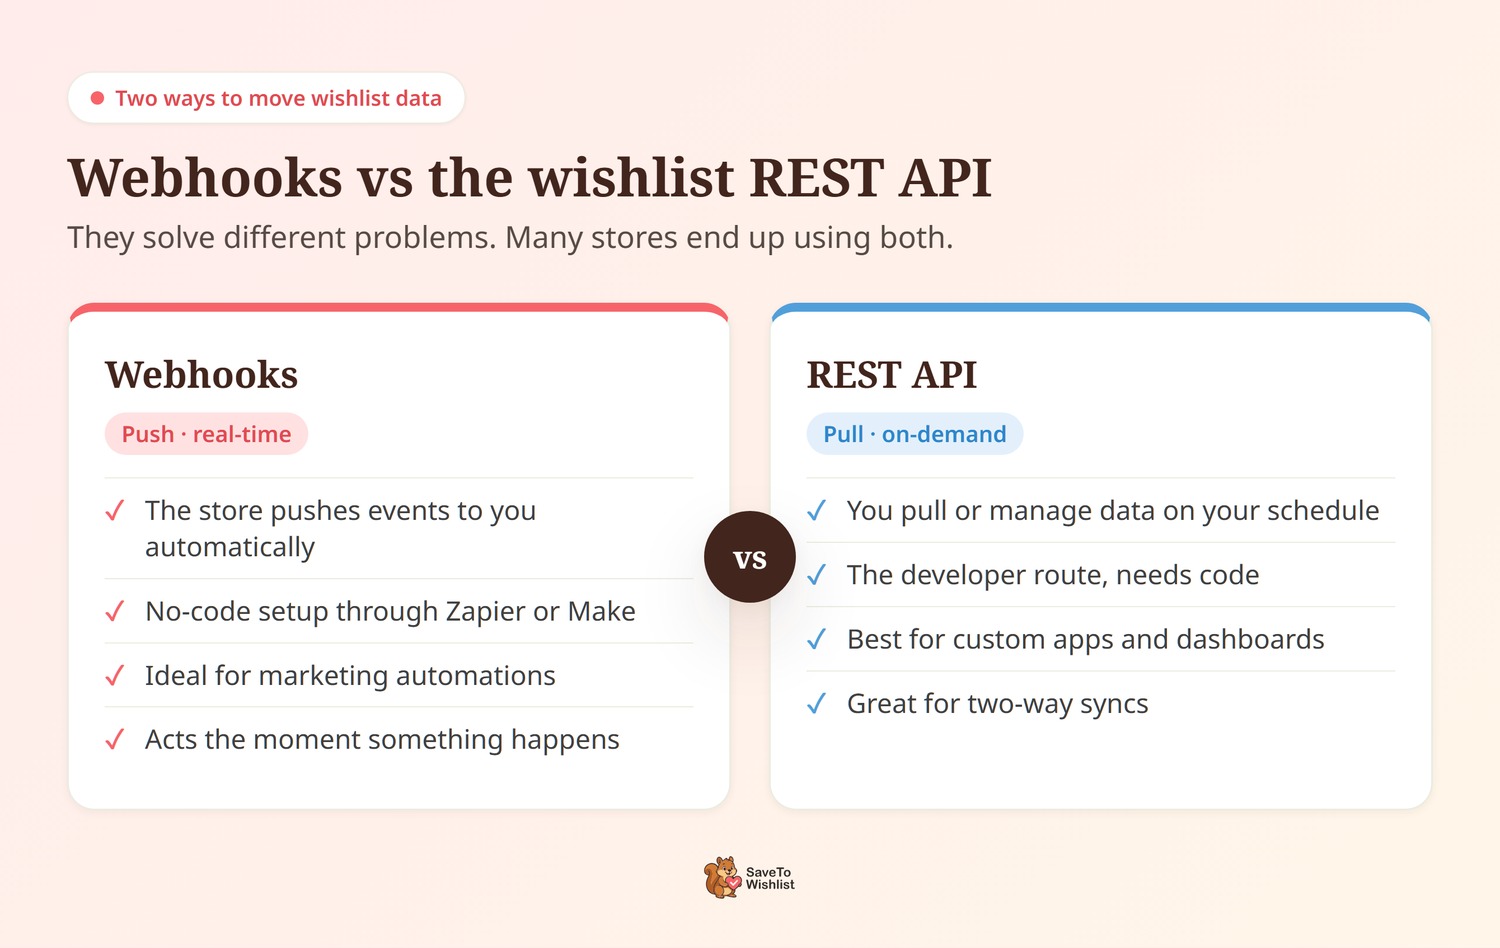
Use webhooks when you want events pushed to you automatically. Use the REST API when you want to pull or manage wishlist data on your own schedule. They solve different problems.
Webhooks are the no-code, real-time option. The store tells the app the moment something happens, which is ideal for marketing automations. The wishlist REST API is the developer route. It suits custom apps, reporting dashboards, or two-way syncs where you request data when you need it.
Many stores end up using both. If you have a developer on hand, our WooCommerce wishlist REST API developer guide covers that path in detail.
Frequently Asked Questions: WooCommerce Zapier + Wishlists
Do I need to know how to code to connect a wishlist to Zapier?
No. The webhook action in SaveTo Wishlist Pro gives you the URL and payload. Zapier handles the connection to your other apps through its visual builder. You paste a URL and map a few fields.
Can I connect my wishlist to Klaviyo or Mailchimp?
Yes, through Zapier or Make. SaveTo Wishlist Pro sends a standard outgoing webhook, which Zapier passes into Klaviyo, Mailchimp, and thousands of other apps. It isn’t a native integration, but the automation works the same way for you.
What wishlist events can trigger a webhook?
Events include a new wishlist being created, an item being added, a saved product going on sale, and a saved product coming back in stock. Each event sends details like the customer email, wishlist name, and wishlist URL.
Is the webhook feature in the free version?
No. Webhook automations are part of SaveTo Wishlist Pro. The free plugin covers wishlists themselves. Pro adds the automations, alerts, and webhook actions that connect wishlist data to your other tools.
Can wishlist webhooks help build my mailing list?
Whenever a guest creates an account to save a favorite item, you can use a webhook to automatically add new WooCommerce customers straight into your email marketing platform.
Can I use webhooks to sync wishlist users with my CRM?
Yes. If you want to save new WooCommerce clients to your CRM platform, simply map the webhook’s email and name fields in Zapier to automatically generate a new contact profile the moment a wishlist is created.
Can wishlist automations change a customer’s shipping method?
No. Wishlist webhooks are designed purely for marketing and data tracking. They do not alter core checkout settings, such as a customer’s chosen shipping method or payment details.
Does this setup work well for recurring products?
Yes. If you sell recurring services or boxes, customers can still save them. You can use Zapier to send targeted reminders that help turn those saved items into active WooCommerce subscriptions.
Will these webhooks slow down my daily store operations?
Not at all. Webhooks run quietly in the background on your server, ensuring your team can handle standard order fulfillment and shipping without any lag or interruption from your marketing automations.
Put Your Wishlist Data To Work
Wishlist activity is one of the cleanest buying signals your WooCommerce store collects. With a WooCommerce Zapier connection, it no longer sits idle. A single webhook turns a saved product into an email, an alert, or a follow-up that brings the shopper back.
- What is a wishlist webhook: a real-time message your store sends when someone saves a product.
- What you can automate: reminders, price-drop and back-in-stock alerts, and more.
- How to connect to Zapier: create the catch hook, paste it into a Pro automation, map the fields.
- Webhooks vs the REST API: push events with webhooks, pull data with the API.
Ready to automate your wishlist? Connect your first webhook today with SaveTo Wishlist Pro.