
 Reviewed by
 A shopper saves a product to a wishlist. They want that item, just not today. Most WooCommerce stores record that signal and then leave it sitting there.
Your email tool usually can’t see any of it. It knows who bought and who opened. It has no idea who is circling a product, waiting for a reason to commit.
The FluentCRM integration in SaveTo Wishlist Lite closes that gap. FluentCRM is a marketing automation plugin for WordPress, so everything runs inside the same site as your store. The integration turns wishlist activity into contact tags. Those tags can then start a FluentCRM wishlist automation.
We’ve seen store owners assume a link like this needs a developer. It doesn’t. Below, I’ll cover what it tracks, how to set it up, and where its limits sit.
Jump to:
- Why Wishlist Activity Belongs In Your Email Tool
- What The FluentCRM Integration Does
- What You Need Before You Start
- How To Set Up The FluentCRM Integration
- How To Trigger A FluentCRM Wishlist Automation With Tags
- Wishlist Segments Worth Building First
- Limits To Know Before You Rely On Wishlist Tags
- Frequently Asked Questions: FluentCRM Wishlist Automation
- Put Your Wishlist Data To Work
Why Wishlist Activity Belongs In Your Email Tool
A wishlist save is one of the clearest buying signals a store collects, yet most stores never act on it.
Think about how many shoppers slip away before checkout. Baymard Institute puts the average documented cart abandonment rate at 70.22%. That average draws on 50 separate studies, last updated in September 2025.
Email marketing automation is how stores win some of that back. In Omnisend’s 2025 data, automated emails were only 2% of sends. Still, they drove 30% of all email revenue. Per send, that’s $2.87 against $0.18 for scheduled campaigns.
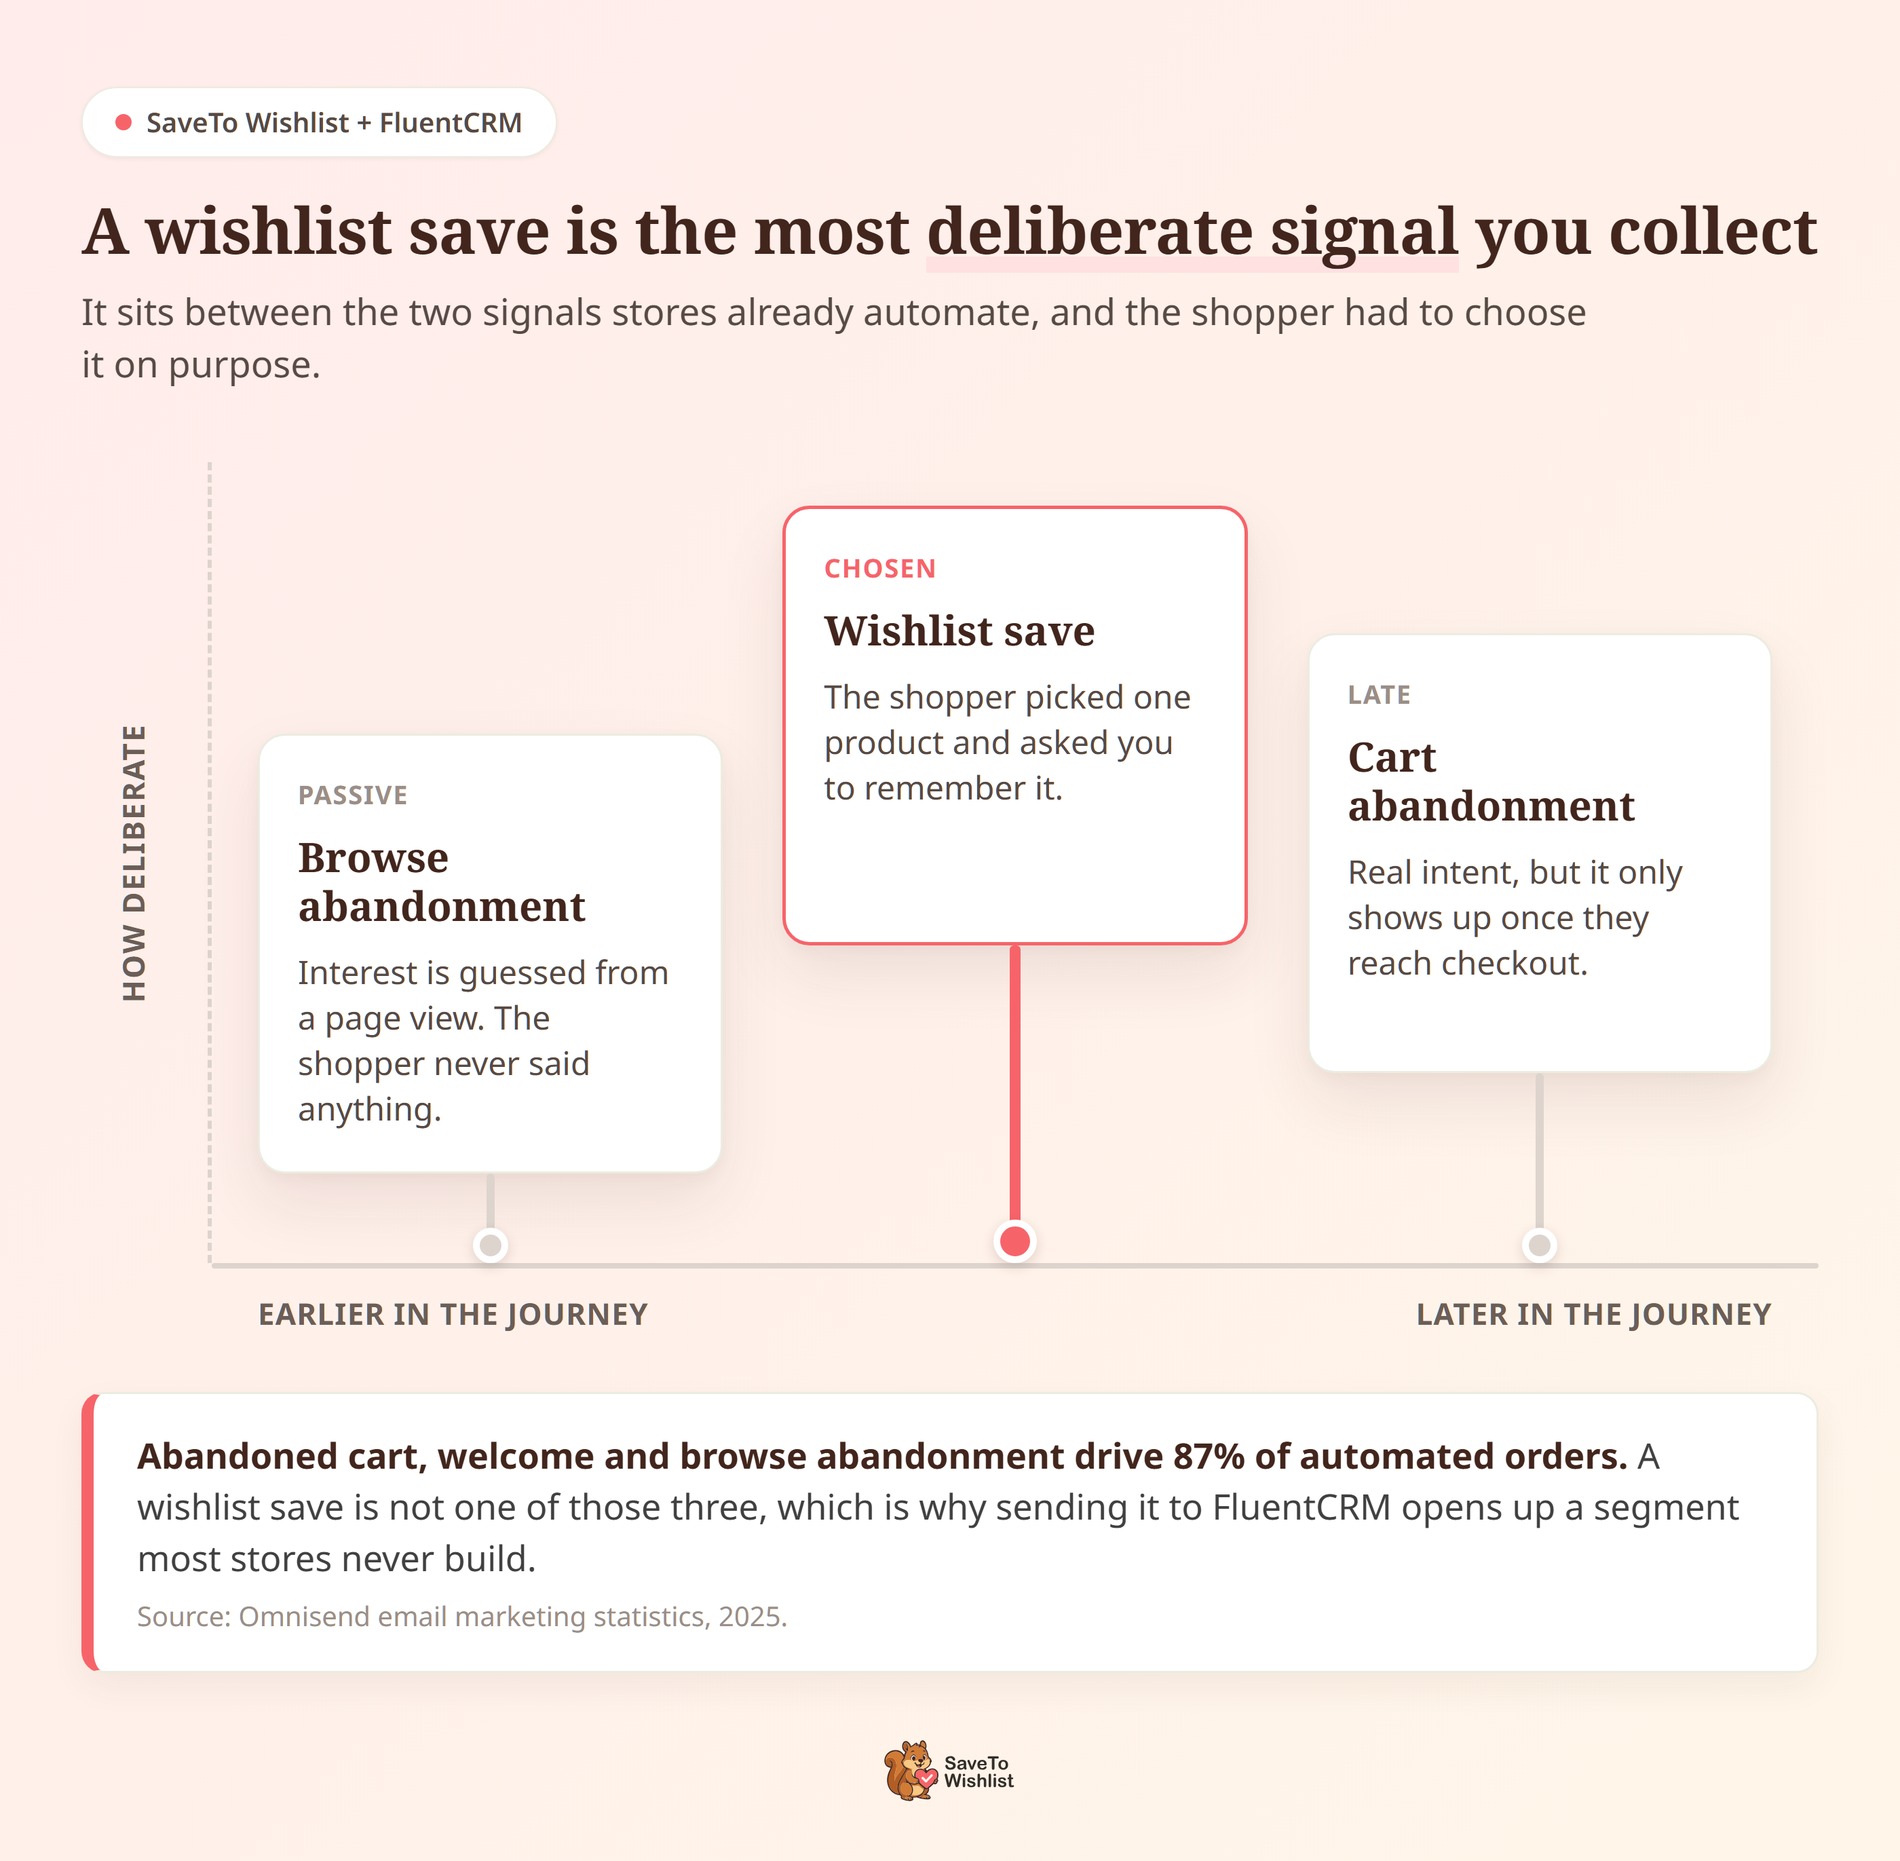
However, look at which automations do that work. Abandoned cart, welcome, and browse abandonment emails made up 87% of automated orders. Browse abandonment guesses at interest from a page view. Cart abandonment waits until someone has already committed.
A wishlist save sits between those two, and it takes more thought than either. The shopper picked one specific product. Then they asked you to remember it.
In other words, it’s zero-party data: information the customer handed over on purpose. As a result, it belongs in the same system that decides who gets which email.
What The FluentCRM Integration Does
It turns wishlist events into FluentCRM contact tags. You pick the tags. SaveTo Wishlist attaches and detaches them. From there, a FluentCRM automation decides what happens next.
There are two tag mappings, covering three wishlist events:
- Added to wishlist tag: attached when a customer adds a product, then detached when they remove one. Both events share this single mapping, so one tag does double duty.
- Wishlist saved tag: attached when a customer saves a wishlist.
Setting up your FluentCRM wishlist automation stays short because everything runs through FluentCRM’s on-site API. There’s no API key to paste, no webhook to configure, and no outside service in the middle. Both plugins simply need to be active on the same WordPress site.
It also costs nothing extra. The integration arrived in SaveTo Wishlist Lite in version 1.0.9, which makes it part of the free plugin, so SaveTo Wishlist Pro isn’t required. On the FluentCRM side, the integration works with both the free and Pro versions.
What the integration doesn’t send
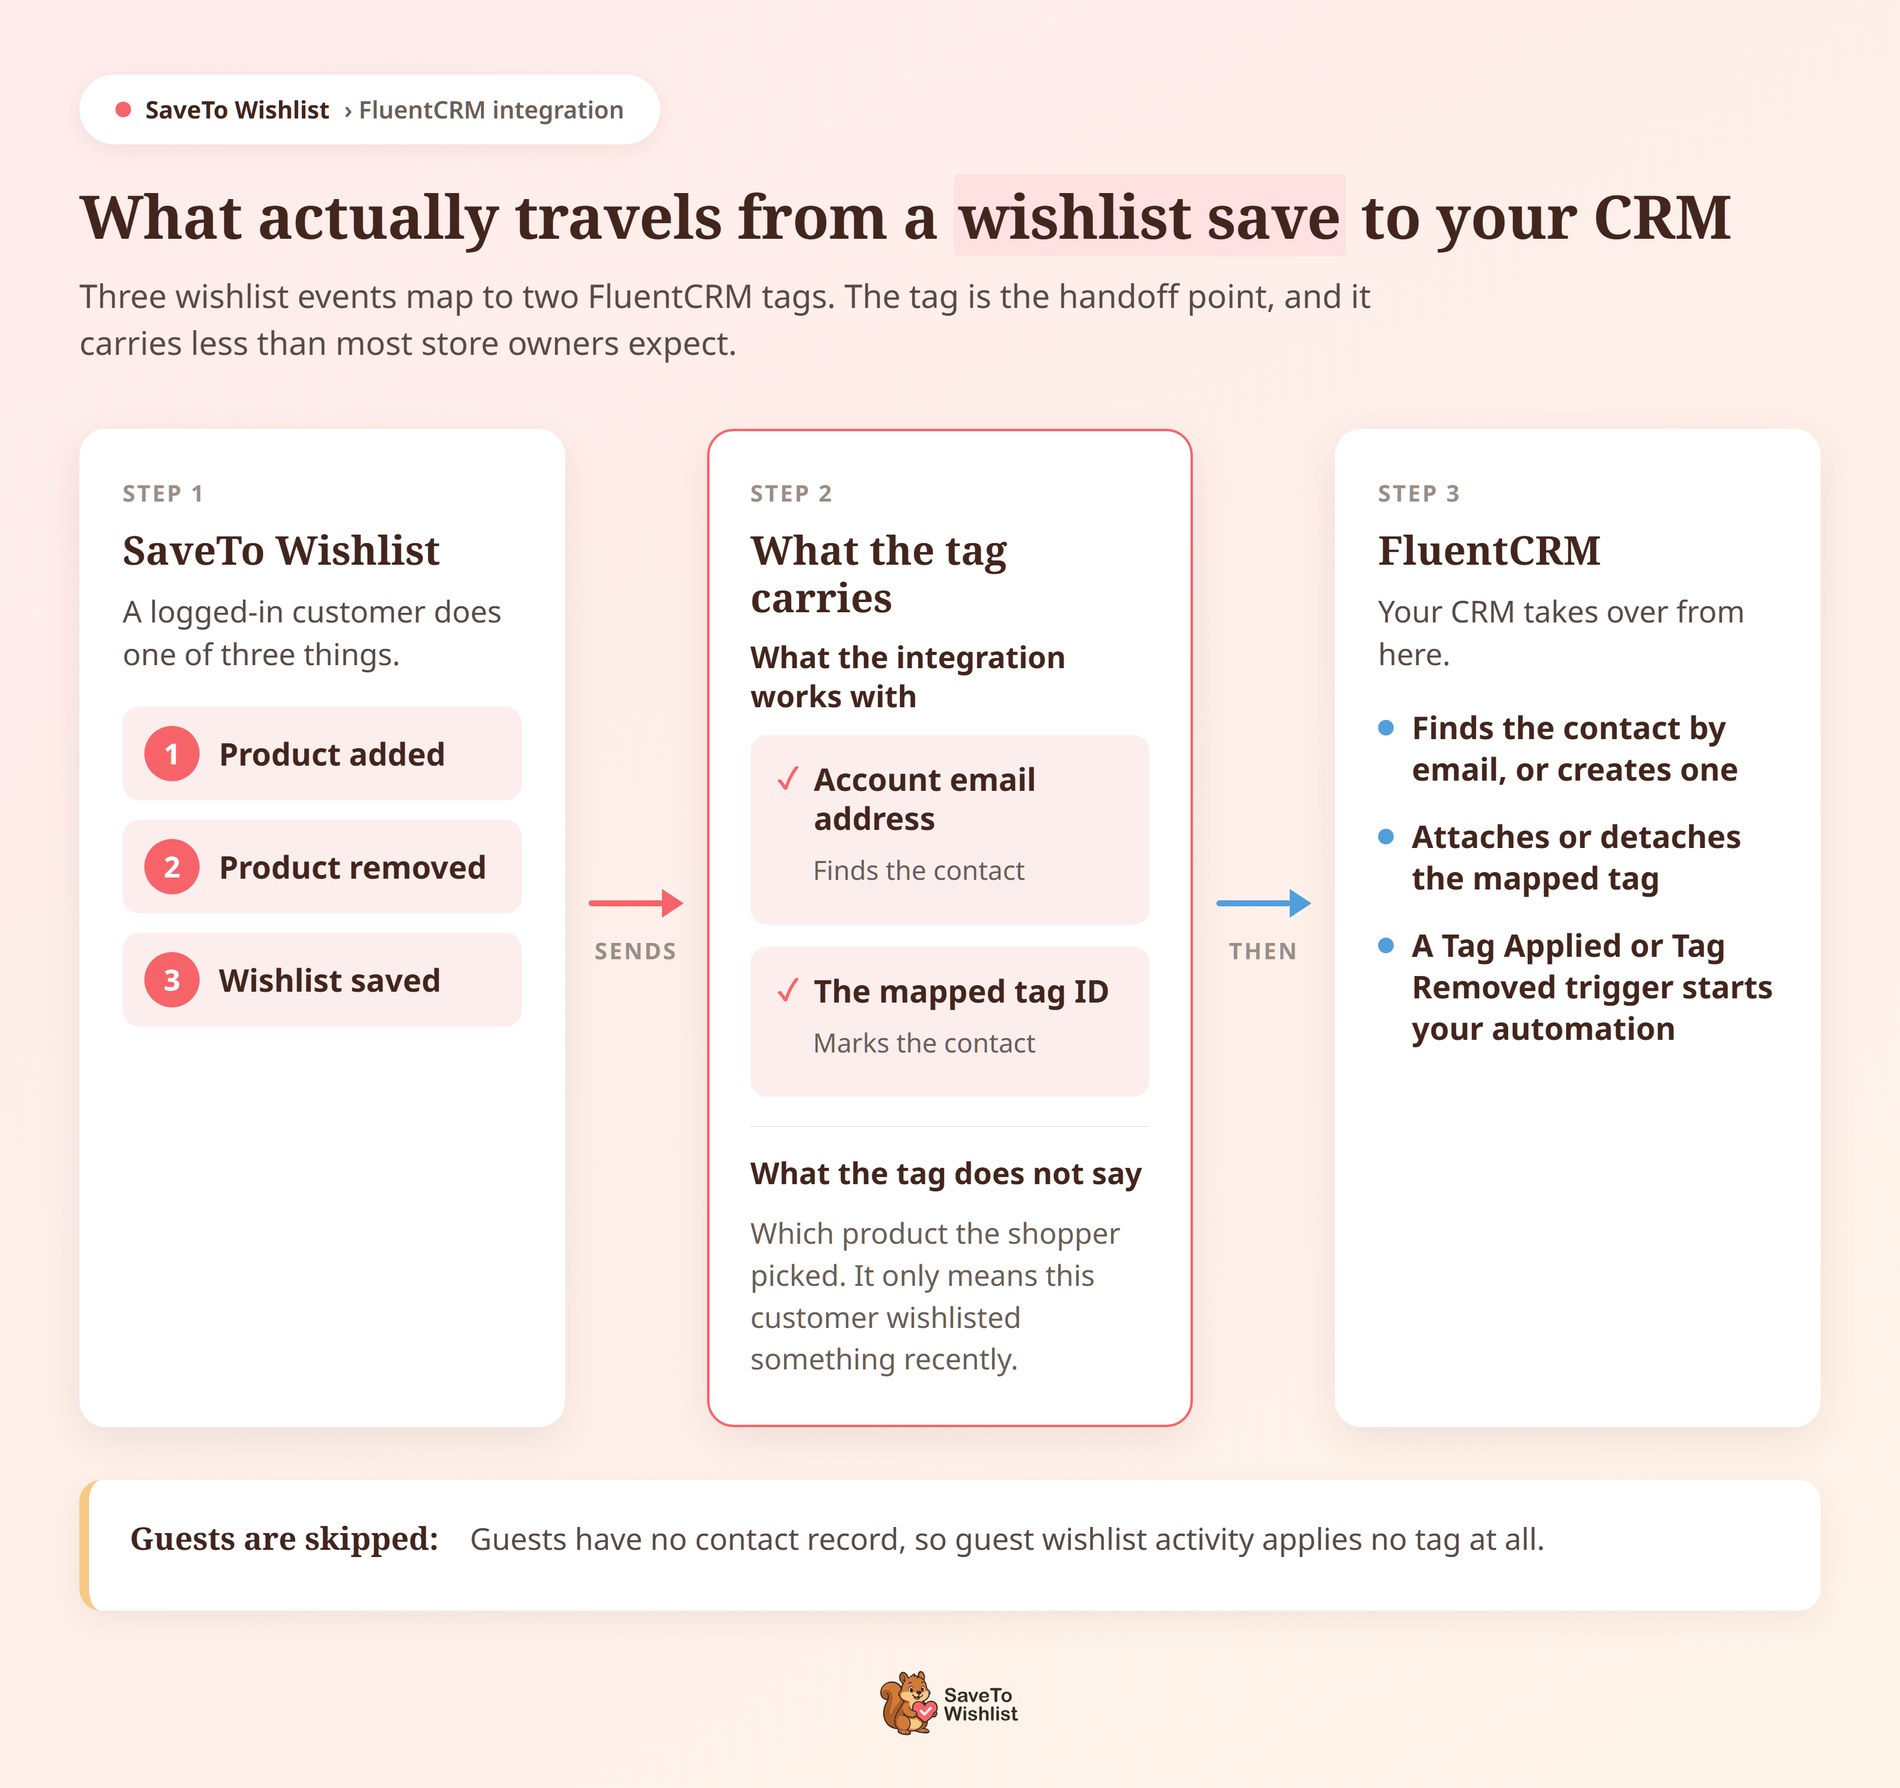
The integration works with two values: the wishlist owner’s account email, which finds the right contact, and the ID of the tag you mapped, which marks it.
Because this specific tag-based integration is designed to be lightweight, the product data itself doesn’t cross over. While FluentCRM has deep, dynamic WooCommerce capabilities for other e-commerce triggers, a FluentCRM wishlist automation built strictly on these tags won’t name the specific item.
Guest activity is skipped as well. A tag has to land on a contact record, and a contact record needs an email address, so the shopper has to be logged in. In practice, that keeps your contact list made up of identifiable shoppers rather than anonymous records.
What You Need Before You Start
Three things, and that’s the whole list.
- FluentCRM installed and active on your WordPress site. This integration is fully compatible with both the free and Pro versions of FluentCRM.
- At least one FluentCRM tag, created before you start, since SaveTo Wishlist lists your tags but never creates them
- Customers who are logged in, with an email address on the account. That email is how the tag finds the right contact.
On the SaveTo Wishlist side, you need Lite 1.0.9 or newer, the release that introduced FluentCRM support. Only FluentCRM itself is needed on the other side of the connection.
How To Set Up The FluentCRM Integration
Setup runs in two parts. You connect FluentCRM by creating the tags there first, then mapping them in SaveTo Wishlist. Do it in that order, because the mapping dropdowns only list tags that already exist.
Create your tags in FluentCRM first
In WordPress admin, go to FluentCRM → Contacts → Tags. Two tags are enough to start. Naming them after the behaviour keeps things readable later.
- Wishlist Interest for the product-added event
- Wishlist Saved for the wishlist-saved event
Map the tags in SaveTo Wishlist
Now connect those tags to wishlist events.
- Go to SaveTo Wishlist → Settings.
- Open the Integrations tab.
- Find the FluentCRM section.
- Set Enable FluentCRM integration to Yes. The two tag fields stay hidden until you do.
- Choose your tag under Added to wishlist tag.
- Choose your tag under Wishlist saved tag.
- Save the settings.
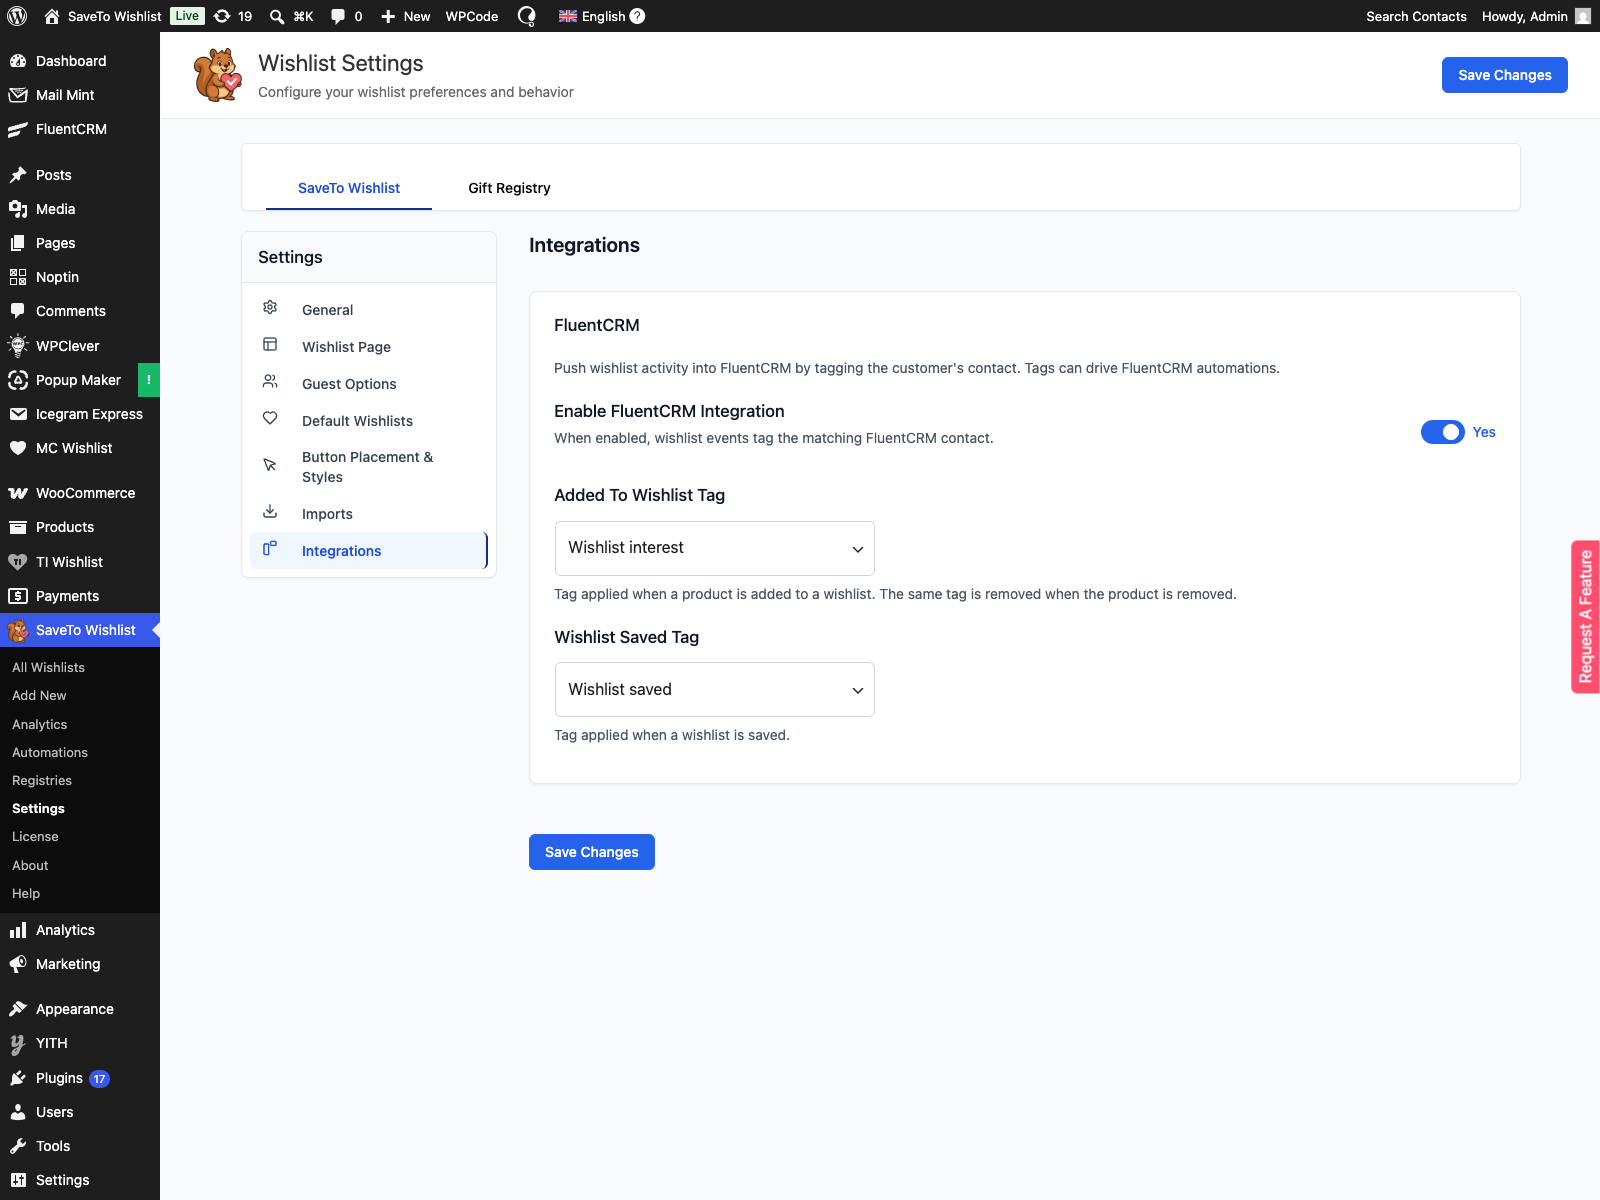
Each field takes one tag, and each dropdown only lists tags that already exist in FluentCRM.
🔍️ What we’ve seen: If a tag dropdown looks empty right after you create a tag, the integration probably isn’t broken. SaveTo Wishlist caches the FluentCRM tag list for five minutes. Wait it out and reload, rather than creating the tag a second time.
To confirm it works, log in as a test customer and save a product. Then open that contact in FluentCRM and check the tag landed. If no contact existed for that email, the integration creates one.
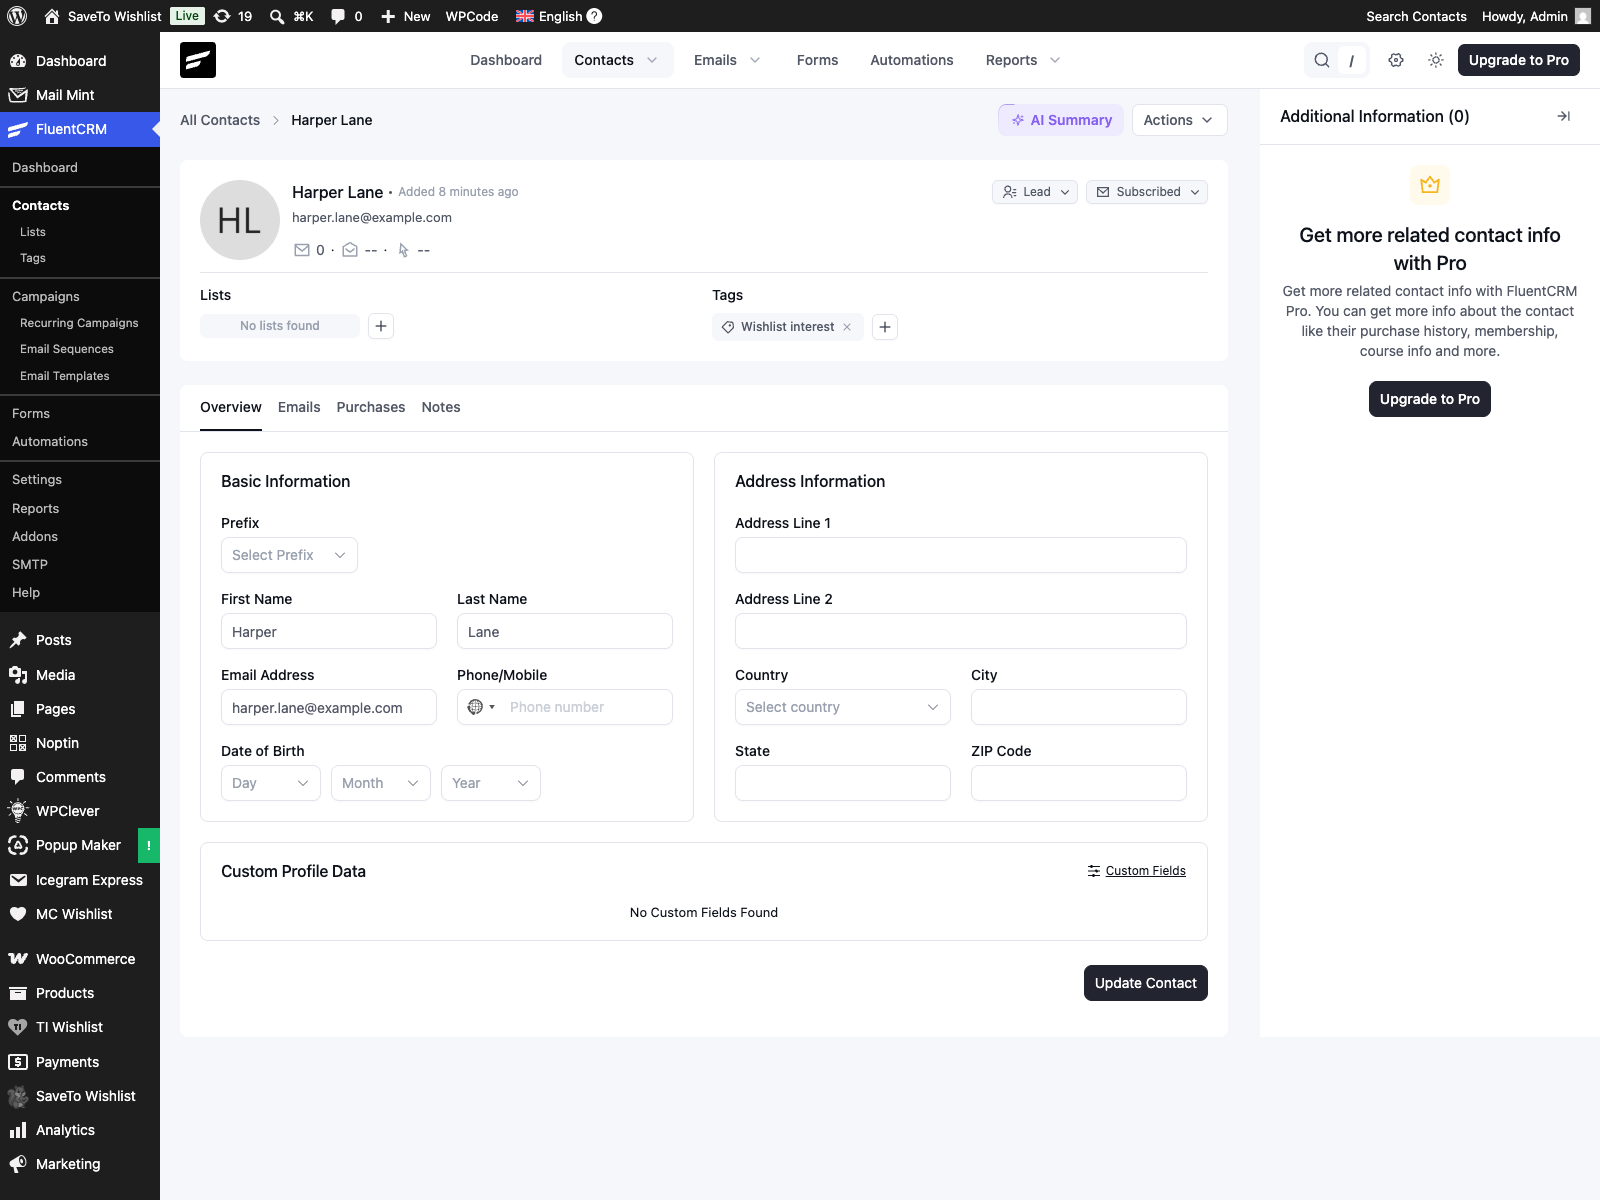
That’s the whole setup on the SaveTo Wishlist side. From here, the work moves into FluentCRM.
How To Trigger A FluentCRM Wishlist Automation With Tags
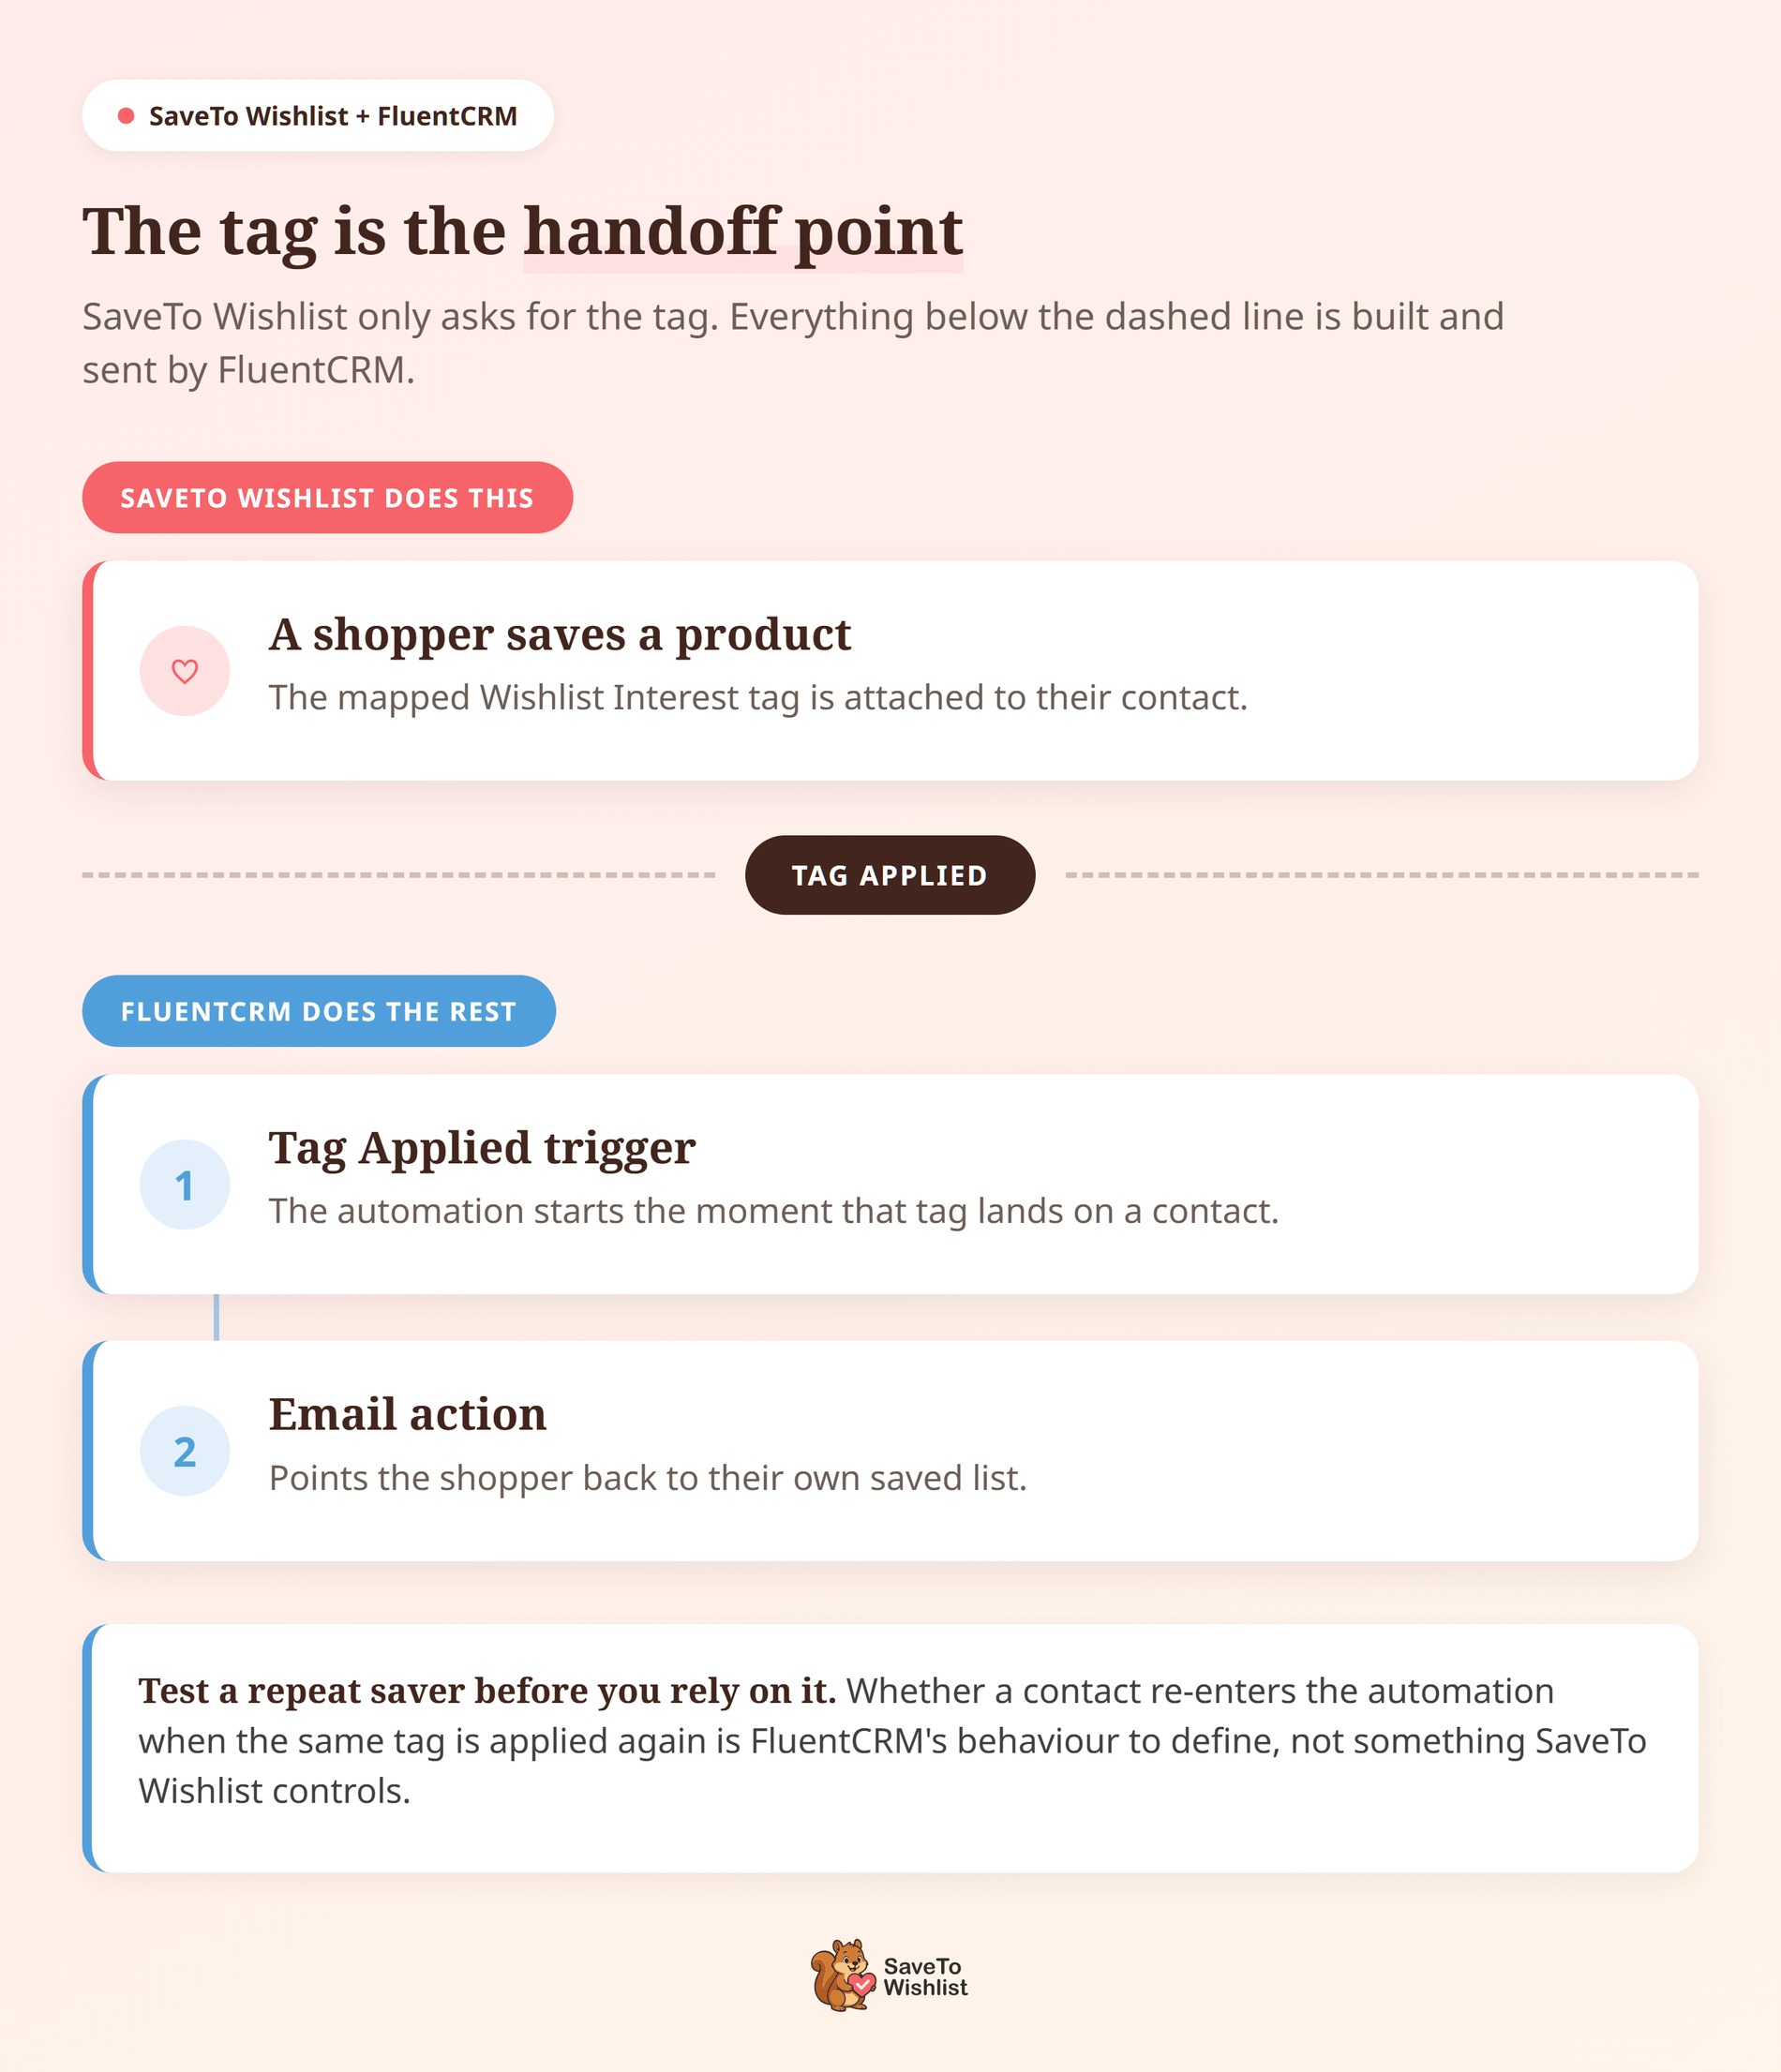
The tag is the handoff point. Once FluentCRM holds it, you build the follow-up with FluentCRM’s own tools. FluentCRM comes with a Tag Applied trigger and a Tag Removed trigger, so a tag going on and a tag coming off can each start an automation.
A first FluentCRM automation might look like this:
- Create a new automation funnel in FluentCRM.
- Choose the Tag Applied trigger.
- Select your Wishlist Interest tag.
- Add an email action pointing shoppers back to their saved list.
From there, the rest is up to you. The documentation notes that a tag change can start any FluentCRM wishlist automation, whether that’s a single email, a longer sequence, or a webhook.
Advanced Coupons has a guide to using coupons in follow-up emails, if you want to add an incentive.
Keep it clear who does what. SaveTo Wishlist asks for the tag change. FluentCRM owns the sending, the sequences, and the email campaigns built on top of them.
One thing is worth testing rather than assuming. When a shopper saves a second product, the same tag is applied again. FluentCRM gives you complete control over how automations behave. Because your CRM settings define whether a contact can re-enter a sequence when they save a second item, we recommend running a test contact through twice to ensure the workflow matches your goals.
Wishlist Segments Worth Building First
Because the tags describe what a shopper did rather than which product they picked, they work best for grouping people. Here are four groups that fit what the integration actually provides, each one ready to sit behind its own FluentCRM wishlist automation.
Build a warm list for launches and sales
Everyone carrying the wishlist tag has shown they want something in your catalogue. That’s a sharper audience for a launch announcement than your full list. Better still, it needs no product data to work, which suits this integration exactly.
Send an abandoned-wishlist nudge
This is the sequence the integration was built for: a wishlist add turns into an abandoned-wishlist follow-up. A short message pointing shoppers to their own saved list does the work here, because the list supplies the product detail your email can’t. It’s wishlist remarketing in its simplest form.
Reach out when interest cools
When a shopper removes a product, the Added to wishlist tag comes off their contact. FluentCRM’s Tag Removed trigger can act on that, so a change of mind becomes something you can answer instead of something you never see. A simple “did you find what you were after?” email fits well here.
Onboard new account holders
A first wishlist save is a good moment to explain how saved lists work in your store. Mention sharing a list with family before a gift occasion. Small explainers like this can head off the support questions that follow.
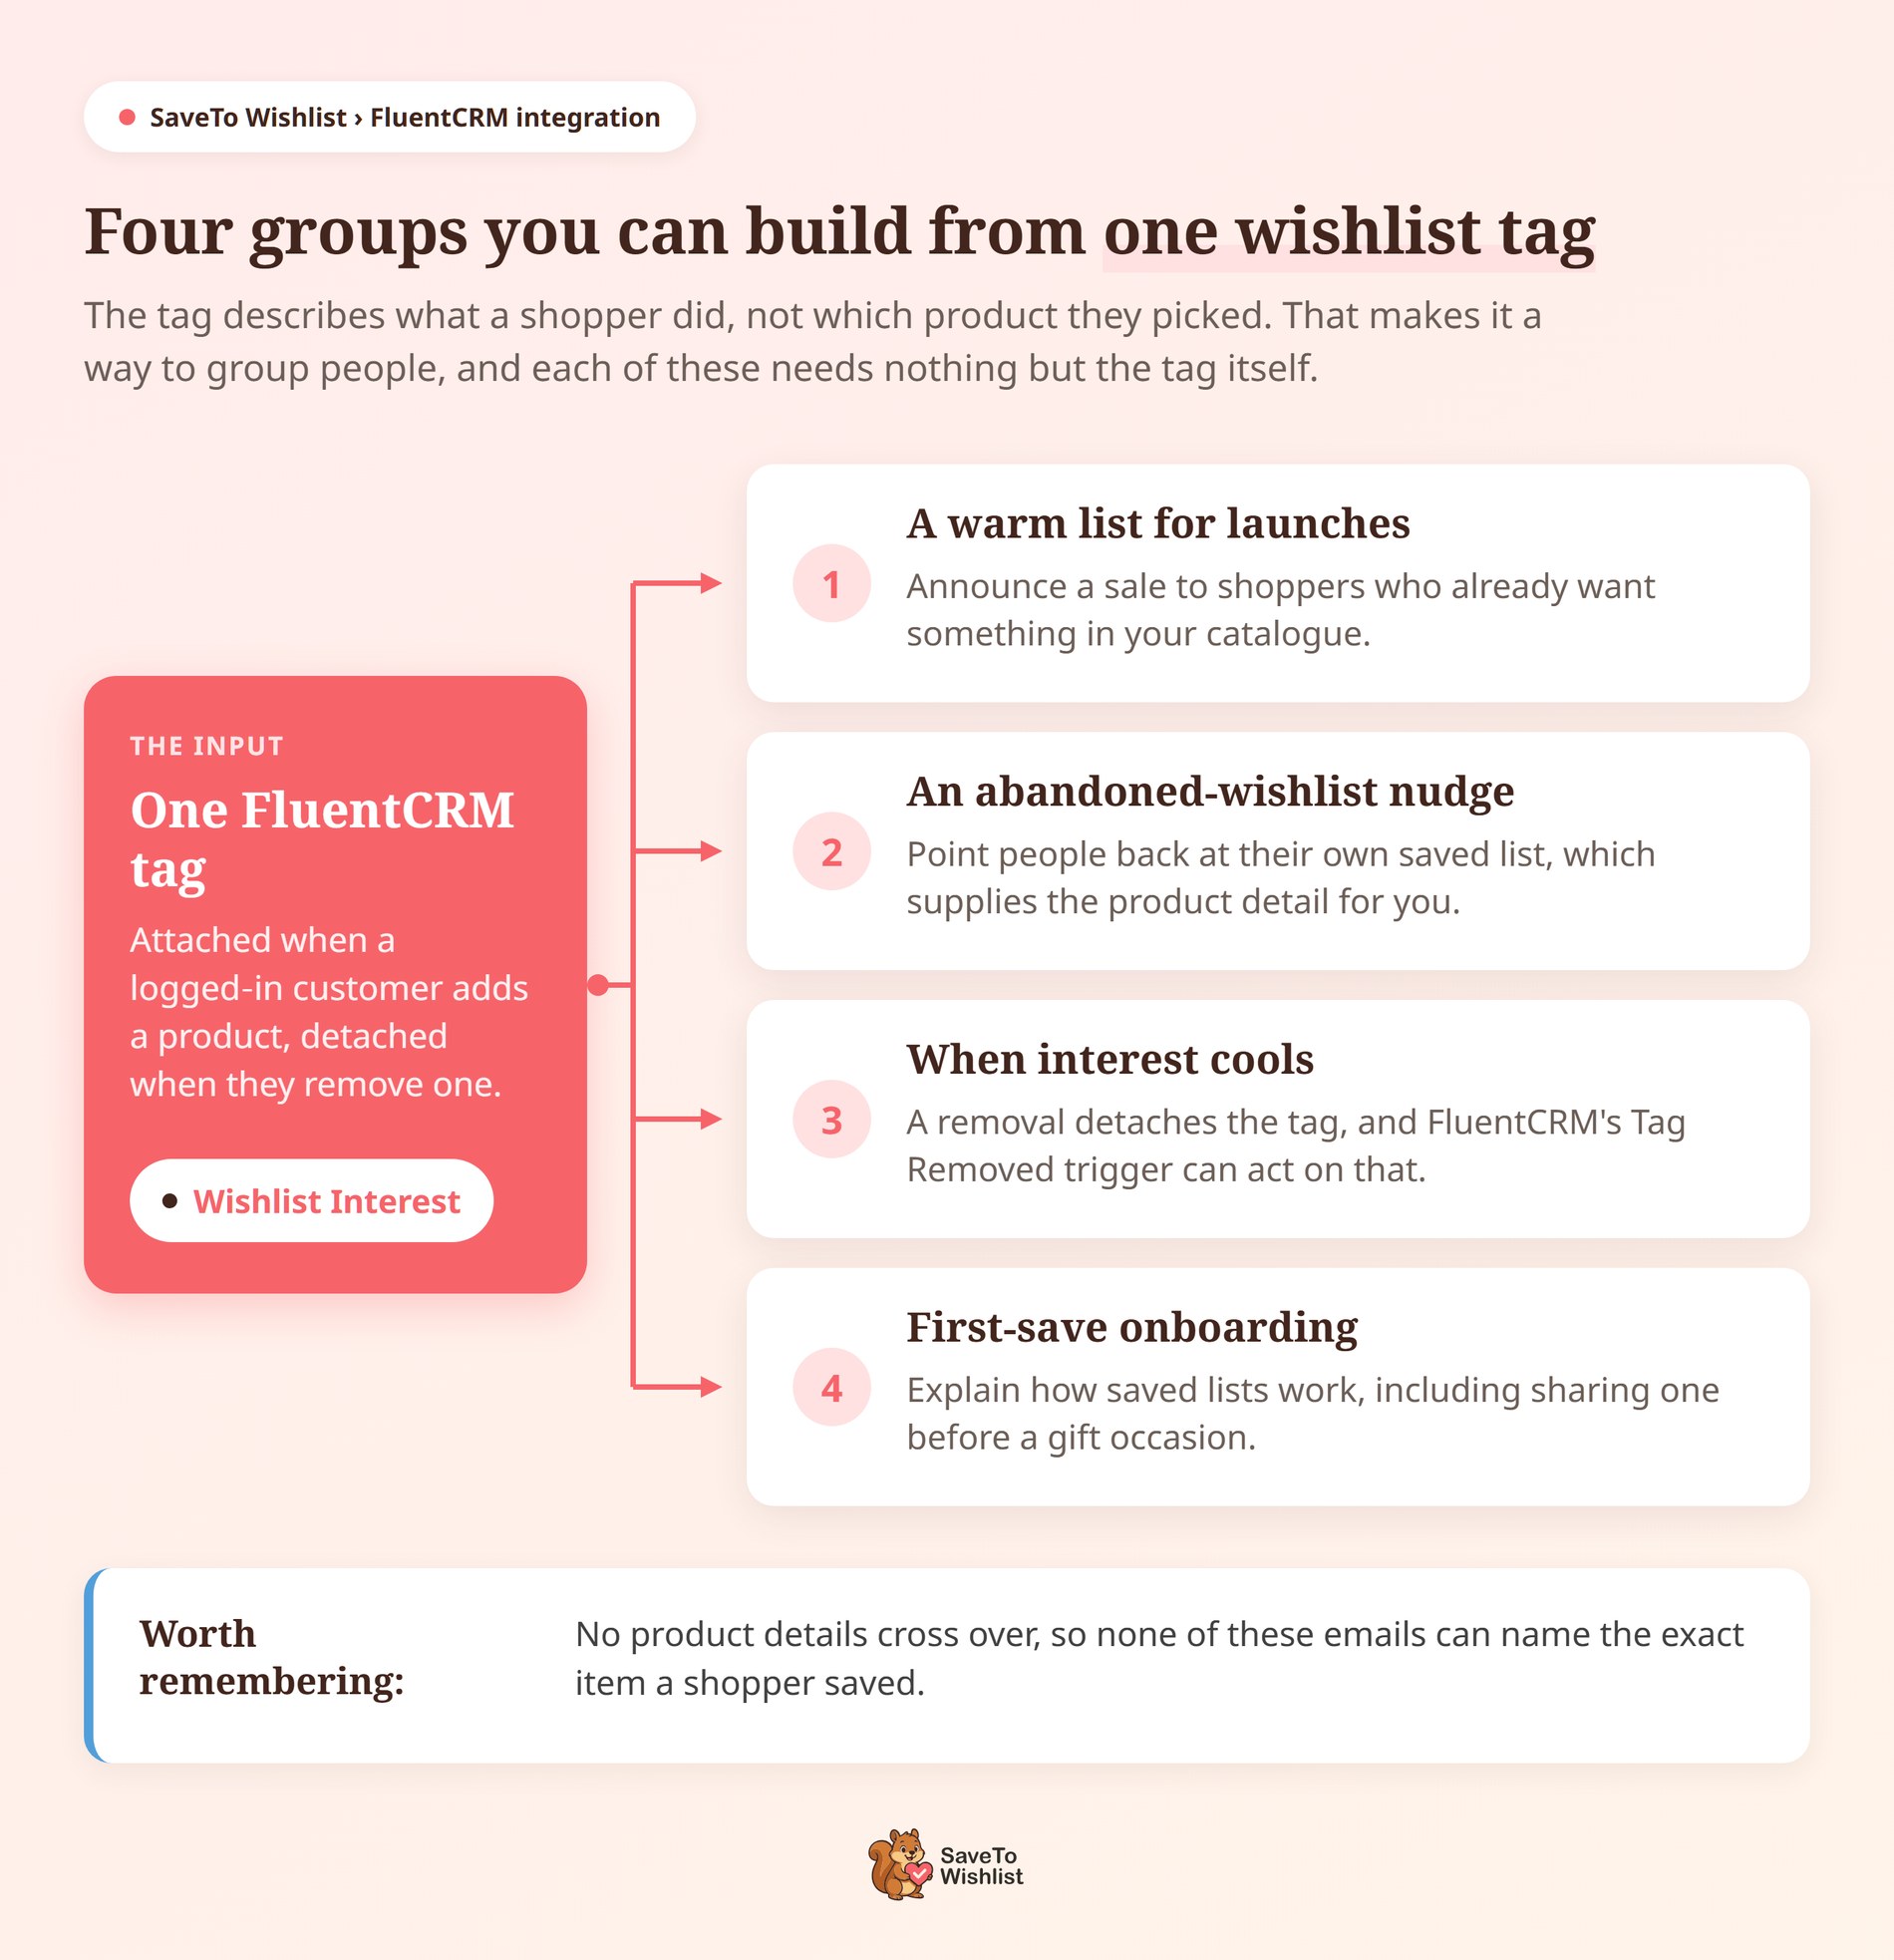
All four lean on email segmentation rather than product-level triggers. For the wider strategy, our guides to wishlist automation and wishlist email marketing go deeper.
Limits To Know Before You Rely On Wishlist Tags
These tags are a way to group people, not a record of what they saved. Knowing the edges keeps you from building a FluentCRM automation on an assumption that doesn’t hold.
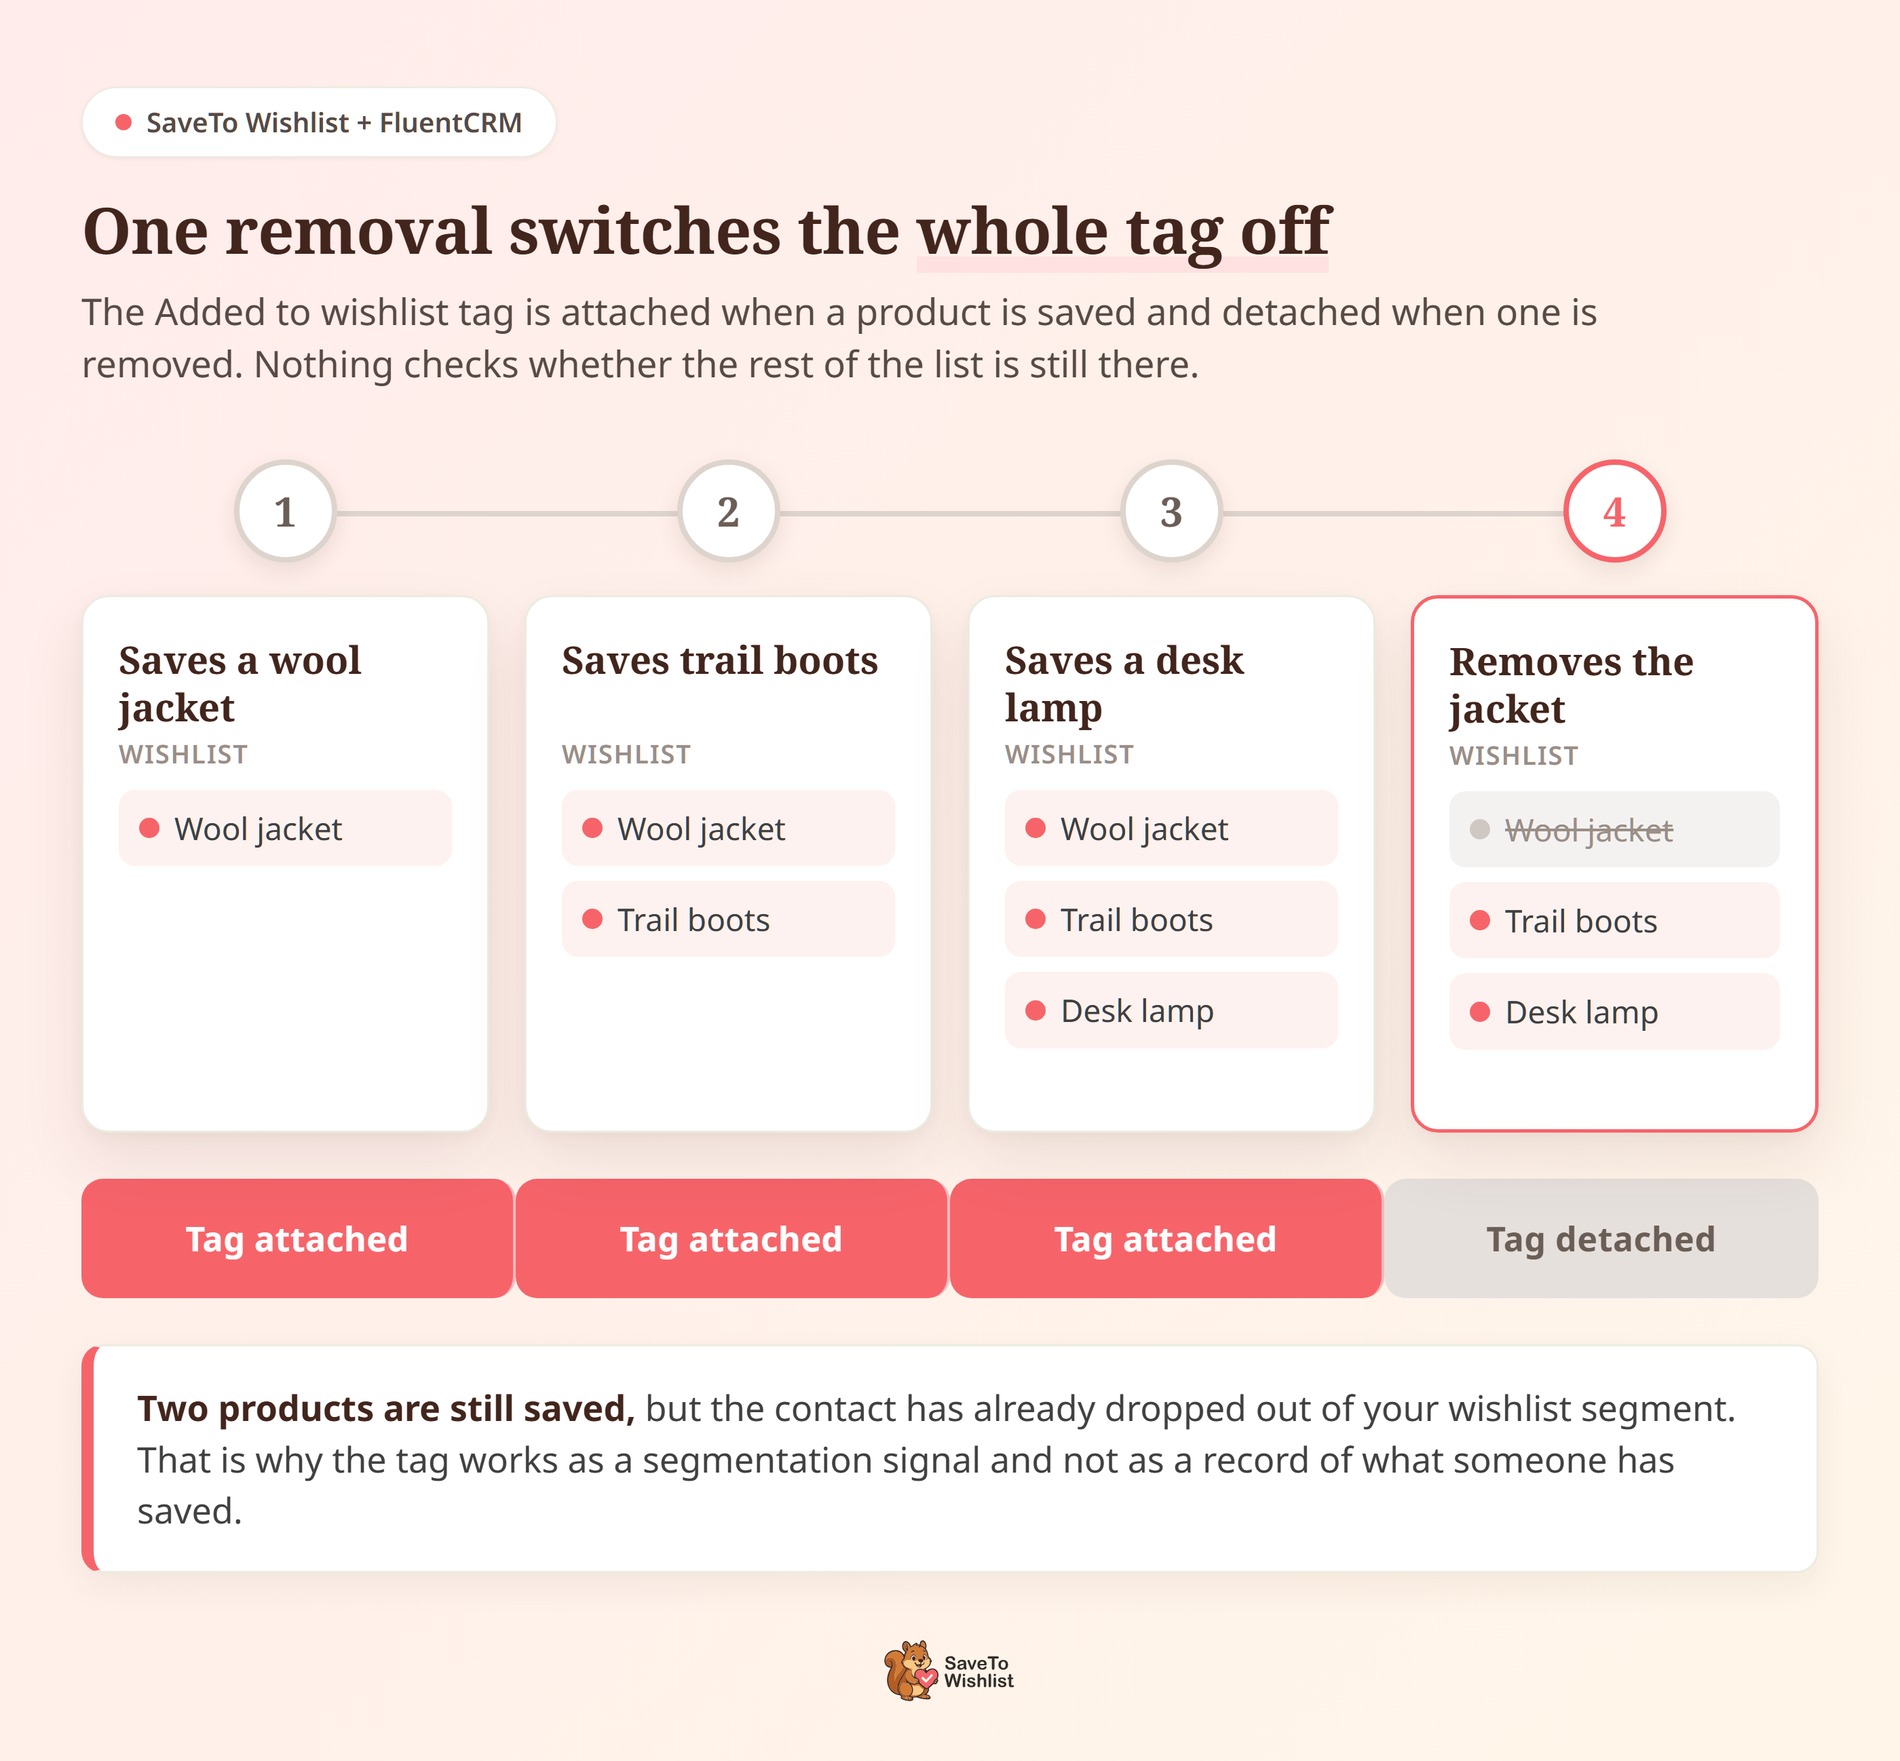
- The add tag isn’t a live list of saved items. Removing one product detaches the tag. Nothing checks whether other products remain, so the tag can come off while a shopper still has plenty saved.
- There’s no separate removal tag. Removing a product detaches the same tag that adding one attaches.
- Guest activity applies no tag. Guests have no contact record for a tag to land on, so nothing reaches FluentCRM until a shopper has an account.
- It works on activity as it happens. The integration responds to a product being added, a product being removed, or a wishlist being saved, at the moment it happens.
- The tag follows the wishlist owner. The integration acts only on the owner of the wishlist, so that’s whose contact record gets tagged.
If you need a real record of who saved what, Visser Labs covers exporting your customer data.
Frequently Asked Questions: FluentCRM Wishlist Automation
Do I need SaveTo Wishlist Pro for the FluentCRM integration?
No. The integration ships in the free SaveTo Wishlist Lite plugin, from version 1.0.9 onward. You don’t need a separate add-on, an API key, or a webhook. The two plugins talk through FluentCRM’s on-site API instead. The integration is fully compatible with both the free and Pro versions of FluentCRM.
Does the integration tell FluentCRM which product was saved?
No, and this is the expectation most worth resetting early. The integration works with the wishlist owner’s account email, which finds the contact, and the ID of the mapped tag, which marks it. The tag means this customer wishlisted something recently, not which product they picked. So an automation can’t reference the specific item someone saved.
Can guest shoppers be tagged?
Not through this integration. A tag has to land on a contact record, and that needs an email address, so the shopper has to be logged in. Guests have no contact record, so guest wishlist activity applies no tag. The upside is that your contact list stays made up of shoppers you can identify.
Why did removing one product remove the tag?
That’s the mapping working as designed. Adding and removing a product share the Added to wishlist tag field, so a removal detaches the same tag an addition attached. Nothing checks whether other products are still saved, which is why the tag suits grouping people better than reporting on them.
What if the FluentCRM section never appears in my settings?
FluentCRM has to be active for the integration to work, and the whole thing runs through FluentCRM’s on-site API. Check that FluentCRM is installed and activated on the same site, then reload the settings page.
Put Your Wishlist Data To Work
A wishlist save is one of the clearest signals of what a shopper wants next. Sending that signal into FluentCRM is what makes it usable. Two tag mappings do it, and you won’t need a developer.
Here’s how to get going:
- Check the requirements, including one existing FluentCRM tag
- Create two tags in FluentCRM, then map them in SaveTo Wishlist
- Know what actually reaches FluentCRM before you write the email, since the product itself never does
- Build one FluentCRM automation on a Tag Applied trigger, then test it with a test customer
- Read the limits so your campaign doesn’t assume data the tags don’t carry
- Pick a single wishlist segment to act on before adding more
Ready to turn saved products into segments you can market to? Install SaveTo Wishlist Lite, then follow the FluentCRM setup guide in our knowledge base for the click-by-click version.