
 Reviewed by
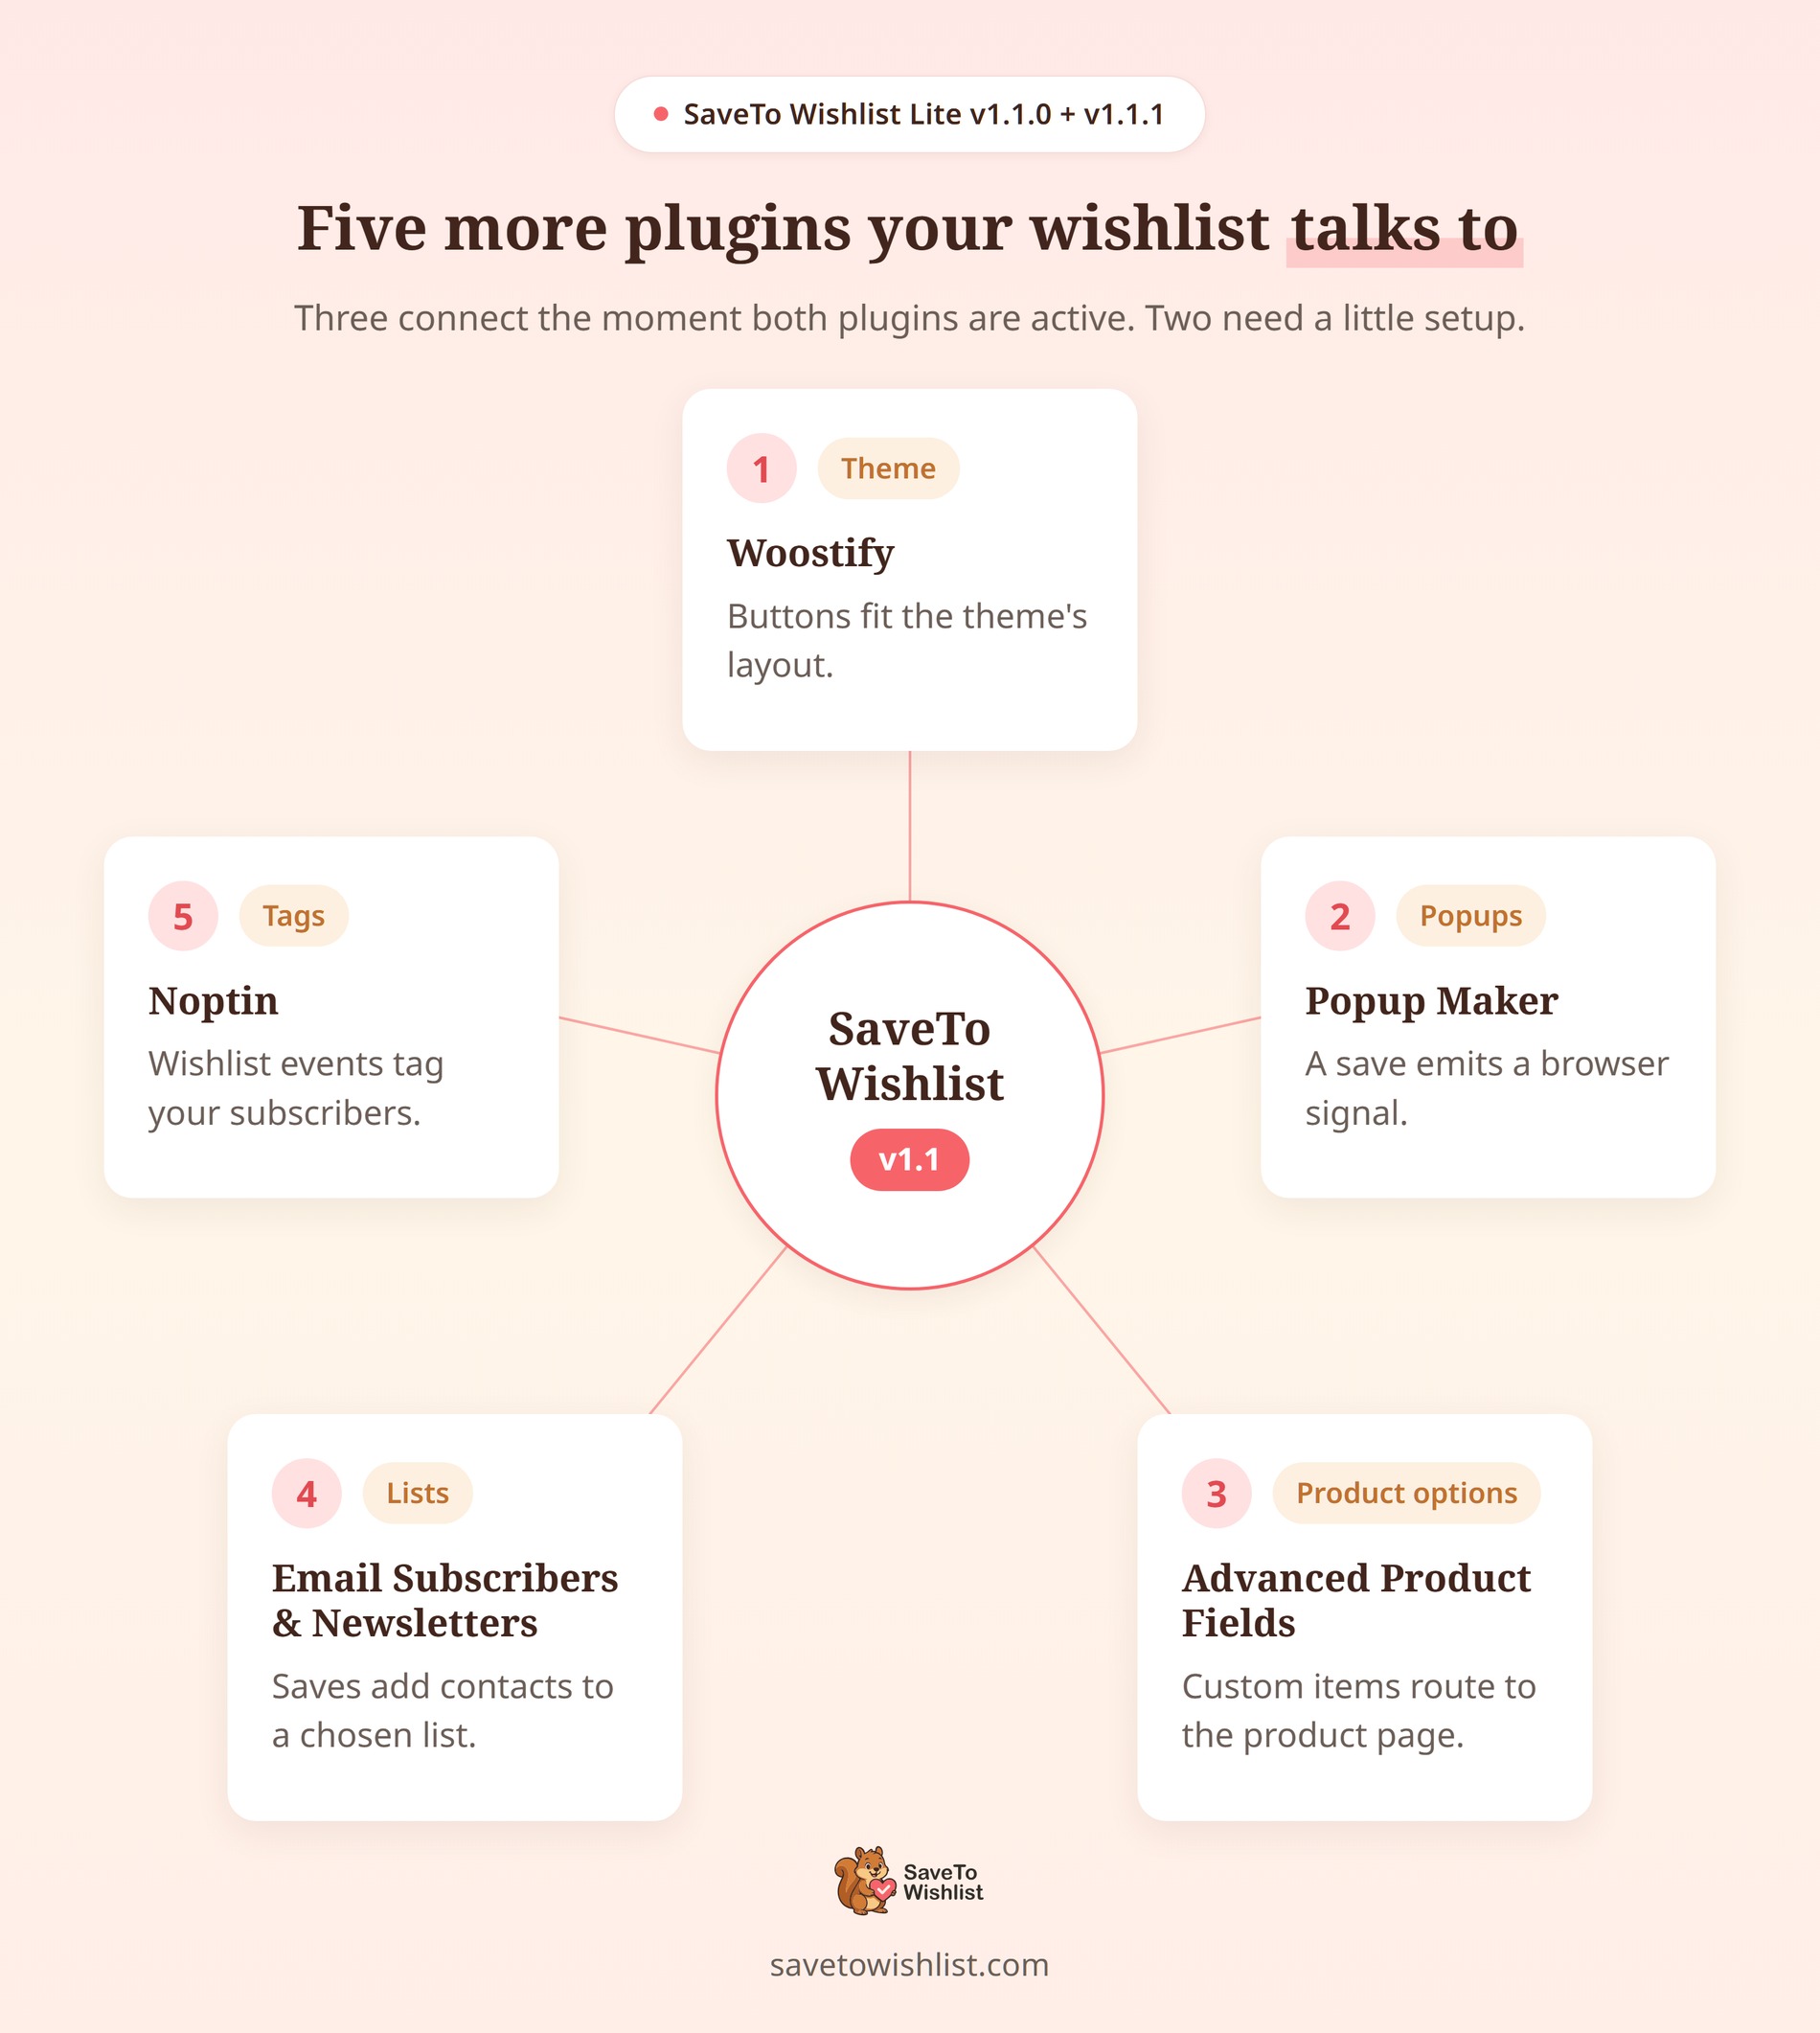
 With the SaveTo Wishlist Lite v1.1.0 and v1.1.1 integrations, the free version now connects to 5 more WordPress plugins and themes.
This batch adds two email marketing bridges and a browser signal you can point at a popup. It also brings a safeguard for products that need configuring. Plus, wishlist buttons now sit correctly on the Woostify theme.
None of them need an API key, a connected account, or an outside service. Instead, the work happens on your own server or in the visitor’s browser. As a result, you’re only using plugins you already have installed.
We’ve found release notes rarely tell you the part that actually matters: what to check first. So here’s a plain-English breakdown of how each connection works.
Jump to:
5 New SaveTo Wishlist Plugin Integrations
Each of the SaveTo Wishlist v1.1.0 and v1.1.1 integrations unlocks a specific workflow. Two feed your email lists, while the others cover popups, custom product options, and theme styling. Here’s how each one works, and what you need to set up.
1. Woostify: Wishlist Buttons That Match Your Theme
A wishlist button that looks slightly out of place can easily mess up an otherwise beautiful shop page. Because the Woostify theme uses its own product grids and single-product layouts instead of the standard WooCommerce markup, wishlist buttons could sometimes sit in the wrong spot or clash with Woostify’s built-in controls.
New in v1.1.1, SaveTo Wishlist automatically fixes this. It now loads a compatibility stylesheet built specifically to match Woostify’s layout. Your button will now sit neatly inside the product cards on your shop page and on each single product page, looking like a native part of your store.
How it works
- Automatic Theme Detection: When your active theme is set to Woostify, SaveTo Wishlist automatically loads the extra matching styles. It detects your active theme template, which means any child themes built on Woostify get the exact same styling automatically.
- Only Loads When Needed: This styling loads right after the plugin’s main styles so it can adjust the button properly. However, if you use a different theme, this Woostify-specific styling won’t load at all. Your button will just use its normal style.
- You Still Have Full Control: The new Woostify styling simply adapts to the design choices you make. It doesn’t override them. You still decide exactly where the button goes and what it looks like, just like you would on any other theme.
🚀 Pro Tip: If your buttons still look slightly off, double-check that Woostify (or your Woostify child theme) is currently set as your active theme. SaveTo Wishlist specifically checks your active theme to trigger the layout fix. If you only have Woostify installed but are actively previewing or running a different theme, these perfect-fit styles won’t load!
Settings and configuration
There is absolutely nothing you need to set up for this integration to work. The theme detection and the matching styles apply completely automatically as long as Woostify is your active theme.
Everything you need to adjust already lives in your standard settings. Just go to SaveTo Wishlist → Settings → Button Placement & Styles to pick your preferred button style and location. The integration will do the rest of the heavy lifting to ensure it fits perfectly into Woostify’s design.
Full walkthrough: How to integrate SaveTo Wishlist with Woostify.
2. Popup Maker: Trigger Popups Right After A Save
The seconds right after a save are a good moment to say something. In practice, that could be a discount code, a shipping threshold, or a nudge toward a related item.
Shipped in v1.1.0, this integration gives you two browser-side signals after a successful save. Popup Maker then decides what to do with them, or your own snippet does. However, SaveTo Wishlist never opens a popup itself.
How it works
- A DOM Event For The Same Page: SaveTo Wishlist dispatches
stwlite_added_to_wishlistondocument. Its detail carriesproductIdandcollectionId. Register your listener ondocumentbefore the click, because the event isn’t replayed later. - A Cookie For Later Pages: It also writes a
stwlite_wishlist_addedcookie with a 30 day lifetime. The cookie usespath=/andSameSite=Lax, plus Secure on HTTPS. It holds one product ID, and the next qualifying save overwrites it. - Two ID Values To Watch For: A guest save reports
collectionId: 0, because guest lists live in browser storage. A Save Cart to Wishlist operation reportsproductId: 0. That one fires once for the whole cart, not once per item. - Only On Real Successes: For a logged-in single-item save, the signals fire only on a confirmed add. A failed save restores the button, shows a retry notice, and emits nothing.
- You Wire Up The Popup: Popup Maker’s cookie features exist to stop a popup repeating, not to open one. There’s no built-in condition that reads another plugin’s cookie. Opening a popup takes a few lines of JavaScript. It listens for the event, or reads the cookie, then calls
PUM.open()with your popup ID.
Settings and configuration
There are no settings for this integration. Instead, the event and the cookie are generic browser interfaces. They fire whenever the frontend script loads and a save succeeds. That happens whether or not Popup Maker is installed.
Still, one nearby setting is worth knowing about. At SaveTo Wishlist → Settings → General, the Add to wishlist button option sets what a shopper sees after clicking. The choices are Redirect, Popup, or Fade. Note that Popup here means SaveTo Wishlist’s own confirmation modal, not a Popup Maker popup.
However, Redirect needs one extra thought. A logged-in shopper starts navigating away right after the event fires. A synchronous listener still runs, though slower work can get cut off. Read the cookie on the destination page instead.
Full walkthrough: How to integrate SaveTo Wishlist with Popup Maker.
3. Advanced Product Fields: Keep Custom Orders Complete
Advanced Product Fields for WooCommerce (both free and Pro versions) lets shoppers personalize a product with choices like a specific size, custom engraving text, or an uploaded file.
Because wishlists don’t currently capture and save those specific choices, a saved item could accidentally be moved to the cart with all of its custom details missing. Added in v1.0.9, this integration acts as a smart safeguard. Instead of letting an incomplete custom item slip into the cart, it makes sure the customer finishes configuring it first.
How it works
- Detects Custom Products: SaveTo Wishlist automatically checks to see if a product carries an Advanced Product Fields add-on. If it does, the plugin flags that specific item as “needs configuration.”
- Smart Routing: Because of that flag, when a shopper tries to add the product to their cart from the wishlist, they are safely routed back to the product page instead of the item adding straight away.
- Fresh Configurations: The wishlist does exactly what it’s supposed to do—it keeps the product saved so the customer can return to it anytime. Once routed back to the product page, the shopper simply fills out their required options and adds the completed item to their cart so nothing important is skipped.
- Consistent Protection: If you use our PPOM integration, this behaves in the exact same way. SaveTo Wishlist uses one consistent, shared system to ensure the most common add-on plugins are handled safely instead of failing in the cart.
🚀 Pro tip for site speed: Wondering if checking every single product for custom fields will slow down your page? Don’t worry! SaveTo Wishlist automatically caches these background checks as the page loads. This means even if a customer builds a massive wishlist, the integration adds no repeated loading costs to your store.
Settings and configuration
There’s absolutely nothing to configure and no switch to turn on. The behavior is completely automatic.
As long as Advanced Product Fields is active on your store, the integration will seamlessly check for option fields in the background. And don’t worry! Only products that actually carry option fields are routed to the product page. Normal products will still add directly to the cart as usual!
Full walkthrough: How to integrate SaveTo Wishlist with Advanced Product Fields.
4. Email Subscribers & Newsletters: Add Wishlist Shoppers To Your Mailing Lists
If you use Email Subscribers & Newsletters (now called Icegram Express) for your marketing, this integration helps you grow your audience. New in v1.1.1, it lets you automatically subscribe customers to your mailing lists when they interact with their wishlists, allowing you to trigger email automations based on what they want to buy.
How it works
- Automatic Subscriptions: You can choose specific lists for two different actions. When a logged-in customer adds a product to a wishlist, they are automatically subscribed to your “Added to wishlist” list. When they save an entire wishlist, they are subscribed to your “Wishlist saved” list.
- Automatic Contact Creation: SaveTo Wishlist finds the customer’s contact using their account email address. If they don’t have a contact record yet, the plugin automatically creates one for them before subscribing them to the list.
- Removals Have No Effect: Because this integration uses standard mailing lists instead of per-event tags, removing a product from a wishlist does not change a customer’s subscription or unsubscribe them.
- 100% Local Processing: Everything runs safely on your own store through the plugin’s internal PHP API. It makes no external HTTP calls to outside services.
- Guests Skipped: Since subscribing requires a contact with an email address, this integration only applies to logged-in customers. Guest activity is safely ignored.
🚀 Pro tip for site speed: Worried that running email automations in the background will slow down your store? Don’t be! SaveTo Wishlist handles the subscription work after the page response is sent to the shopper. This means your customers never have to wait for the email tasks to finish loading, keeping your storefront lightning fast.
Settings and configuration
Before you start, make sure you have created at least one list in Email Subscribers. If you don’t have any lists yet, your dropdown menus will be empty.
To set it up:
- Go to SaveTo Wishlist → Settings → Integrations tab → Email Subscribers & Newsletters.
- Turn on the Enable Email Subscribers integration switch.
- Choose your desired lists under the Added to wishlist list and Wishlist saved list dropdowns.
- Save your settings.
Once connected, these subscriptions trigger Icegram’s own automation events, meaning you can easily start sending welcome emails, abandoned-wishlist sequences, or anything else the plugin supports!
Full walkthrough: How to integrate SaveTo Wishlist with Email Subscribers & Newsletters.
5. Noptin: Tag Subscribers By Wishlist Activity
If you use Noptin for your email marketing, this integration helps you turn customer wishlist activity into automated email campaigns. New in v1.1.1, SaveTo Wishlist automatically applies event-specific tags to logged-in subscribers whenever they interact with a wishlist.
How it works
- Three Event Tags: SaveTo Wishlist applies three distinct tags in Noptin based on customer actions: Wishlist – Product Added, Wishlist – Product Removed, and Wishlist – Saved. You can use any of these tags as triggers for your Noptin automations.
- Tags Are Cumulative: Every wishlist event adds a new tag to the subscriber’s profile rather than replacing existing ones. One event never erases tags written by an earlier action, allowing a subscriber to hold multiple tags at once to record their activity over time.
- Unsubscribed Contacts Left Alone: If a customer has unsubscribed from your marketing, the integration respects their choice. Unsubscribed contacts are left alone and will never be re-subscribed or re-tagged by wishlist actions.
- Owner-Only & Logged-In Customers: Tagging only applies to logged-in customers who have an email address on file. Guest activity applies no tags, and the integration only acts when the actual wishlist owner interacts with their list.
- 100% Local Processing: Syncing runs entirely on your website through Noptin’s public subscriber API. It makes no external HTTP calls, keeping your site fast and customer data secure.
🚀 Pro tip for multilingual stores: Noptin tag names are intentionally kept non-translated (Wishlist – Product Added, Wishlist – Product Removed, and Wishlist – Saved). Because these exact tag identifiers remain identical across all languages and locales, your Noptin email automations will keep running smoothly without breaking if you run a multilingual store.
Settings and configuration
There’s nothing to configure inside SaveTo Wishlist. No switches, tag fields, or API keys are required. The integration activates automatically as long as both plugins are active on your site.
To set up your first automation:
- Make sure both Noptin and SaveTo Wishlist are active.
- Log in as a test customer and add a product to a wishlist to generate the first event.
- In Noptin, open that subscriber’s profile and confirm the tag appears.
- Create a new Noptin automation using the tag-applied trigger, then add your follow-up email steps!
Full walkthrough: How to integrate SaveTo Wishlist with Noptin.
Also New:
Alongside the five integrations above, the latest updates brought a handful of quality-of-life changes. Here’s a quick summary of what else is new.
- Hide Disabled Cart Buttons: A new option hides unusable Add to Cart buttons on the wishlist page.
- A Faster Settings Screen: The settings header and sidebar now stay put as you scroll. The button preview sits beside the style fields, so you see changes as you make them.
- Better Inline Spacing: There’s more room between the Add to Cart and Save to Wishlist buttons on the Inline placement.
- The Wishlist Block: A native Wishlist block you can drop in from the block inserter. It renders exactly what the
[saveto_wishlist]shortcode renders, because it reuses the same code. An optional Wishlist ID field in the sidebar matches the shortcode’sidattribute. Leave it empty to show the current customer’s wishlist. It also works in the Site Editor, and your existing shortcodes keep working. - Direct to Checkout: An After Add All to Cart option that routes shoppers to Cart or Checkout. It applies once they’ve used Add All to Cart on the wishlist page. For a customer who wants the whole list, that’s one less page before paying. Out-of-stock items stay out of the bulk add, as they do elsewhere.
Our full guide to the Wishlist Block and Direct to Checkout walks through both in detail.
Ready To Upgrade Your Wishlists?
The SaveTo Wishlist Lite v1.1.0 and v1.1.1 integrations push the free plugin past a simple list of saved products. Two of them feed your email lists. One hands you a trigger for on-site messaging. Meanwhile, another protects your custom orders, and the last one fixes theme styling.
Three of the five need no setup at all. Email Subscribers & Newsletters takes a switch and two dropdowns. Popup Maker needs a short JavaScript snippet. That said, the Woostify placement check above is worth two minutes of your time.
Missed any of the details? Jump right back to a specific integration to review how it works:
- Woostify: Wishlist Buttons That Match Your Theme
- Popup Maker: Trigger Popups Right After A Save
- Advanced Product Fields: Keep Custom Orders Complete
- Email Subscribers & Newsletters: Add Wishlist Shoppers To Your Mailing Lists
- Noptin: Tag Subscribers By Wishlist Activity
Update SaveTo Wishlist Lite today and start connecting the plugins you already run!